Before we start, are you sitting comfortably? Like the actual process of croissant making, this post will be long and require some commitment. This recipe is made over three days which sounds a long time but with some good planning, if you start on Friday evening, you will have some perfect flaky croissants ready for Sunday brunch.

I love croissants, a love from many a schoolboy holiday in the south of France with my family. Freshly baked and either slathered in butter and jam or dipped in a cafe au lait, you cannot go wrong. A skinny flat white supermarket croissant does not quite hit the mark and are a poor relation to a freshly cooked traditional croissant.
As I had a few days off work, I thought it was the perfect time to try making my own. I must admit my first attempt were an epic fail. Using a different recipe to the one listed below, I tried to rush through the steps to my own peril and ended up with a soggy, buttery roll.
So on the second attempt, using a recipe I found from the weekend bakery site which I tweaked slightly, lowering the amount of butter to be laminated in the dough produced some great results. On my internet search I found a tip that if you are a croissant newbie like me, reducing the butter makes the lamination process easier. As you build your skills you can up the butter content.
Fortify yourself with some strong coffee, practice a few gaelic shrugs, adopt a laissez faire approach and as they say on the Great British Bake Off…..BAKE.
Ingredients for the dough
500g plain flour (extra for dusting)
140g water
140g milk
55g sugar
40g softened unsalted butter
11g instant yeast
12g salt
Other Ingredients
250g butter, unsalted (chilled) for laminating
1 egg to wash
Makes 15 Croissants
Oven Temp: Gas 6, 400F, 200C (180C Fan)
Instructions
Day 1. Make the dough
- Combine all of the dough ingredients in a bowl and knead for 3 minutes until the dough comes together. You do not have to knead for as long as you would do for bread. At this stage you are not looking to build up too much gluten as this will make the lamination stage harder. Just a nice soft pliable dough.
- Flatten the dough into a disc about the size of a dinner plate. Wrap in clingfilm and put in the fridge overnight.
Day 2. Lamination day
Now this next stage requires some precision and patience.
- Draw a square 15 cm x 15 cm on a piece of baking parchment. Then draw another square 17 cm x 17 cm around the outside with an equal gap on each edge (see photo).
- Cut the butter lengthways in approximately 1 cm thick slabs. Arrange the pieces of butter to fill the 15 cm x 15 cm square.
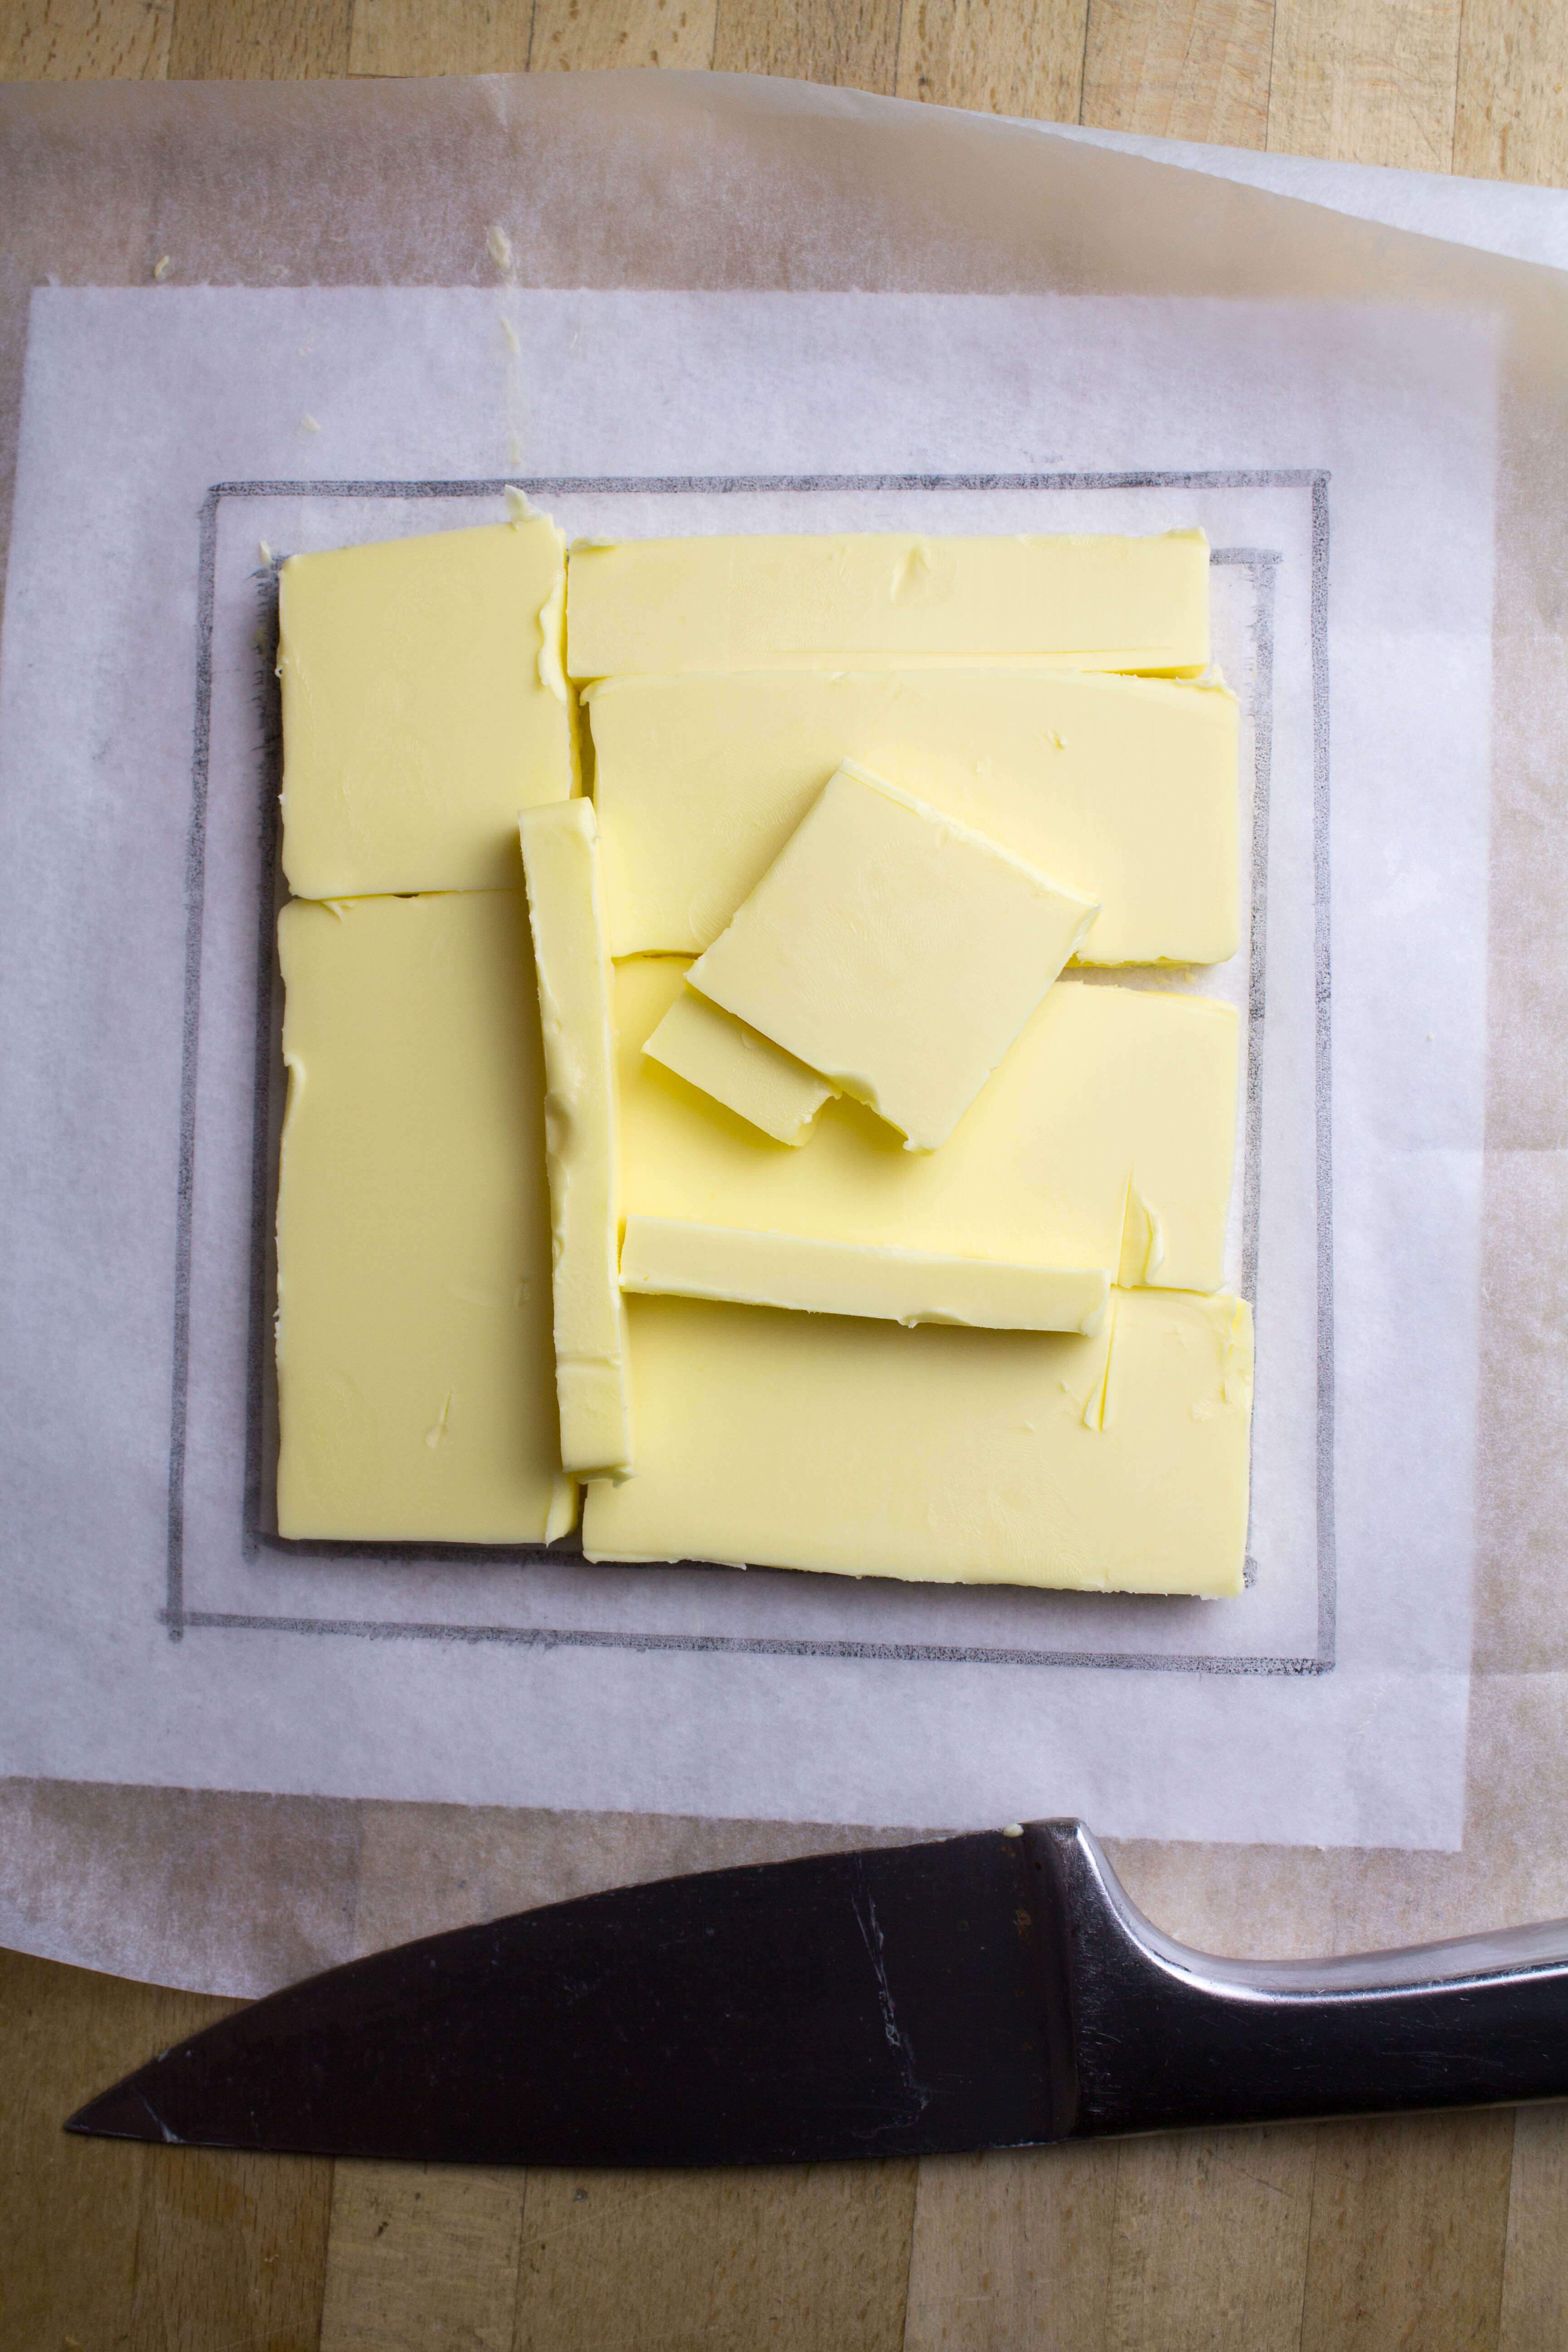
- Cover the butter with another layer of waxed paper and with a rolling pin pound butter until it all forms one sheet and spreads beyond the 17 cm x 17 cm square.
- Trim the edges of the butter back to the 17 cm x 17 cm square, put the trimmings on top of the square.
- Now pound gently to incorporate the trimming, ending with a final neat square of 17 cm x 17 cm.
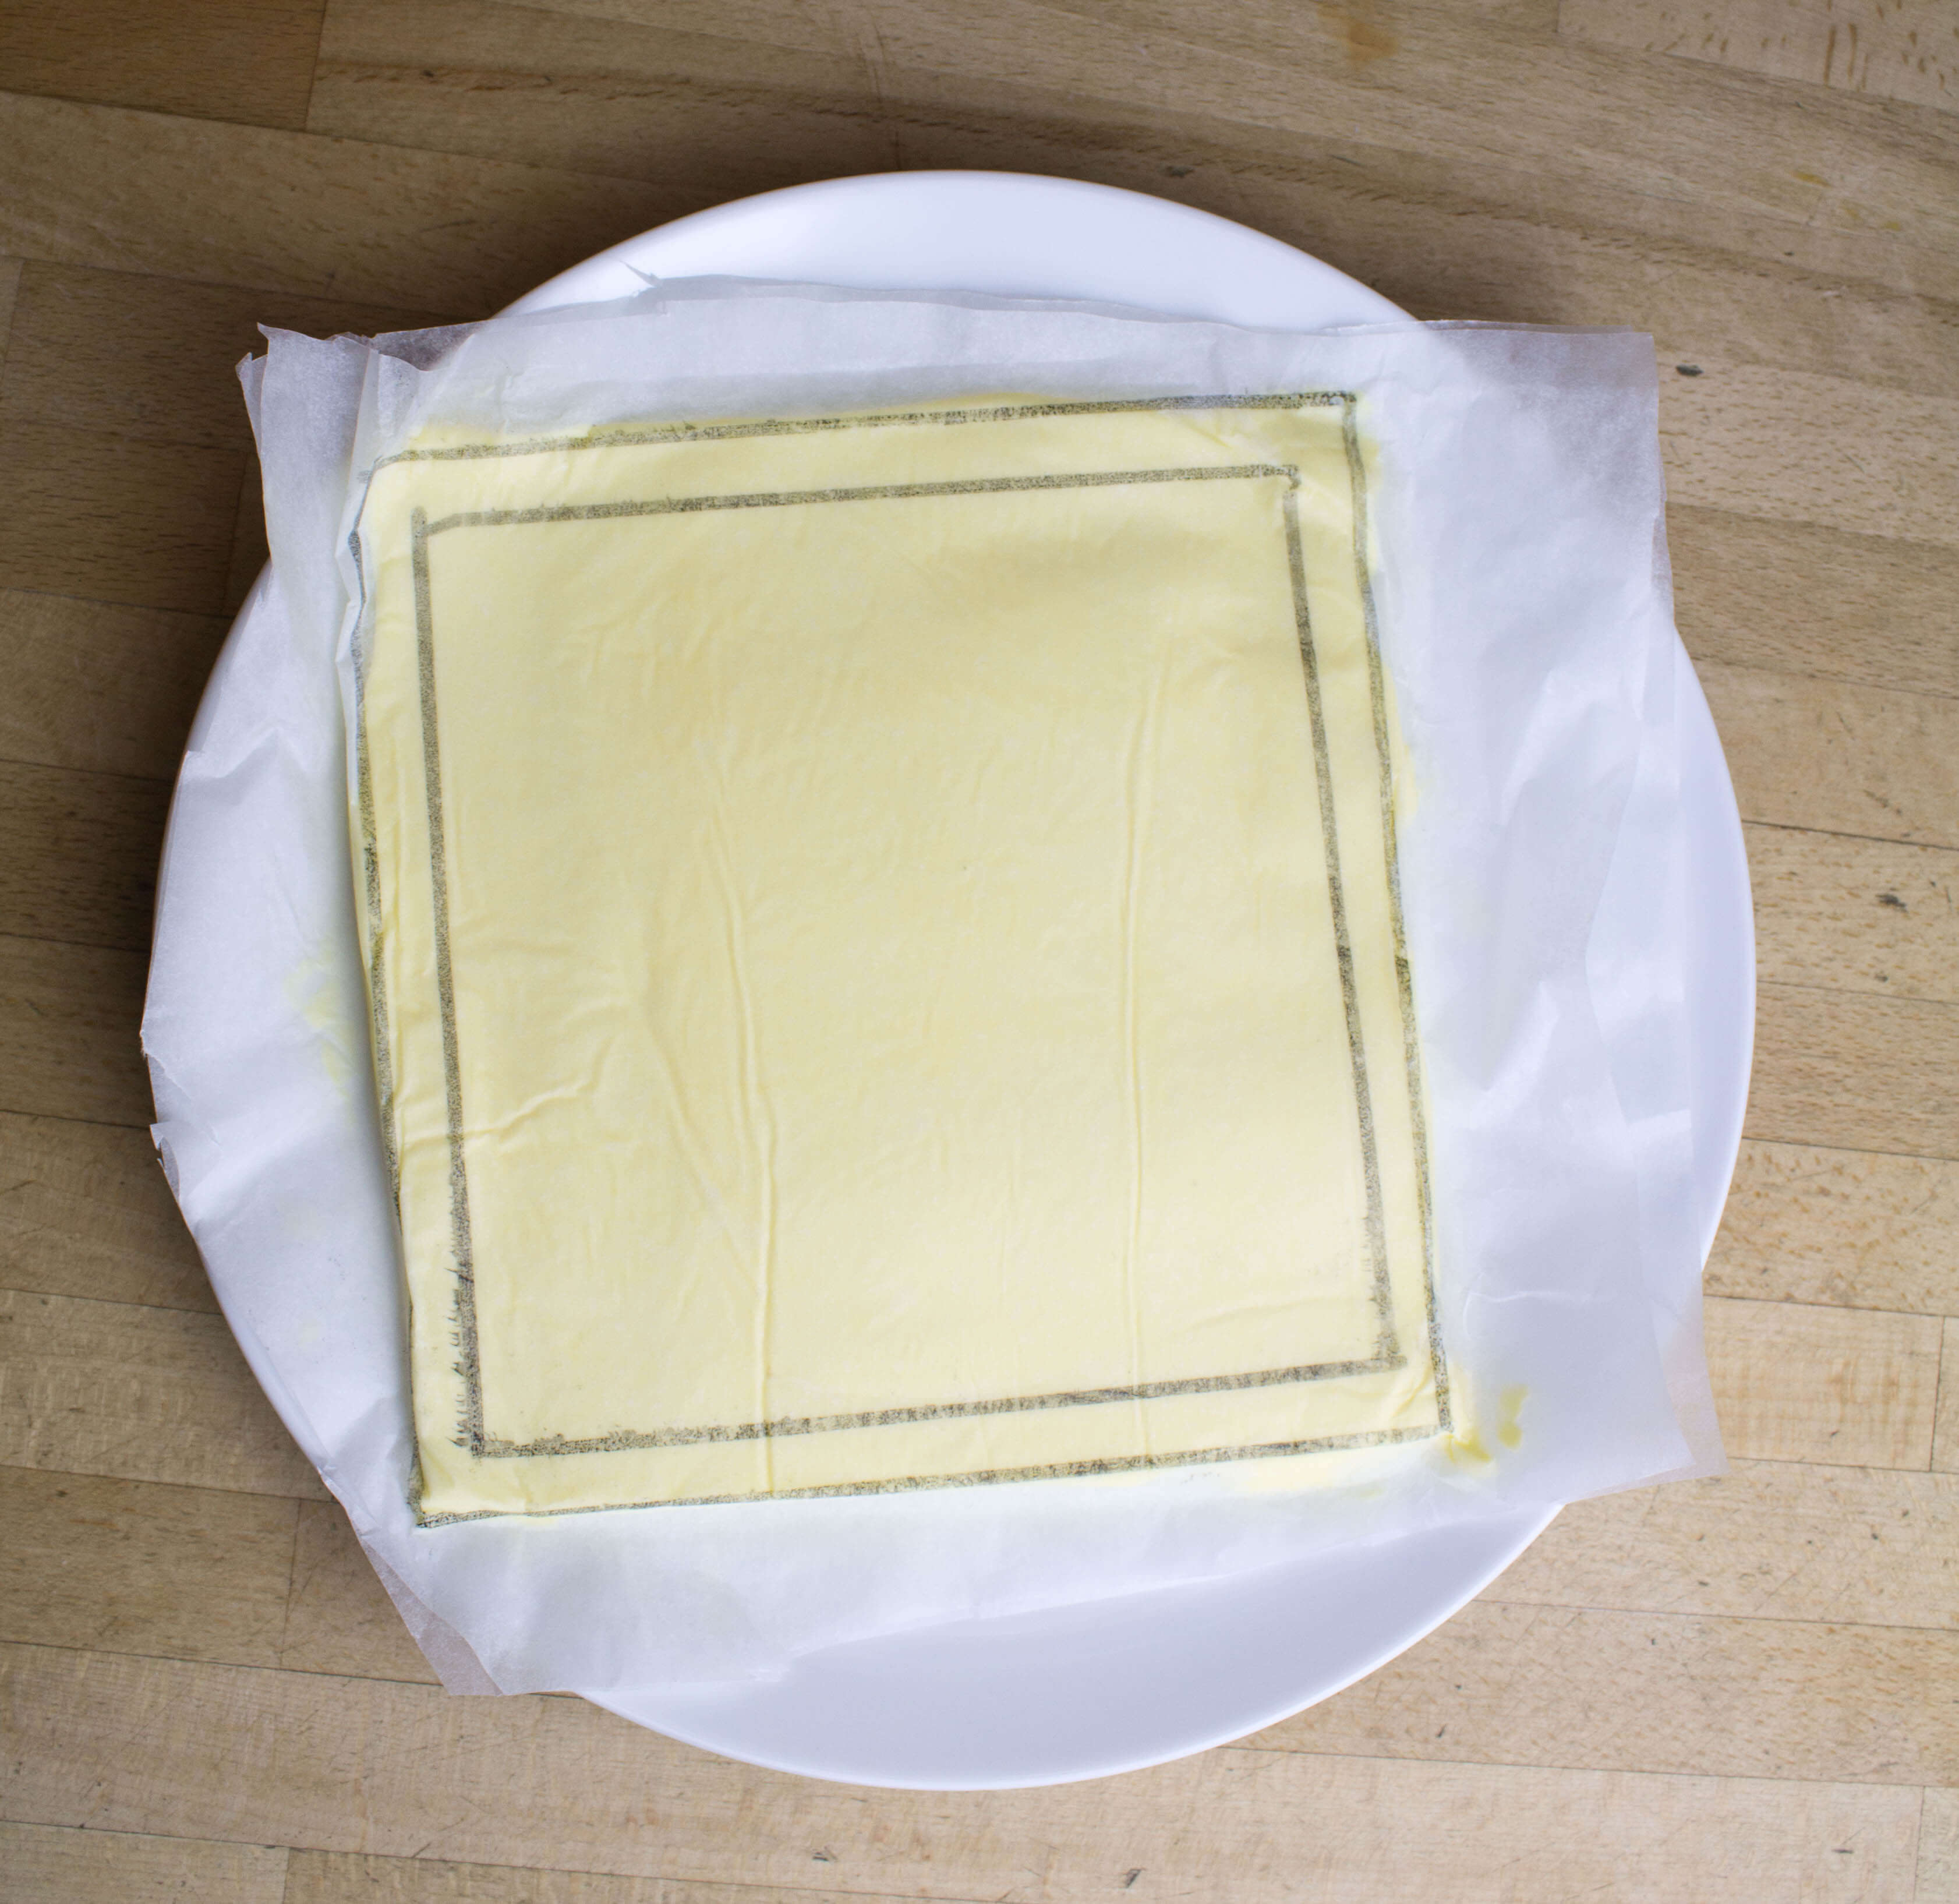
- Wrap in the baking parchment and put in the fridge until needed.
- Take the dough out of the fridge.
- Roll out the dough disc into a 26 cm x 26 cm square.
- Like the precision on the butter square try to get the square as perfect as possible.
- Remove the square of butter from the fridge.
- Place the dough square so one of the sides of the square is facing you and place the butter on top at a 45 degree angle to the dough (see picture).
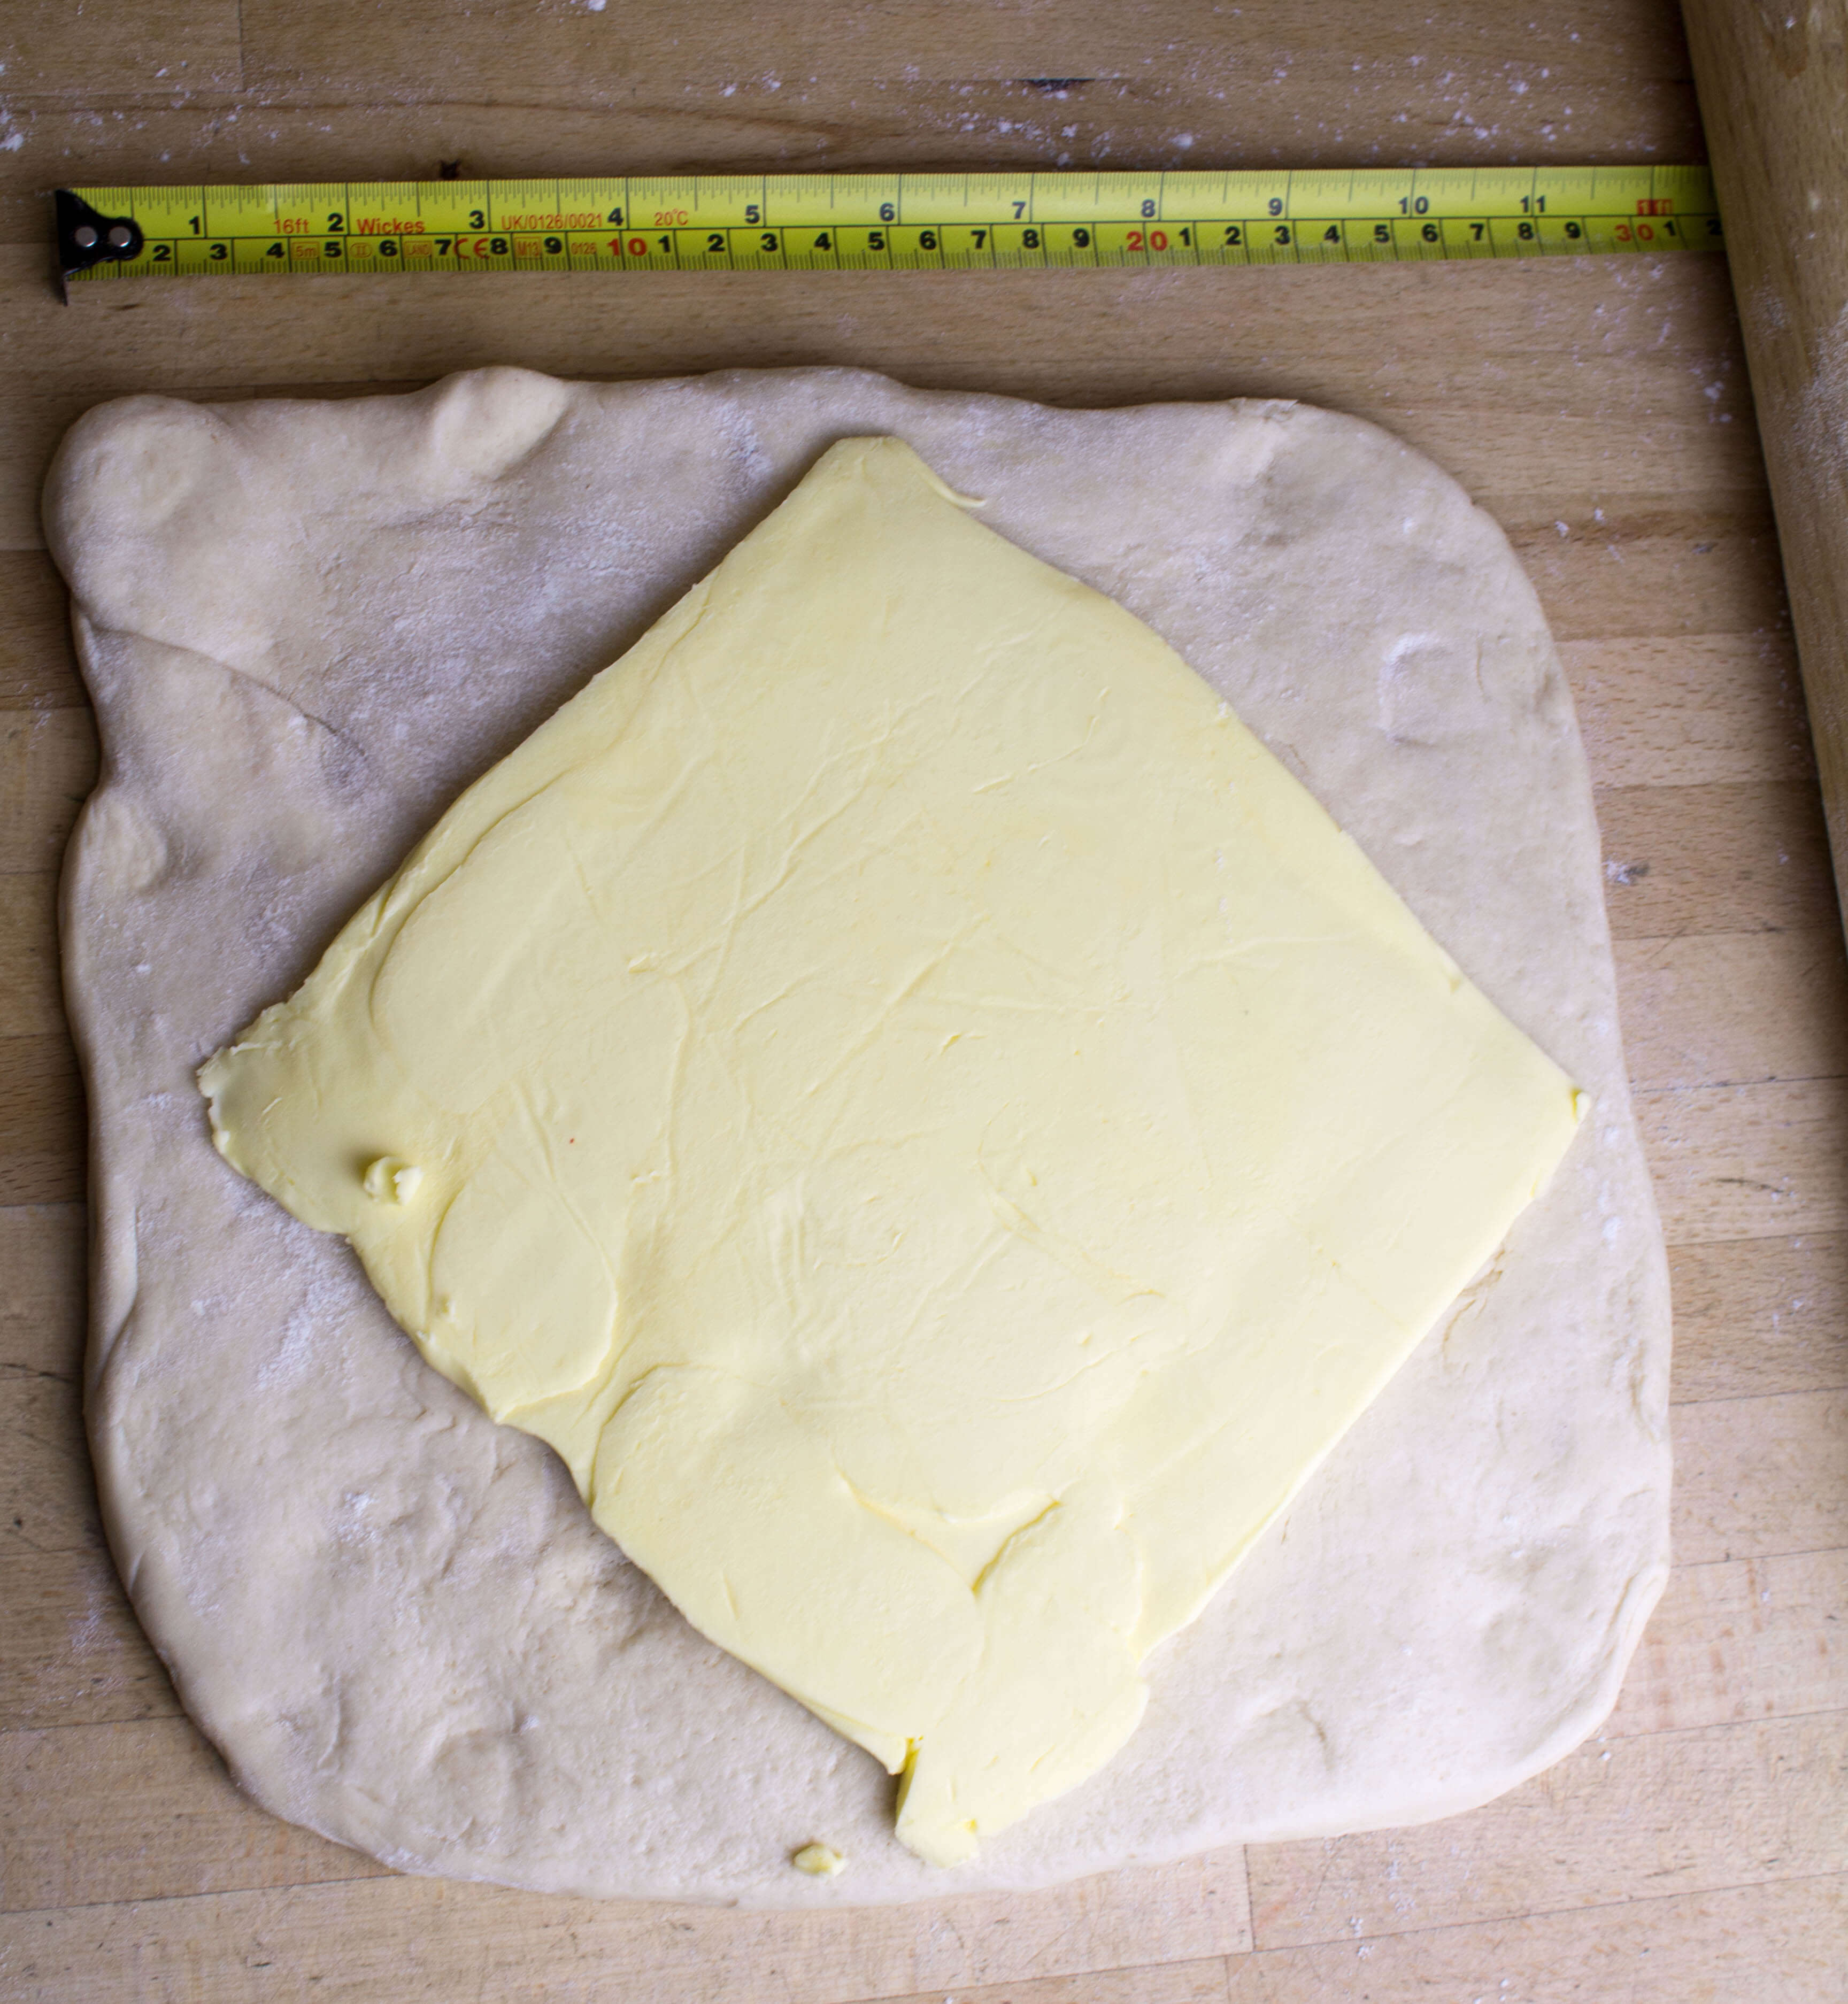
- Fold each flap of dough over the butter, so the point of the flaps reaches the centre. The edges of the dough flaps should slightly overlap to fully enclose the butter.
- Press the seams to seal in the butter.
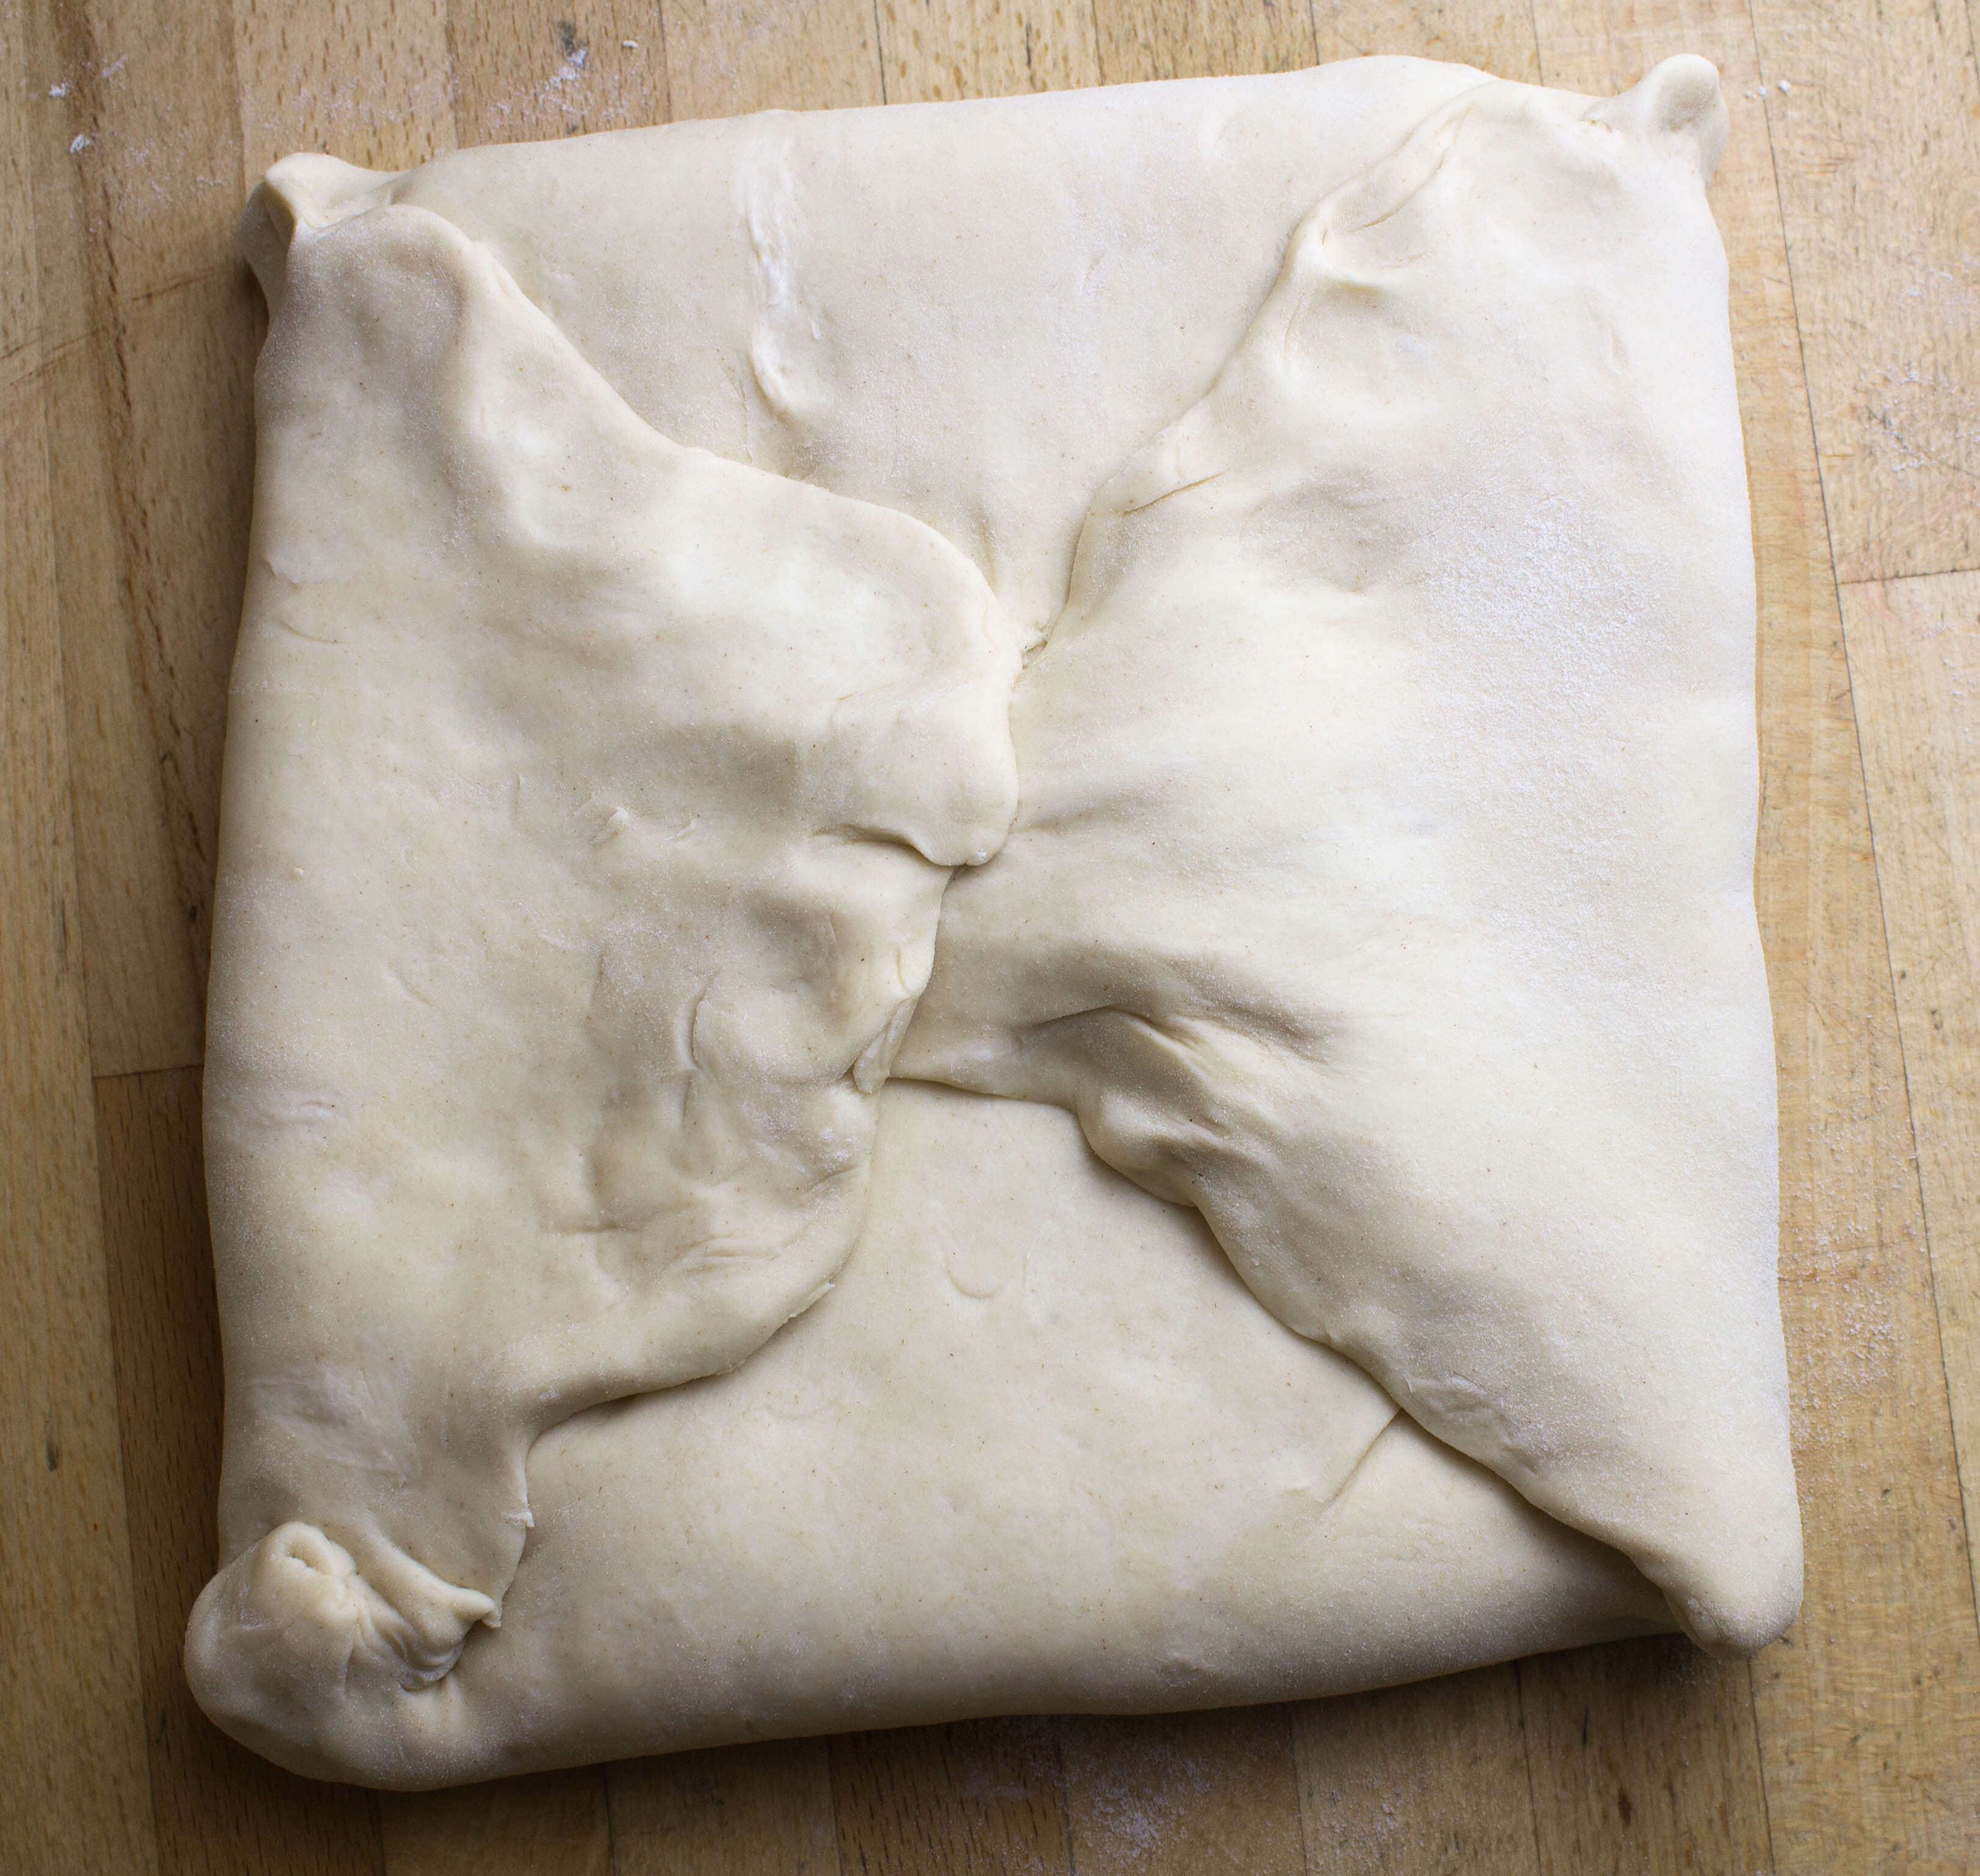
- On a lightly floured surface, roll out the the dough to a rectangle of 20 x 60 cm.
- Fold the dough like a letter in thirds, fold one third up and the other third on top of that. Then cover with clingfilm and put in the fridge for 30 minutes. This is 1 “turn”.
- Repeat the rolling and folding two more times, each time rolling the dough to 20 cm x 60 cm. After each “turn” turn the dough 90 degrees before rolling again. The open ‘end’ of the dough should be towards you every time when you start to roll.
- After the third “turn” put the dough in the fridge overnight until day 3.
Day 3- Time to eat…almost.
- Take the dough out of the fridge.
- Lightly flour your work surface and roll the dough into a long strip of 20 cm wide and just over 100 cm long.
- Make a little paper triangle croissants template, save the faff of measuring each croissant. The base of the triangle should be 12.5cm wide and 20cm tall. With both sloping side equal length.
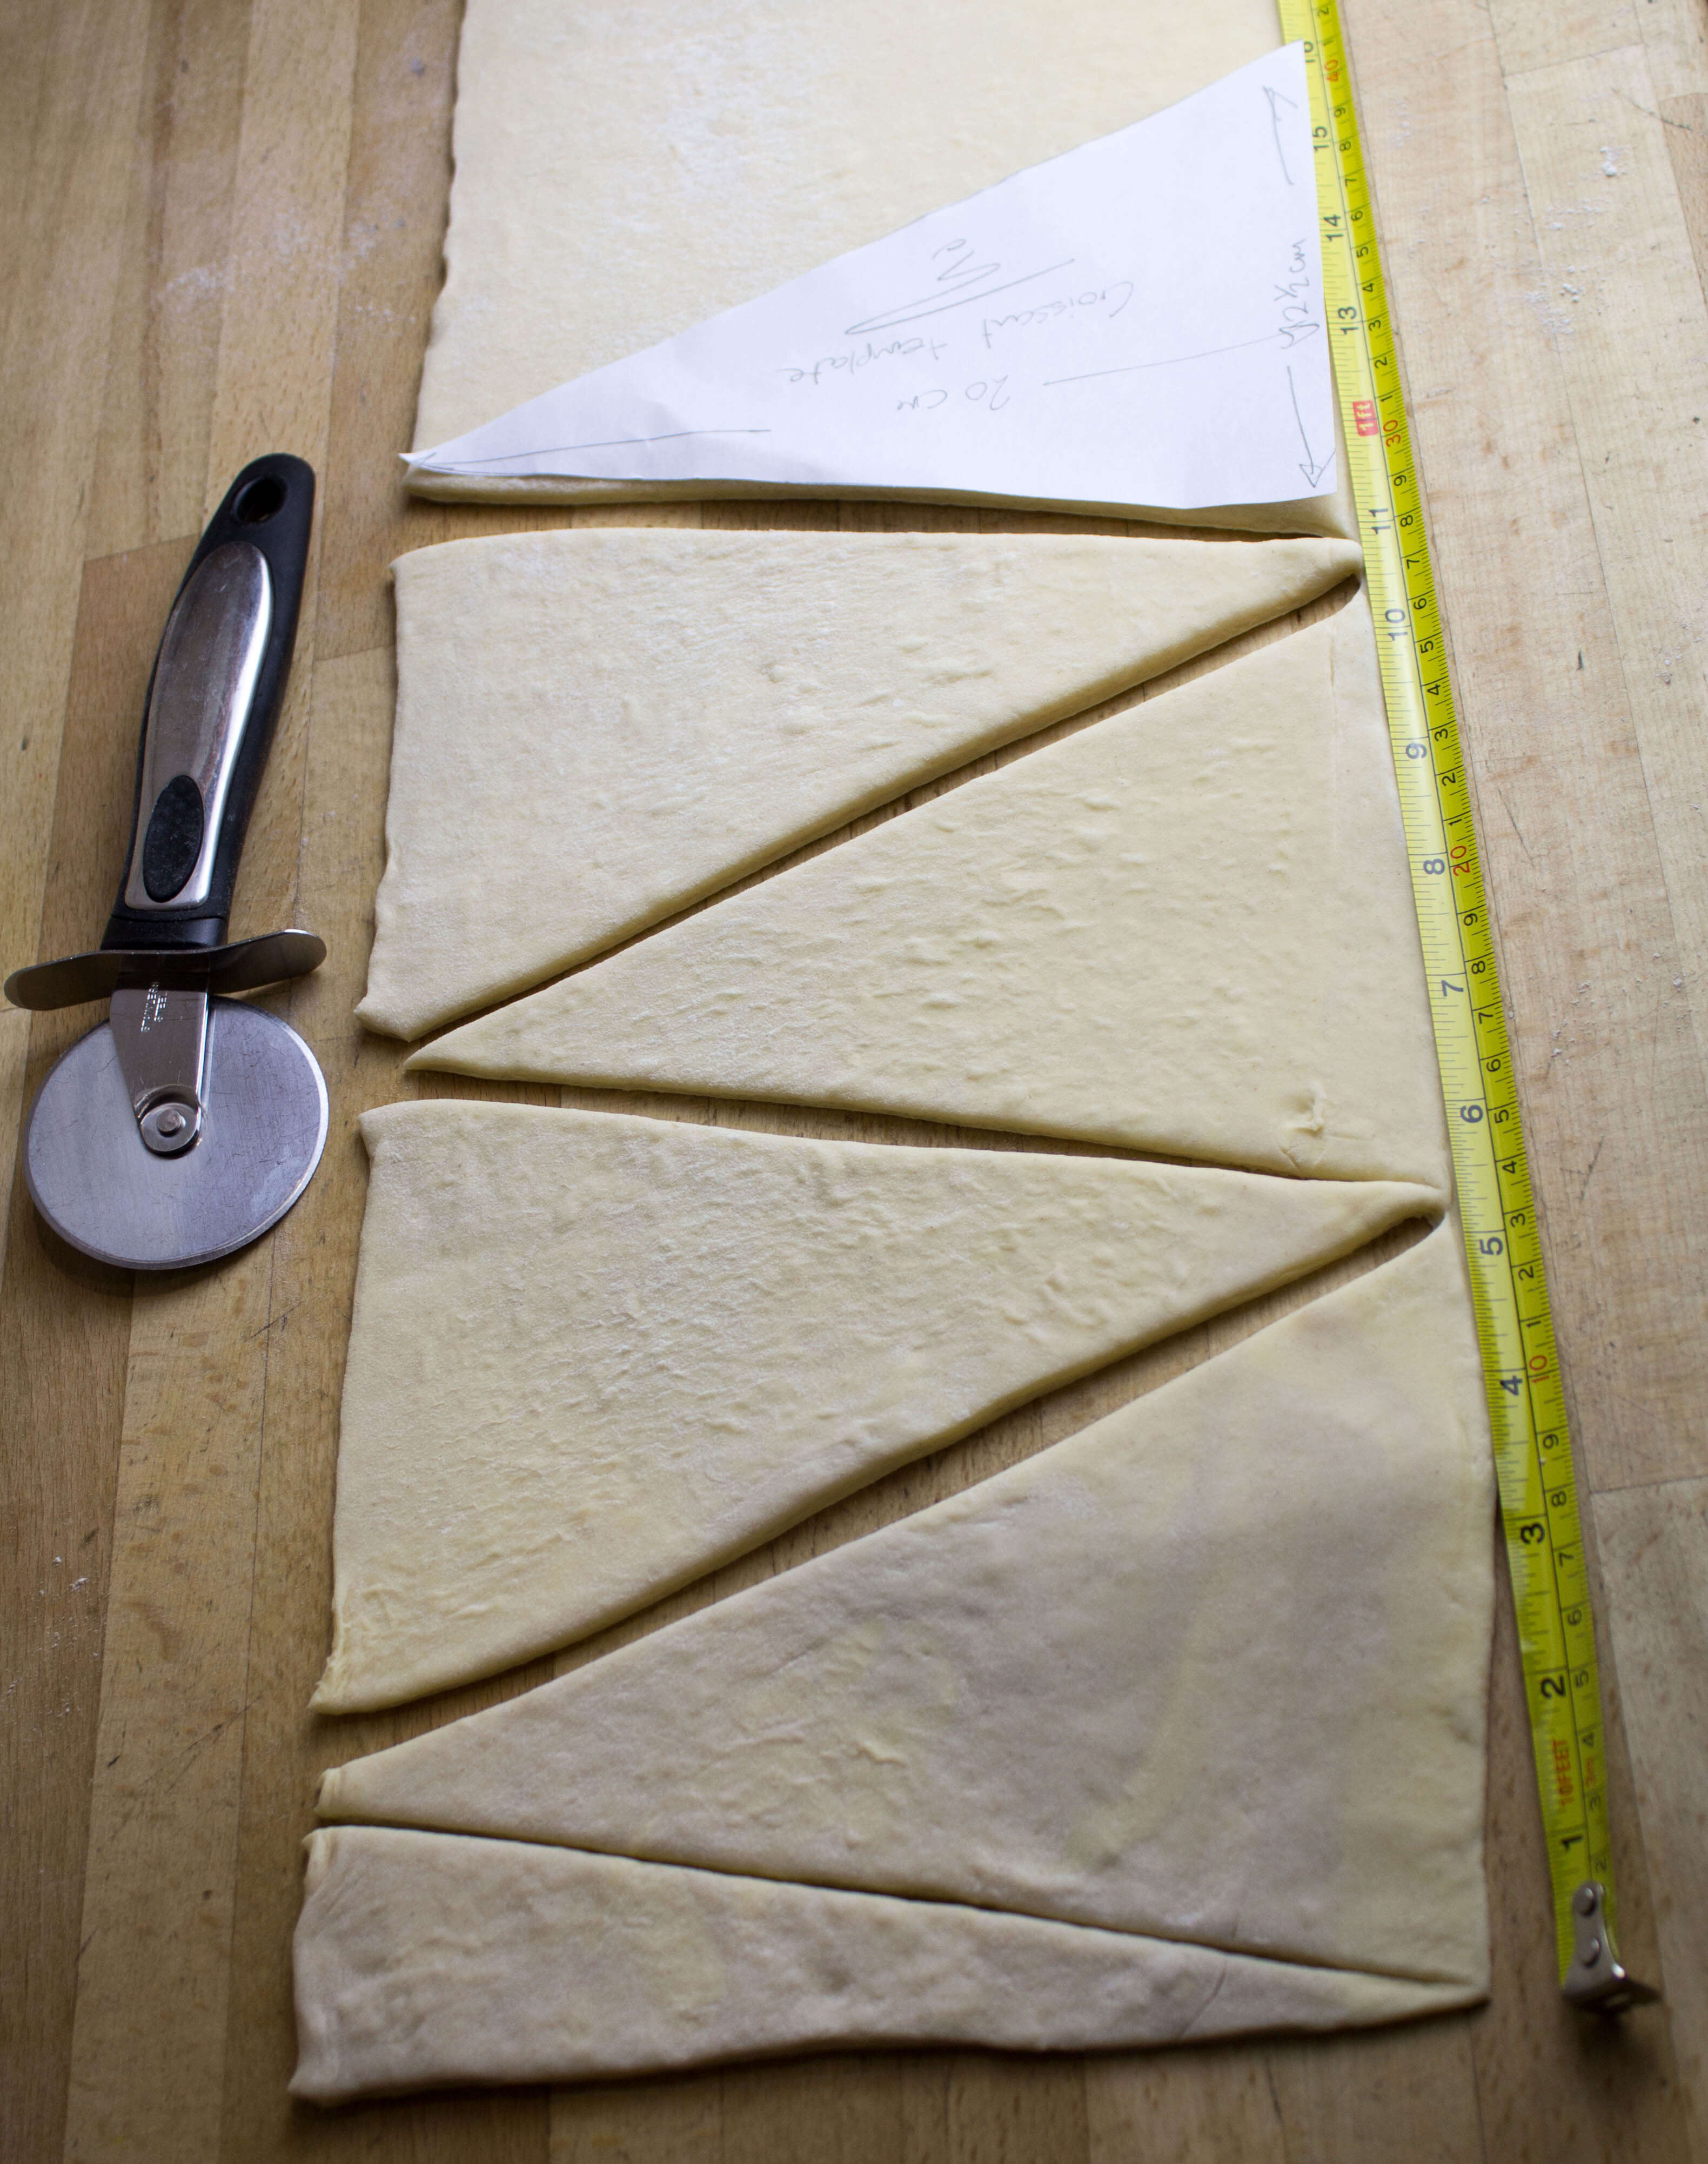
- Cut out your croissant shapes working from left to right. A pizza wheel is ideal for this.
- Cut a notch about 1cm in the middle of the base of the triangle and stretch the base a little so it looks like the Eiffel tower (or Wigwam).
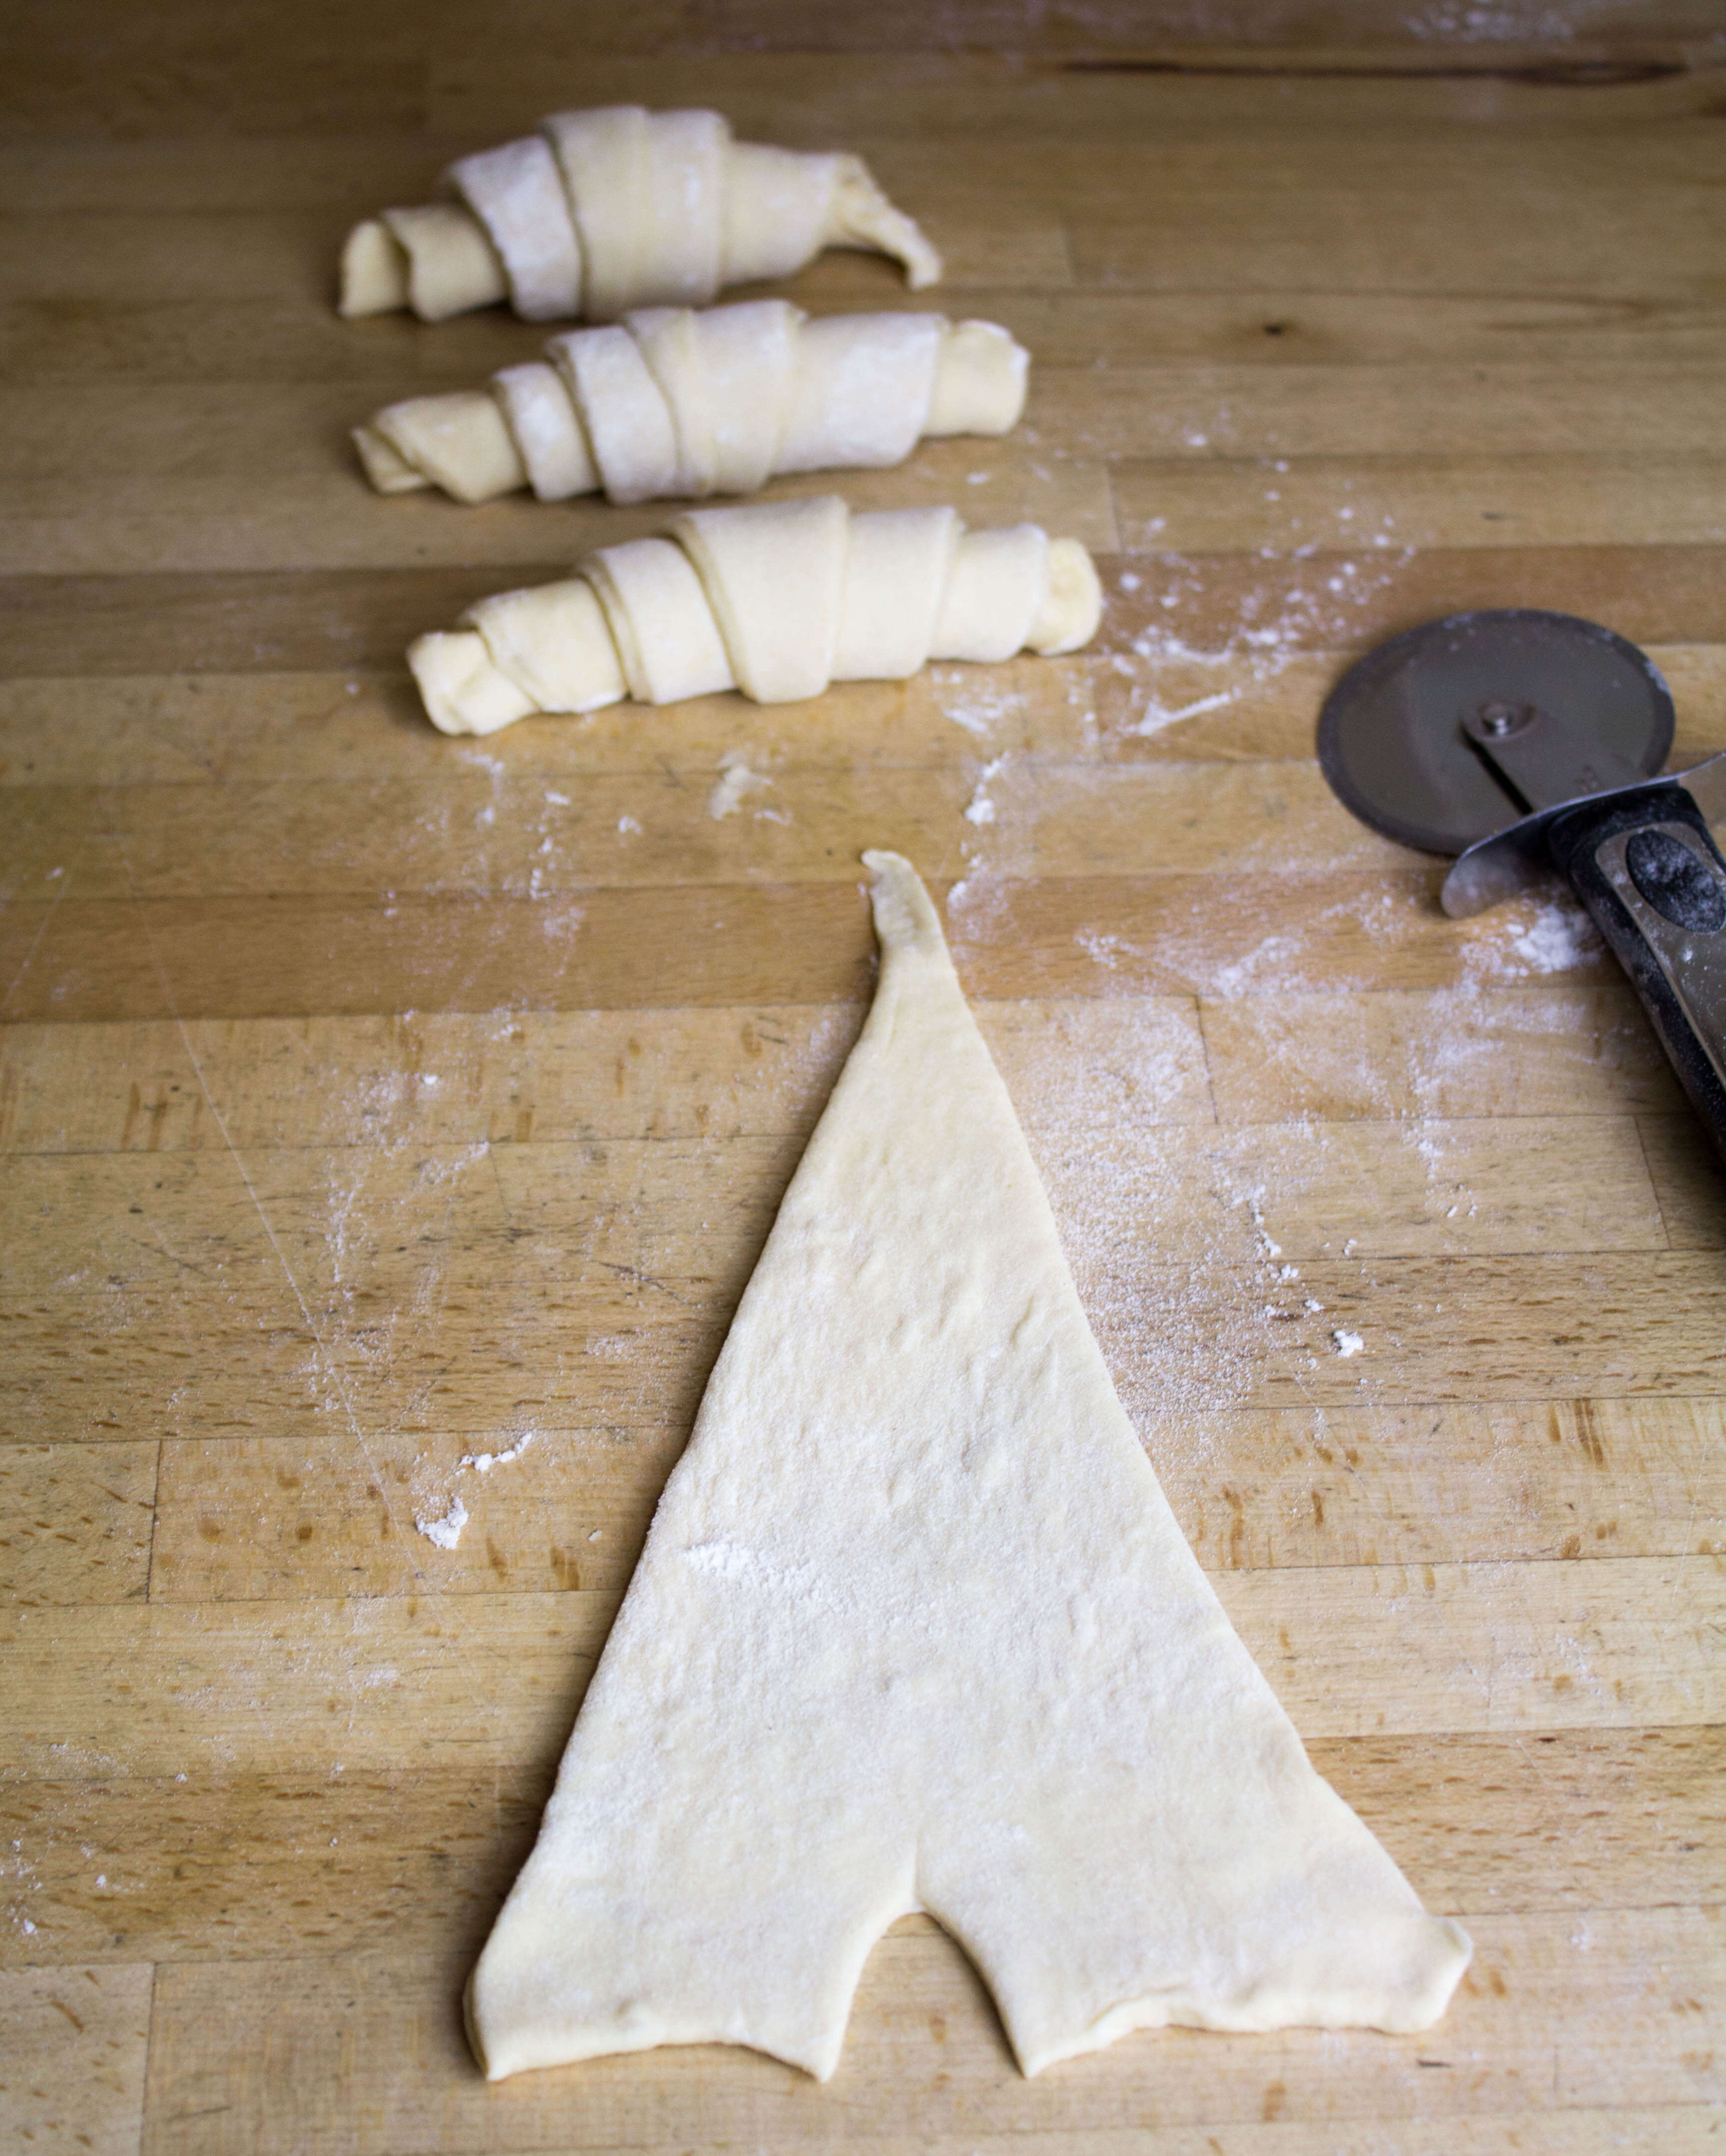
- Roll from the base rolling tightly and firmly but without squashing the croissant.Place on a baking tray lined with baking parchment. At this stage you could freeze them. When frozen put them in a ziplock bag and defrost overnight on a lined baking tray covered with oiled cling film)
- Egg wash the croissants and allow to rise for a couple of hours, until doubled in size.
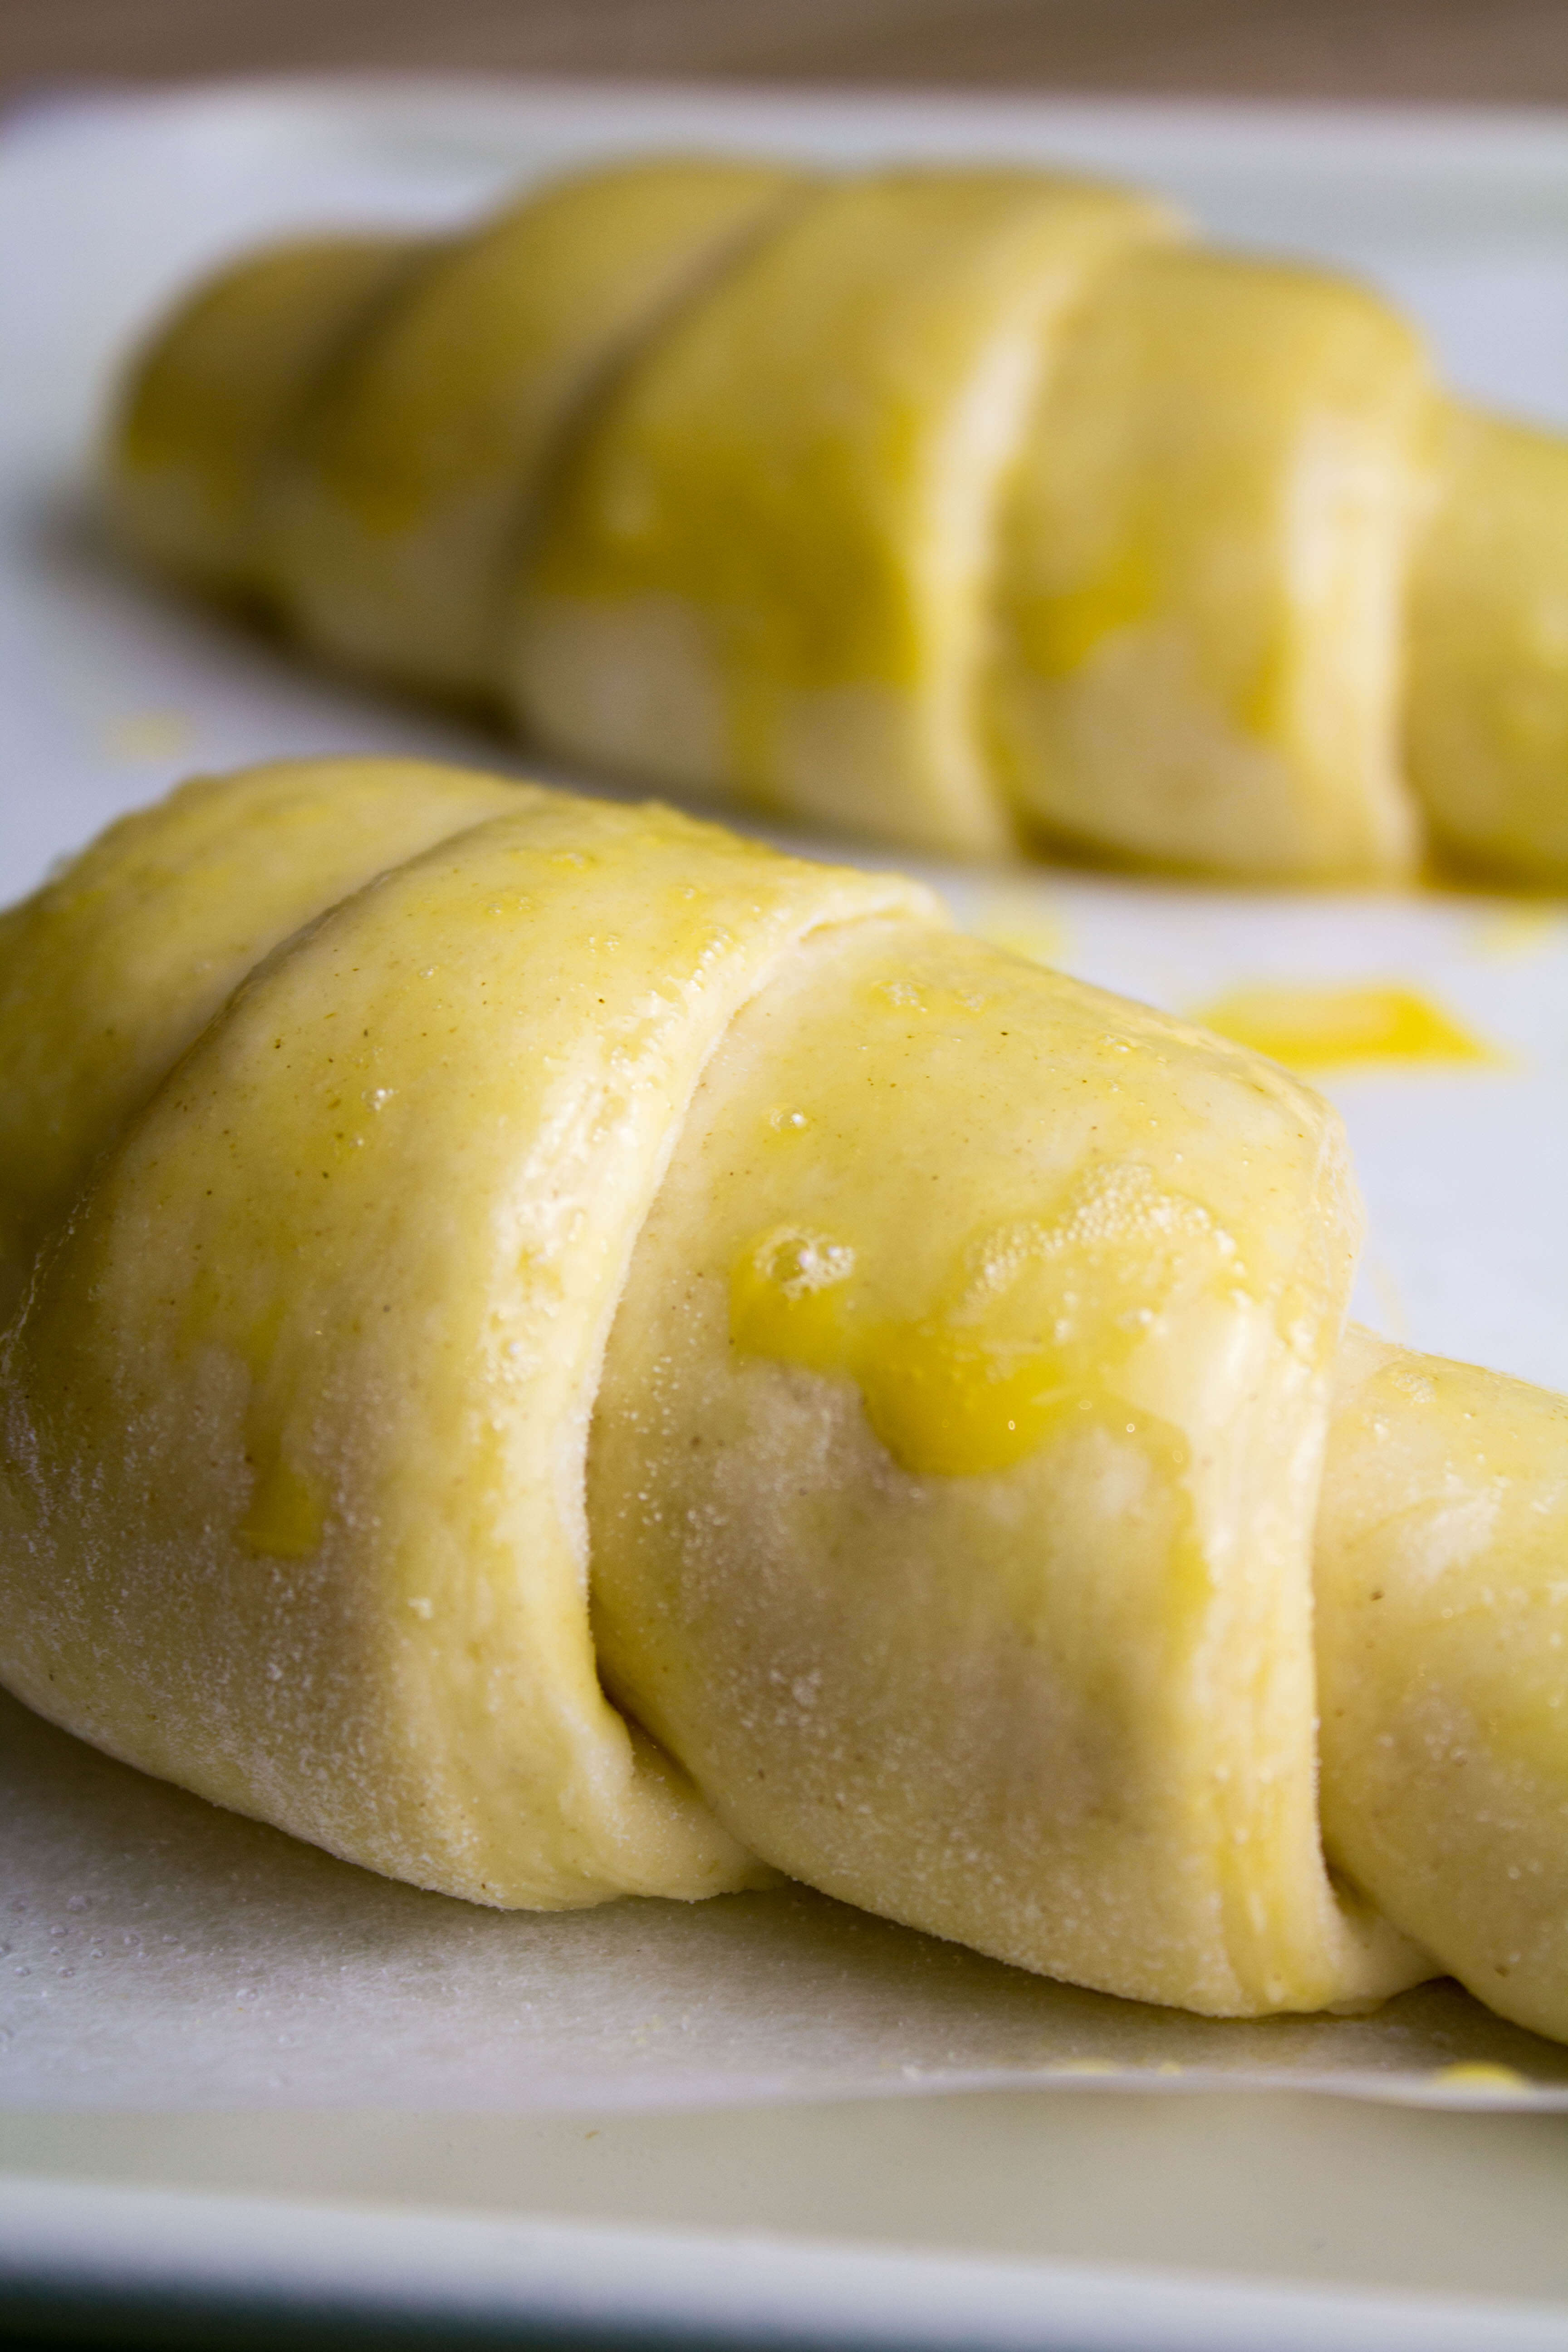
- Preheat oven to 200c/180c fan . Bake for 18-20 minutes.
1

Leave a Reply