• Skip to primary navigation
  • Skip to main content
  • Home
  • About Me
  • Recipes
    • Cake
    • Biscuits
    • Bread
    • Pastry
    • Tray Bakes
    • Condiments
    • Bake with the kids
    • Anti Inflammatory Baking
  • Conversion Charts. Cups – Grams – Ounces
  • Blog

Cluck, Muck & Cook

Baking & Foodie Blog From Sunny Brentwood Essex

CluckMuckCook

Cheese Scone

1 May 15, 2018 Breads

Beer and Cheese Scones with Cheesy Beer Dip

I feel honoured to have been invited to the Stafford Cheese and Ale Festival this June to perform a couple of baking demos. I am always excited to attend a food festival as I love meeting the great artisan food producers who have stalls at the show. Also a festival that focuses on beer and cheese hits a sweet spot for me.

To be honest I always have a little trepidation in what what to bake for each specific festival. This one however was easy.The weekend before I received the call, I had been playing around with scones and also one of my lovely fellow bakers Tom had been making cheese scones that looked delicious on his Instagram feed.

Cheese Scone

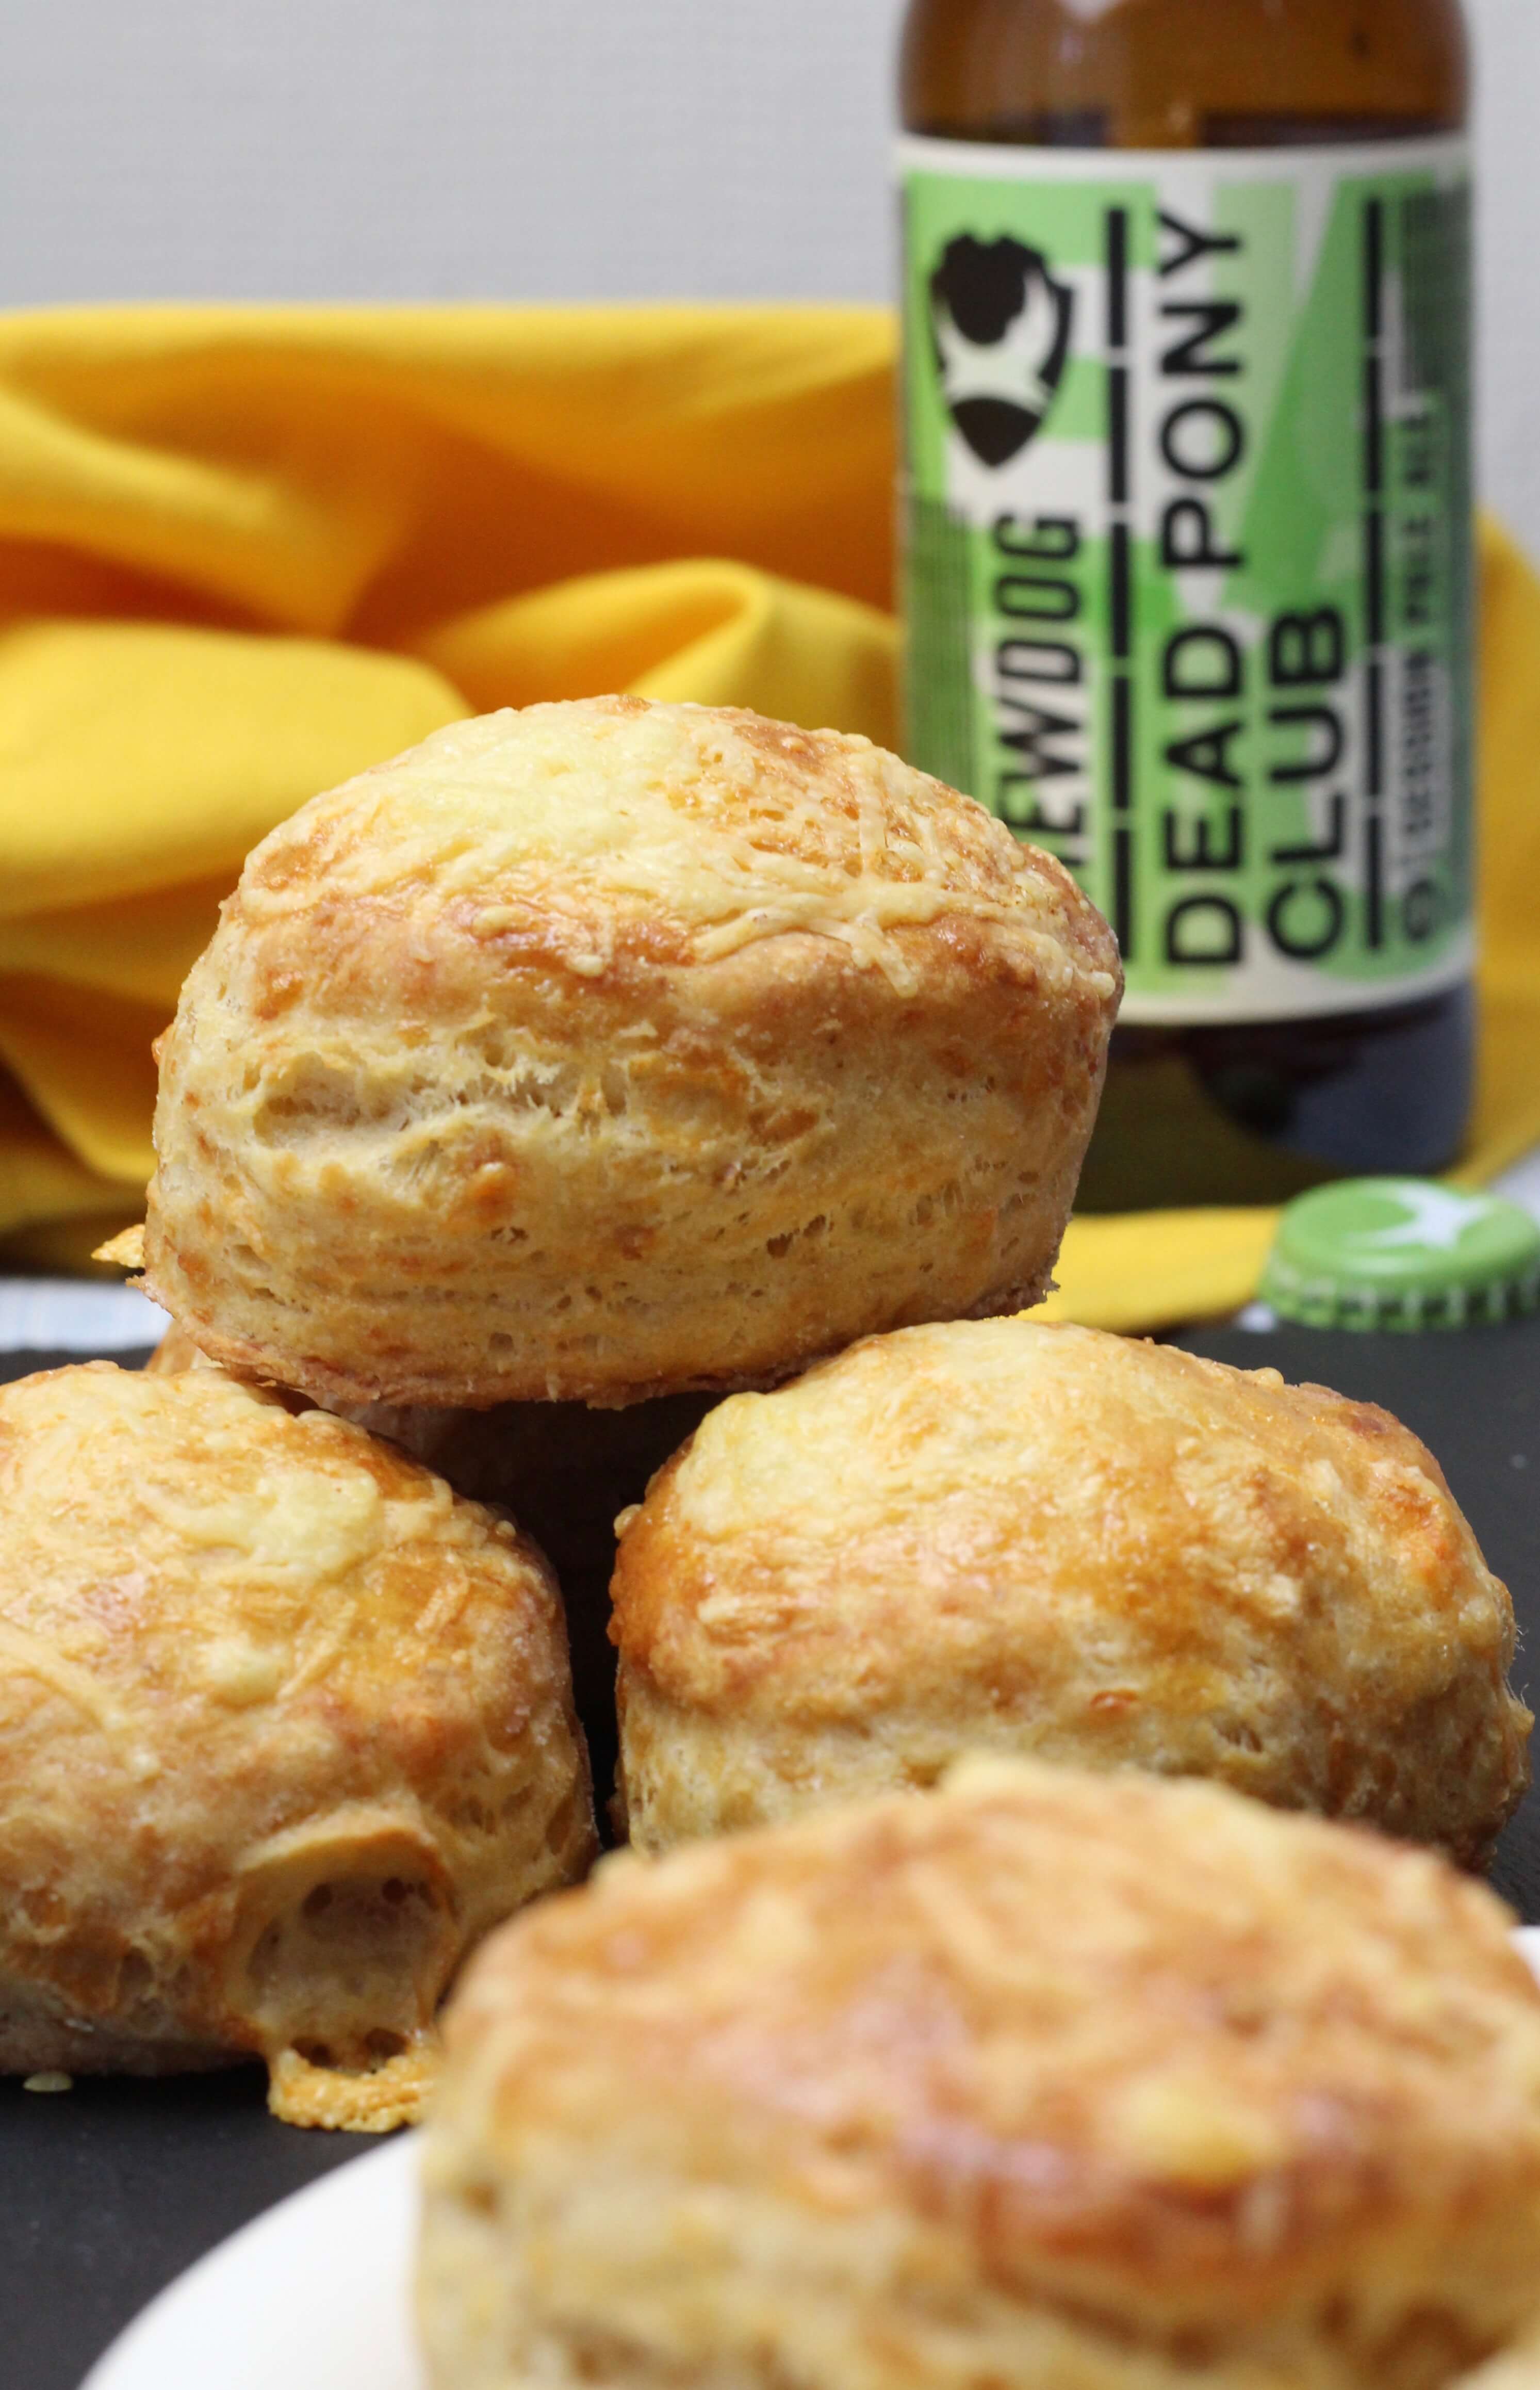
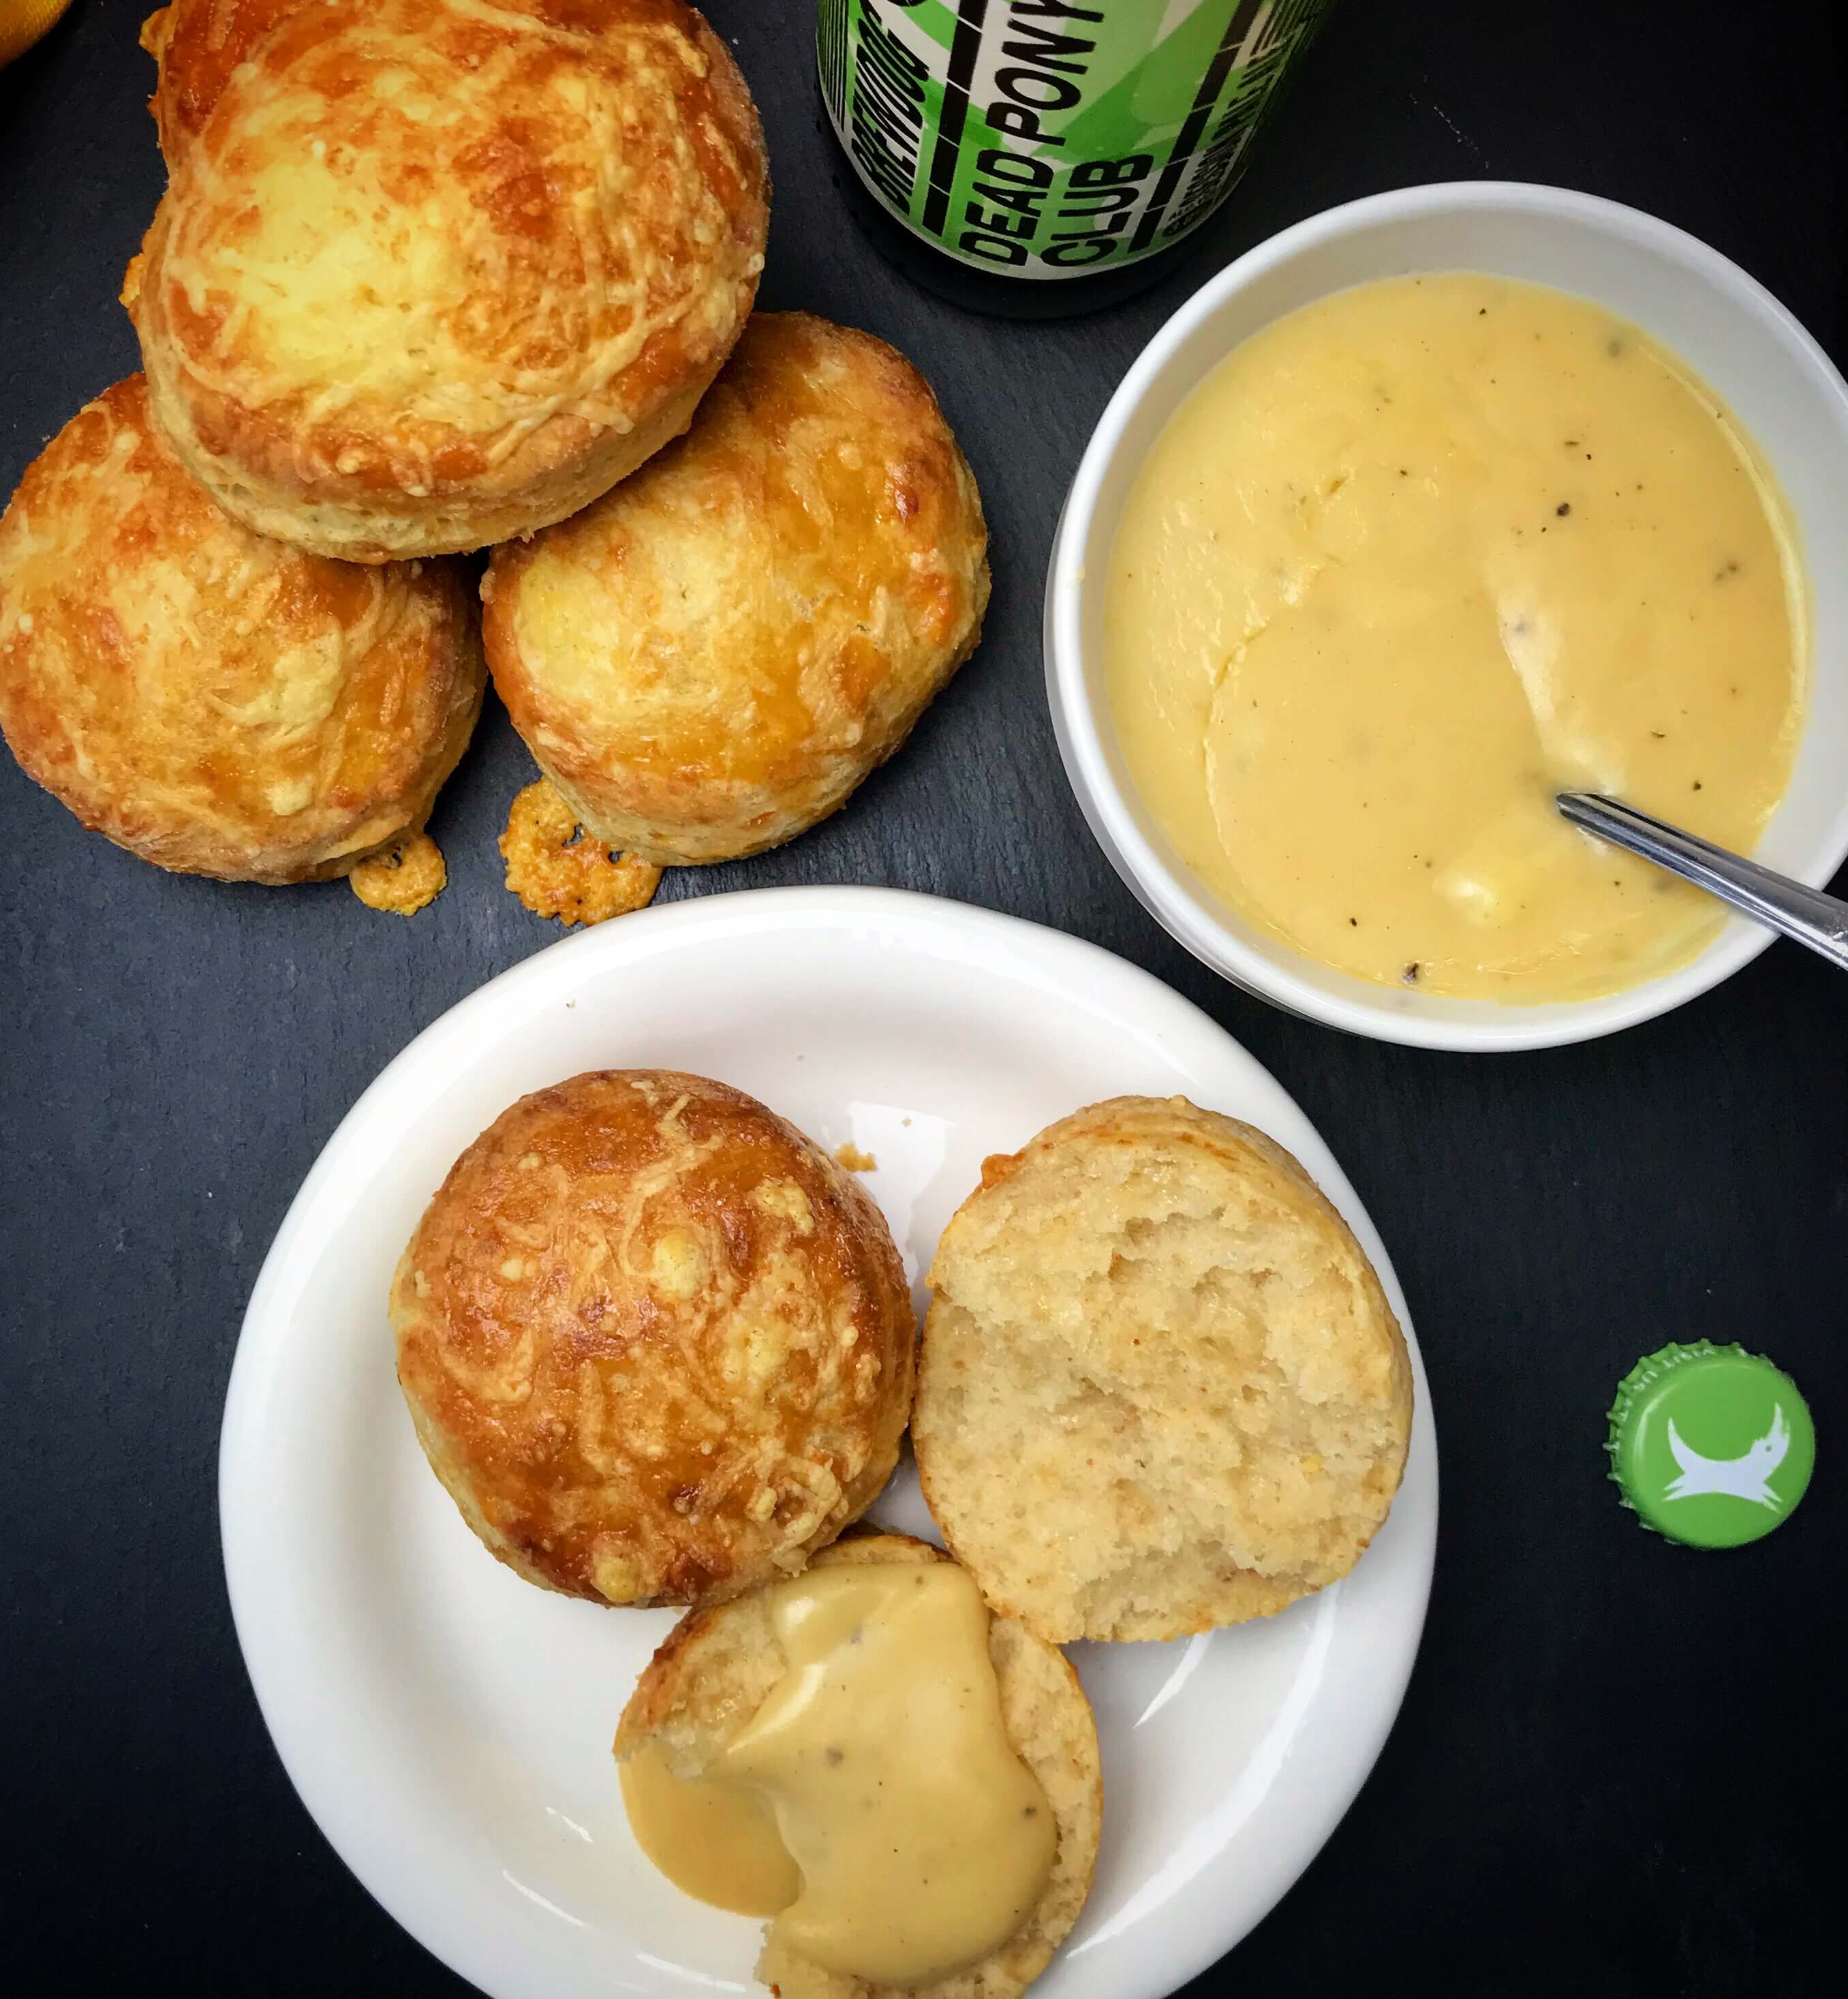
So I decided on a cheese and beer scone. Now I have a variety of craft beer in the garage to play with but I needed an expert to steer me in the right direction. So with the wonders of Twitter, I sent a quick tweet to an exceptionally talented and very helpful beer legend, Sarah Warman (@sarahfwarman). Sarah pointed me in the direction of Brew Dogs Dead Pony Club or a Five Points Railway Porter as a perfect pairing to cooked cheese. Having a few bottles of Dead Pony in the cupboard I went for that, although I will also try them with the Porter another time.

To go with the scones, I thought nacho style cheese sauce with beer would make a perfect warm accompaniment, one that was fully of cheesy beeriness without the neon yellow look. It is super easy to make and so addictive.

Cheese Scone

Cheese and Beer Scones:

480g strong white bread flour
90g salted butter, cold and cubed
150g grated mature cheddar, reserve a little to sprinkle on the scones
15g baking powder
Large pinch of paprika
½ tsp English mustard powder
300ml milk
1 tbsp lemon juice
100ml beer, a pale ale or porter work well

Beer Cheese Dip:

30g butter
20g flour
60ml full fat milk
120ml beer, a pale ale or porter work well
225g grated cheddar cheese
Splash of Worcestershire sauce
½ tsp paprika
½ tsp English mustard powder
salt & black pepper to taste

METHOD

Scones:
Preheat the oven to 220c/200c fan/Gas 7.
Put the flour, baking powder, paprika and mustard powder in a bowl and mix together.
Rub the butter into it until it looks like fine breadcrumbs. Then add the cheese (reserve a little to sprinkle on top later) and mix together with your hands.
Add the lemon juice to the milk and add along with the beer to the dry ingredients.
Mix with a spoon until it just comes together and tip out onto a well floured work surface.
The dough will be wet and sticky. Use floured hands and lightly knead the dough until you have a smooth ball. Do not worry if it is sticky – keep the worktop floured.
Roll to about 3cm thick and cut out with a floured 5cm round cutter.
Place onto a baking sheet lined with parchment and bake for 15 mins.

Beer Cheese Dip:
In a medium nonstick pan, melt the butter, then whisk in the flour, paprika and mustard powder all at once and cook for a couple of minutes whilst whisking.
Slowly pour in the milk, followed by the beer and a splash of Worcestershire sauce, whisking constantly to prevent any lumps.
Stir in the cheese until just melted, then remove from heat and add salt and pepper to taste.

Best served warm with the warm scones. Also goes with well pretzels.


Beer and Cheese Scones with Cheesy Beer dip
 
Save Print
Prep time
30 mins
Cook time
15 mins
Total time
45 mins
 
Author: CluckMuckCook
Serves: 12
Ingredients
  • Cheese and Beer Scones:
  • 480g strong white bread flour
  • 90g salted butter, cold and cubed
  • 150g grated mature cheddar, reserve a little to sprinkle on the scones
  • 15g baking powder
  • Large pinch of paprika
  • ½ tsp English mustard powder
  • 300ml milk
  • 1 tbsp lemon juice
  • 100ml beer, a pale ale or porter work well
  • Beer Cheese Dip:
  • 30g butter
  • 20g flour
  • 60ml full fat milk
  • 120ml beer, a pale ale or porter work well
  • 225g grated cheddar cheese
  • Splash of Worcestershire sauce
  • ½ tsp paprika
  • ½ tsp English mustard powder
  • salt & black pepper to taste
Instructions
  1. Scones:
  2. Preheat the oven to 220c/200c fan/Gas 7.
  3. Put the flour, baking powder, paprika and mustard powder in a bowl and mix together.
  4. Rub the butter into it until it looks like fine breadcrumbs. Then add the cheese (reserve a little to sprinkle on top later) and mix together with your hands.
  5. Add the lemon juice to the milk and add along with the beer to the dry ingredients.
  6. Mix with a spoon until it just comes together and tip out onto a well floured work surface.
  7. The dough will be wet and sticky. Use floured hands and lightly knead the dough until you have a smooth ball. Do not worry if it is sticky – keep the worktop floured.
  8. Roll to about 3cm thick and cut out with a floured 5cm round cutter.
  9. Place onto a baking sheet lined with parchment and bake for 15 mins.
  10. Beer Cheese Dip:
  11. In a medium nonstick pan, melt the butter, then whisk in the flour, paprika and mustard powder all at once and cook for a couple of minutes whilst whisking.
  12. Slowly pour in the milk, followed by the beer and a splash of Worcestershire sauce, whisking constantly to prevent any lumps.
  13. Stir in the cheese until just melted, then remove from heat and add salt and pepper to taste.
  14. Best served warm with the warm scones. Also goes with well pretzels.
3.5.3239


easter chocolate cornflake nests

3 March 22, 2018 Bake with the kids

Easter Chocolate Cornflake Nests

Ethan my youngest was keen to do some Easter baking with me and Oliver my eldest wanted to practise some photography. This relegated me to chief bottle washer and supervisor which I was more than happy with, as I had already spent a lot of time in the kitchen making hot cross buns.

easter chocolate cornflake nests

I love spending time in the kitchen with the boys as it makes me nostalgic for the time I used to spend in the kitchen with my Dad. Relaxing and chatting for 30 minutes, with no interruptions from social media, the Xbox or phones is such a joy and rare in our hectic lives.

With nostalgia being the theme, we agreed on a very simple recipe I remember making as a young lad, which Ethan could nail and that would look great when Oliver grabbed the camera.

easter chocolate cornflake nests

Not sure if calling it baking is stretching the skills needed, but if you can melt stuff, stir and spoon into cupcake cases then this is the recipe for you.

Ingredients:
225g plain chocolate, broken into pieces
2 tbsp golden syrup
50g unsalted butter
75g cornflakes
2 bags of Cadbury mini chocolate eggs

Method:

  1. Line a 12-hole muffin tin with paper cupcake cases.
  2. In a bowl set on a pan of simmering water, gently melt the chocolate, golden syrup and butter, stirring until smooth and fully combined.
  3. Gently fold in the cornflakes until totally coated in the chocolate.
  4. Divide the mixture between the 12 paper cases and pop 3 chocolate eggs into the centre of each nest.
  5. Chill in the fridge until completely set.

Easter chocolate cornflake nests
 
Save Print
Prep time
15 mins
Total time
15 mins
 
Old school chocolate cornflake nests for Easter.
Author: CluckMuckCook
Serves: 12
Ingredients
  • Ingredients:
  • 225g plain chocolate, broken into pieces
  • 2 tbsp golden syrup
  • 50g unsalted butter
  • 75g cornflakes
  • 2 bags of Cadbury mini chocolate eggs
Instructions
  1. Line a 12-hole muffin tin with paper cupcake cases.
  2. In a bowl set on a pan of simmering water, gently melt the chocolate, golden syrup and butter, stirring until smooth and fully combined.
  3. Gently fold in the cornflakes until totally coated in the chocolate.
  4. Divide the mixture between the 12 paper cases and pop 3 chocolate eggs into the centre of each nest.
  5. Chill in the fridge until completely set
3.5.3229


Hot Cross Buns

3 March 12, 2018 Breads

Cranberry and Orange Hot Cross Buns

One of my great childhood Easter memories was walking down to the bakers at the end of the road with my Dad on Good Friday morning to pick up some freshly baked hot cross buns for breakfast. The heady smell of freshly baked buns rich with spices and fruit still makes me dribble.

Hot Cross Buns

Imagine my horror this year when I heard there was a raisin shortage. Luckily I am not a traditionalist so I made a delicious tweak on my normal Hot Cross Bun recipe. A lovely combination of cranberry and orange zest for those who like me are not a big fan of the peel in a standard hot cross bun.

My house now smells like that bakers every weekend on the run up to Easter, as I think hot cross buns should not be a one day affair.

Delicious warm from the oven or toasted slathered in butter.


Ingredients:

500g strong white flour (plus extra for dusting)
75g soft brown sugar
2 1/2 tsp mixed spice powder
1/2 tsp ground ginger
1 lemon and 1 large orange (zest only)
10g salt
10g fast-acting dried yeast
40g butter
300ml milk
1 medium egg, beaten
200g dried cranberries
oil for greasing

For the Cross Topping:
75g plain flour
100ml water
Maple syrup for glazing

Method:

  1. Add the milk and butter to a small saucepan and gently warm until the butter melts. Remove from the heat and allow to cool for 15 minutes. Then beat in the egg.
  2. Put the flour, sugar and spices into a large bowl and mix together.
  3. Add the salt and yeast, on opposite sides of the bowl.
  4. Finely zest the orange and lemon and add to the dry ingredients.
  5. You can do the next step by hand or in a stand mixer. Add about 90 percent of the liquid into the bowl of dry ingredients and bring together with your hand until you incorporate all of the flour. You want a soft dough so add more milk if needed.
  6. Tip the dough out on to a lightly floured work surface. Knead by hand for 5 minutes. If the dough still seems too sticky and is not forming a soft ball, add a little flour.
  7. Add the cranberries and knead for another 5 minutes.
  8. If using a stand mixer, mix with a dough hook for 5 minutes,then add the cranberries and mix for another minute or two.
  9. Oil a large bowl. Place the dough in a bowl and cover with cling film. Leave to rest in a warm place for about 1-1½ hours or until doubled in size.
  10. Turn the dough out on to a lightly floured surface and divide into 12 equal size balls. Roll the balls on the counter until they look nice, round and tight.
  11. Line a large baking tray with baking parchment and place the balls on the tray, placing them fairly close together.
  12. Put the baking tray into a large clean polythene bag (bin bags work well). Puff up the bag so it doesn’t touch the buns. Leave for 1 hour or until the buns have doubled in size.
  13. When the buns have doubled in size, preheat the oven to 220C/200C Fan/Gas 7.

For the Cross Topping:

  1. Whisk together the flour in a bowl with 100ml water until it forms a smooth paste and then pour into the icing bag.
  2. Pipe a cross onto each bun. I normally do a line down each row, then a line across each row, rather than doing each bun individually.
  3. Bake for 16-20 minutes until pale golden-brown. Turn the baking tray around halfway through for an even colour.
  4. When the buns come out of the oven, brush with a little maple syrup, before cooling on a wire rack.

Cranberry and Orange Hot Cross Buns
 
Save Print
One of my great childhood Easter memories was walking down to the bakers at the end of the road with my Dad on Good Friday morning to pick up some freshly baked hot cross buns for breakfast. The heady smell of freshly baked buns rich with spices and fruit still makes me dribble. These will fill your house with that same delicious smell.
Author: CluckMuckCook
Ingredients
  • Ingredients:
  • 500g strong white flour (plus extra for dusting)
  • 75g soft brown sugar
  • 2½ tsp mixed spice powder
  • ½ tsp ground ginger
  • 1 lemon and 1 large orange (zest only)
  • 10g salt
  • 10g fast-acting dried yeast
  • 40g butter
  • 300ml milk
  • 1 medium egg, beaten
  • 200g dried cranberries
  • oil for greasing
  • For the Cross Topping:
  • 75g plain flour
  • 100ml water
  • Maple syrup for glazing
Instructions
  1. Add the milk and butter to a small saucepan and gently warm until the butter melts. Remove from the heat and allow to cool for 15 minutes. Then beat in the egg.
  2. Put the flour, sugar and spices into a large bowl and mix together.
  3. Add the salt and yeast, on opposite sides of the bowl.
  4. Finely zest the orange and lemon and add to the dry ingredients.
  5. You can do the next step by hand or in a stand mixer. Add about 90 percent of the liquid into the bowl of dry ingredients and bring together with your hand until you incorporate all of the flour. You want a soft dough so add more milk if needed.
  6. Tip the dough out on to a lightly floured work surface. Knead by hand for 5 minutes. If the dough still seems too sticky and is not forming a soft ball, add a little flour.
  7. Add the cranberries and knead for another 5 minutes.
  8. If using a stand mixer, mix with a dough hook for 5 minutes,then add the cranberries and mix for another minute or two.
  9. Oil a large bowl. Place the dough in a bowl and cover with cling film. Leave to rest in a warm place for about 1-1½ hours or until doubled in size.
  10. Turn the dough out on to a lightly floured surface and divide into 12 equal size balls. Roll the balls on the counter until they look nice, round and tight.
  11. Line a large baking tray with baking parchment and place the balls on the tray, placing them fairly close together.
  12. Put the baking tray into a large clean polythene bag (bin bags work well). Puff up the bag so it doesn’t touch the buns. Leave for 1 hour or until the buns have doubled in size.
  13. When the buns have doubled in size, preheat the oven to 220C/200C Fan/Gas 7.
  14. For the Cross Topping:
  15. Whisk together the flour in a bowl with 100ml water until it forms a smooth paste and then pour into the icing bag.
  16. Pipe a cross onto each bun. I normally do a line down each row, then a line across each row, rather than doing each bun individually.
  17. Bake for 16-20 minutes until pale golden-brown. Turn the baking tray around halfway through for an even colour.
  18. When the buns come out of the oven, brush with a little maple syrup, before cooling on a wire rack.
3.5.3229


Blood Orange Drizzle Cake

0 February 26, 2018 Bake with the kids

Blood Orange Drizzle Cake

This time of year I go crazy for sweet vibrant blood oranges. They bring a ray of sunshine into a season of dreary fruit. So what better way to use the oranges than in a drizzle cake. Perfect for a lazy Sunday afternoon with a cuppa after a bracing dog walk with Chester our Cockerpoo.

Blood Orange Drizzle Cake

It is super simple to make and the kids can join in too. The sponge is basically a Victoria sandwich recipe, but when filled with the zest and a little juice of the oranges, it is transformed into a citrus delight. Then it is crowned with a sweet zesty orange syrup that oozes into the cake to make it super moist.

OK I am dribbling, I need to go and grab a slice.

Ingredients:

175g unsalted butter, softened, plus extra for greasing
175g light brown soft sugar
175g plain flour
3 medium eggs
1 tsp baking powder
3 blood oranges (normal oranges will also work)
1/2 tsp orange extract (optional)
50g caster sugar

Method:

  1. Grease and line a 2lb loaf tin with baking parchment.
  2. Preheat the oven to 180˚C (160c Fan), Gas 4.
  3. In a stand mixer or with an electric hand whisk, cream the butter, brown sugar and zest of 2 oranges until light and fluffy.
  4. Scrape down the sides of the bowl and add the eggs one at a time. If it starts to curdle, add a couple of tablespoons of flour.
  5. Add the remaining flour and baking powder, a tablespoon of the juice of one of the oranges (and orange extract if using) and mix until combined.
  6. Pour into the lined loaf tin and bake for 45-55 minutes. Poke a skewer into the middle of the cake and if it comes out clean it is done.
  7. Whilst the cake is in the oven, put the caster sugar in a small pan with about 6 tablespoons of orange juice and the zest of the remaining orange and simmer until the sugar has dissolved.
  8. When the cake comes out of the oven, pierce the top all over with a skewer. Then pour on the orange syrup you have made.
  9. Leave to cool completely in the tin before removing.

Blood Orange Drizzle Cake
 
Save Print
Prep time
20 mins
Cook time
45 mins
Total time
1 hour 5 mins
 
This time of year I go crazy for sweet vibrant blood oranges. They bring a ray of sunshine into a season of dreary fruit. So what better way to use the oranges than in a drizzle cake. Perfect for a lazy Sunday afternoon with a cuppa after a bracing dog walk with Chester our Cockerpoo.
Author: CluckMuckCook
Serves: 1
Ingredients
  • 175g unsalted butter, softened, plus extra for greasing
  • 175g light brown soft sugar
  • 175g plain flour
  • 3 medium eggs
  • 1 tsp baking powder
  • 3 blood oranges (normal oranges will also work)
  • ½ tsp orange extract (optional)
  • 50g caster sugar
Instructions
  1. Grease and line a 2lb loaf tin with baking parchment.
  2. Preheat the oven to 180˚C (160c Fan), Gas 4.
  3. In a stand mixer or with an electric hand whisk, cream the butter, brown sugar and zest of 2 oranges until light and fluffy.
  4. Scrape down the sides of the bowl and add the eggs one at a time. If it starts to curdle, add a couple of tablespoons of flour.
  5. Add the remaining flour and baking powder, a tablespoon of the juice of one of the oranges (and orange extract if using) and mix until combined.
  6. Pour into the lined loaf tin and bake for 45-55 minutes. Poke a skewer into the middle of the cake and if it comes out clean it is done.
  7. Whilst the cake is in the oven, put the caster sugar in a small pan with about 6 tablespoons of orange juice and the zest of the remaining orange and simmer until the sugar has dissolved.
  8. When the cake comes out of the oven, pierce the top all over with a skewer. Then pour on the orange syrup you have made.
  9. Leave to cool completely in the tin before removing.
3.5.3229


Easy sourdough

2 February 23, 2018 Blog

Easy Sourdough Recipe

I must admit that before the Great British Bake Off, bread was my nemesis. I am talking a basic white loaf. Sourdough was a world of wizardry that I thought I would never understand. Some of the bread gurus I met would talk about FDT (final dough temperature, I eventually found out), bakers percentages, autolyse times and the importance of bench rest. I will not baffle you with these terms but will give you the recipe in layman’s terms, as I wished someone would have done for me in the beginning.

Eventually I started to understand the terminology and coEasy sourdoughncepts which can be intimidating at first. Then I broke it down to plain English. Which soon demystified the process.

There is a scene in the “Wizard of Oz” where Toto finds the wizard working the controls of his machines from behind a curtain and when discovered, the less-than-wonderful wizard shouts into his microphone: “Pay no attention to that man behind the curtain!”. Like this I hope to remove the fear of the mystery of making a decent loaf of sourdough and show you what’s behind the curtain. Which in reality is not scary at all. All you need is a bit of time and planning.

Hopefully making this simple but delicious loaf will give you the bug. Then when hooked, please do delve into the art and science of bread making if you want. Or just play around with this great basic recipe and be a bit of bread maverick like me.

I am assuming you have a sourdough starter, you can buy them on line or make your own. If you are like me you will end up with a collection of them, they all have their own unique flavours. If you want to make one yourself I have made Paul Hollywood’s one in the past. Recipe here

Let’s start with planning. I normally start late morning on Saturday for the mixing and first proof. Then in the evening at least 3 hours before I go to bed I shape the dough and put it in a proofing basket. Then when I go to bed I stick it in the fridge. The timing all depends on the temperature in your house. I am assuming around 70 degrees.

Think of yeast in the sourdough starter as a reptile. If it is cold they are slow and just hang around not doing much. Warm them up a bit and they come to life. The speed your dough rises will be a combination of how strong your starter is and how warm the environment you are proofing the dough is.

The expression ‘wetter is better’ is so true in bread making, especially with sourdough. The downside to that is that shaping sourdough for the beginner is a pain.

Easy sourdough

My approach is that you shape the dough the best you can before putting it in the bread form. Let it rise until it doubles in size. Then my hack is to stick it in the fridge overnight, like a brioche dough it will firm up nicely, which is critical when you need take it out of the bread form before baking, otherwise it can be like wrestling a jelly fish into a string bag.

The other eureka moment was when Yanny and Chris explained what a difference baking a loaf in a Dutch oven makes. In English terms a cast iron casserole dish , think le Creuset or Van Chef. Looking on the internet I kept seeing recommendations for a 6 quart one in bread recipes. I had no idea what that size was, so I just got a big one, about 25-26 cm is perfect. This helps retain heat and steam, it’s like an oven in an oven and totally transformed my bread making. Failing that a pizza stone in the oven or heavy baking sheet to help retain some heat in the oven will also work well.

Easy sourdough

I have saved step by step photos and videos on my Instagram page under story highlights @cluckmuckcook


Ingredients:
150g active, fed starter
350g water, tepid, preferably filtered
500g strong bread flour
10g sea salt
fine polenta or cornmeal for dusting

Method:
In a large bowl, whisk together the water and sourdough starter, then mix in the flour and salt until it forms a rough dough. Cover with cling film and leave for an hour. This is the autolyse period. Basically this hydrates the flour and starts breaking it down and starts to build gluten.

For the next 2 hours, every 30 minutes, grab a portion of the dough, stretch and pull it upwards and then fold it over to the other side of the bowl and tuck under. Rotate the bowl a quarter turn and repeat until you have done it 4 times and the bowl has gone around 1 full turn, cover with cling film and repeat 4 times over the 2 hours.

On the final turn, cover with cling film and leave in a warm place to rise until doubled in size. Be patient, this will depend on the strength of your starter and how warm the ambient temperature is.

Once doubled in size, tip onto the work surface and gently fold it into a ball, pulling each side into the middle. Do not worry about knocking the air out before you do this. Flip the ball over, cup your hands either side of the dough and gently turn the ball a quarter of a turn, tightening the dough. Repeat 3 or 4 times to get a nice tension on the dough. Do not worry too much as the fridge trick will help later.

Liberally flour the bread proving basket and pop the ball of dough in it seam side up. Oil some cling film and lay it on top.

Allow to proof until double in size and pop in the fridge overnight.

In the morning, preheat the oven for at least 30 mins at 240c (220c Fan) with the Dutch oven in the oven.

When the oven has been preheated, remove the dough from the fridge. Cut a circle of baking parchment larger than the loaf and scrunch it up then flatten out.

Sprinkle the base of the loaf with polenta, lay the baking parchment on top, then place a tray on top of that.

Flip everything over carefully and allow the dough to gently release from the proving basket. Slash the top with a serrated knife.

Remove the Dutch oven from the oven, remove the lid (carefully it will be red hot), pick up the loaf on the baking parchment and drop it into the Dutch oven. Replace the lid and put it in the oven for 20 mins. After 20 minutes, remove the lid and bake for a further 30-40 minutes, depending on how dark you like the crust.

Remove from the oven and carefully take the loaf out of the Dutch oven. I use a couple of spatulas and cool on a wire rack.

It is best to let it cool thoroughly before cutting.


Easy Sourdough Recipe
 
Save Print
Prep time
60 mins
Cook time
60 mins
Total time
2 hours
 
This is a super easy recipe that hopefully demystifys making process of making a delicious sourdough loaf.
Author: CluckMuckCook
Serves: 1
Ingredients
  • Ingredients:
  • 150g active, fed starter
  • 350g water, tepid, preferably filtered
  • 500g strong bread flour
  • 10g sea salt
  • fine polenta or cornmeal for dusting
  • .
Instructions
  1. In a large bowl, whisk together the water and sourdough starter, then mix in the flour and salt until it forms a rough dough. Cover with cling film and leave for an hour. This is the autolyse period. Basically this hydrates the flour and starts breaking it down and starts to build gluten.
  2. For the next 2 hours, every 30 minutes, grab a portion of the dough, stretch and pull it upwards and then fold it over to the other side of the bowl and tuck under. Rotate the bowl a quarter turn and repeat until you have done it 4 times and the bowl has gone around 1 full turn, cover with cling film and repeat 4 times over the 2 hours.
  3. On the final turn, cover with cling film and leave in a warm place to rise until doubled in size. Be patient, this will depend on the strength of your starter and how warm the ambient temperature is.
  4. Once doubled in size, tip onto the work surface and gently fold it into a ball, pulling each side into the middle. Do not worry about knocking the air out before you do this. Flip the ball over, cup your hands either side of the dough and gently turn the ball a quarter of a turn, tightening the dough. Repeat 3 or 4 times to get a nice tension on the dough. Do not worry too much as the fridge trick will help later.
  5. Liberally flour the bread proving basket and pop the ball of dough in it seam side up. Oil some cling film and lay it on top.
  6. Allow to proof until double in size and pop in the fridge overnight.
  7. In the morning, preheat the oven for at least 30 mins at 240c (220c Fan) with the Dutch oven in the oven.
  8. When the oven has been preheated, remove the dough from the fridge. Cut a circle of baking parchment larger than the loaf and scrunch it up then flatten out.
  9. Sprinkle the base of the loaf with polenta, lay the baking parchment on top, then place a tray on top of that.
  10. Flip everything over carefully and allow the dough to gently release from the proving basket. Slash the top with a serrated knife.
  11. Remove the Dutch oven from the oven, remove the lid (carefully it will be red hot), pick up the loaf on the baking parchment and drop it into the Dutch oven. Replace the lid and put it in the oven for 20 mins. After 20 minutes, remove the lid and bake for a further 30-40 minutes, depending on how dark you like the crust.
  12. Remove from the oven and carefully take the loaf out of the Dutch oven. I use a couple of spatulas and cool on a wire rack.
  13. It is best to let it cool thoroughly before cutting.
3.5.3229

Lotus Biscoff Biscuit Blondies

79 January 16, 2018 Bake with the kids

Lotus Biscoff Biscuit Blondies

My boys absolutely love Lotus Biscoff biscuits. If we were ever out for a meal and I had an espresso and these biscuits were served on the side , I would not get a look in.  Then Pizza Express started doing a Biscoff cheesecake and my biscuits were safe as my youngest would want his own cheese cake desert.

Lotus Biscoff Biscuit Blondies

That got me thinking as to what I could make that was based on these biscuits. It needed to be quick and easy to get the kids involved. I landed on the blondie as the vehicle to carry the delicious biscoff caramel flavour.

Blondies are even easier to make than brownies. Just melt the butter, sugar, spread and vanilla together. Let it cool a bit. Mix in an egg, flour and some crushed biscuits and you are pretty much done. 10 minutes to make, which even my kids can pay attention for and then 20 minutes baking. Job done.

Lotus Biscoff Biscuit Blondies

After the kids gave them the thumbs up, I took a batch into the office for some more discerning feedback and they were a resounding success. They have become one of the top 3 bakes I have taken into the office in their mental score sheet.

Makes: 10-12 blondies
Oven Temp: Gas 4, 350F, 180C (160C Fan)

Ingredients:
75g butter
220g dark brown sugar
1 teaspoon vanilla extract
Pinch of salt
1 large egg
140g plain flour
100g Lotus Biscoff Biscuit Spread
20 -22 Lotus Biscoff Biscuits

Instructions:
Pre-heat oven to 180c (160c) Fan and line a square 9 inch baking tin with baking parchment.
Melt the butter gently in a saucepan along with the dark brown sugar, salt, Biscoff biscuit spread and vanilla extract until all melted and combined together.
Allow to cool for 5 minutes and then whisk in the egg.
Add the flour to the wet ingredients and fold in gently until combined.
Crush 8 biscuits and gently fold into the mixture.
Spread the mixture evenly into the tin, then place the remaining biscuits on top.
Bake for 20-25 minutes until golden on top but still a little squidgy in the middle.
Leave to cool in the tin for 30 minutes. Then remove and cut into rectangles around the biscuits.

Lotus Biscoff Biscuit Blondies
 
Save Print
Prep time
10 mins
Cook time
20 mins
Total time
30 mins
 
My boys absolutely love Lotus Biscoff biscuits. These delicious, gooey, caramel, biscuity blondies were a resounding success with the kids and become one of the top 3 bakes I have taken into the office. So easy to make and get the kids involved.
Author: CluckMuckCook
Serves: 12
Ingredients
  • Ingredients:
  • 75g butter
  • 220g dark brown sugar
  • 1 teaspoon vanilla extract
  • Pinch of salt
  • 1 large egg
  • 140g plain flour
  • 100g Lotus Biscoff Biscuit Spread
  • 20 -22 Lotus Biscoff Biscuits
Instructions
  1. Makes: 10-12 blondies
  2. Oven Temp: Gas 4, 350F, 180C (160C Fan)
  3. Instructions:
  4. Pre-heat oven to 180c (160c) Fan and line a square 9 inch baking tin with baking parchment.
  5. Melt the butter gently in a saucepan along with the dark brown sugar, salt, Biscoff biscuit spread and vanilla extract until all melted and combined together.
  6. Allow to cool for 5 minutes and then whisk in the egg.
  7. Add the flour to the wet ingredients and fold in gently until combined.
  8. Crush 8 biscuits and gently fold into the mixture.
  9. Spread the mixture evenly into the tin, then place the remaining biscuits on top.
  10. Bake for 20-25 minutes until golden on top but still a little squidgy in the middle.
  11. Leave to cool in the tin for 30 minutes. Then remove and cut into rectangles around the biscuits.
3.5.3229


0 January 1, 2018 Blog

Matt Inwood’s Instagram Workshop

Last year, post the Great British Bake Off, I realised I needed to up my game on social media. Whilst I had dipped my toe into social media before GBBO, I so learnt how engaging the medium could be, especially as I like to share my trials and tribulations of baking. I have always been a keen amateur photographer but felt I needed some fresh inspiration.

Chillis

I came across a class that looked right up my street. Run by Matt Inwood at the Cinnamon Club in Westminster, a stunning Indian restaurant that I had not been to in years. So I jumped at the chance of a morning improving skills in Instagram and photography, in a beautiful building with a delicious lunch thrown in.

Matt is the first to humbly acknowledge he is not a photographer, he is an art director and designer and every shot he takes is on an IPhone and edited using (what I would soon find out is a very powerful tool) Instagram’s photo editing capabilities.

Don’t let Matt’s comments around not being a photographer fool you. He takes a mean photo that I can only aspire to. Check out his Instagram feed. He has designed many beautiful cook books along with all of the Cinnamon Club’s cook books. Hence access to a great venue and lots of food props.

Eggs

The course starts in a lovely room with a group of like minded individuals who I throughly enjoyed chatting with over lunch later. In the first part of the course, Matt focuses on Instagram as a tool and social media platform as well as the editing suite. He walks through how to get the most out of Instagram and engage your audience. How to curate a great feed and, for the pictures you want to share but not necessarily keep in your main feed, how to use the story mode. A function I had previously ignored.

One of the biggest lessons I learnt (apart from that natural light is king) is that when you take photos it is better to be under exposed than over exposed. This is because you can pull the detail out very easily from an under exposed shot. Matt also showed us quick ways to create a light reflector to bounce lights into the shadow. It’s all the little tips and tricks that fascinated me. I had spent my last 6 months flooding my shots with too much light.
Matt took a photo that was very under exposed and walked us through the key editing functions to pull back the photo into a stunning picture.

Tomatoes

Tomatoes

His skill with managing light was something I have always struggled with but has improved greatly since the course.

Also Matt challenged us to think about the layout of our photos and plan this ahead of constructing the picture.

After coffee we got to play ourselves with lots of lovely produce and spices from the kitchen and Matt’s seemingly endless supply of photo props. I have never been so proud of the photos I had taken.

Matt was a lovely person to spend time with and is a great teacher. He is a warm, friendly and very generous with his time and advice. I would throughly recommend this course to anyone wanting to improve their Instagram photos and photography skills.

Matt and Me

Matt and Me

Follow Matt on instagram  @Matt_Inwood

Talking of like minded individuals, by chance Urvashi Roe, the Botanical Baker and a previous GBBO contestant was also there at the same time. It was lovely sharing tent stories with one of the GBBO Alumni.

Urvashi and Me – Photo by Matt Inwood

Banana bread

5 December 5, 2017 Bake with the kids

Pecan & Chocolate Chip Banana Bread

I fell back in love with banana bread over a lazy Sunday morning brunch with my two boys.  We decided to give Mum some peace and headed into one of our favourite local cafes ‘The Brentwood Kitchen’. The boys love the pancakes there . I fancied something different for a change and decided on a warm banana bread with Nutella . It was delicious. That spurred me on to develop my own recipe.

Banana bread


The one thing that slowed me down with receipe development is that my family love bananas and they never last long enough in the house to get nice, ripe, brown and spotty which is what you want for this recipe. I ended up having to hide them!

A warm slice of banana bread slathered in Nutella is delicious but I also like to drizzle over some caramel sauce as a lovely alternative. It goes brilliantly with the pecans in this recipe.

Ingredients:
285g plain flour
1 tsp bicarbonate of soda
½ tsp salt
110g butter, plus extra for greasing
225g caster sugar
2 large eggs
4 very ripe and mashed bananas
85ml buttermilk
1 tsp vanilla extract
50g chopped pecan nuts
50g choc Chips

Method:
1 Preheat the oven to 180c/160c Fan.
2 Mash up the bananas to a paste consistency.
3 Combine the flour, bicarbonate of soda, pecans, choc chips and salt into a large mixing bowl.
4 In a stand mixer or another bowl, cream the butter and sugar together until light and pale.
5 Add the eggs, bananas, buttermilk and vanilla extract to the butter and sugar mixture and mix until well combined.
6 Fold in the flour mixture gently until just combined.
7 Grease a 2lb loaf tin and pour the cake mixture into it.
8 Bake for about an hour until golden-brown and if you insert a skewer it comes out clean.
9 Remove from the oven and allow to cool in the tin for a few minutes.
10 Turn out onto a wire rack and allow to cool. Serve warm or cold with a drizzle of caramel sauce or spread with Nutella .


Pecan & Chocolate Chip Banana Bread
 
Save Print
Prep time
15 mins
Cook time
60 mins
Total time
1 hour 15 mins
 
Author: CluckMuckCook
Recipe type: Cake
Serves: 1
Ingredients
  • 285g plain flour
  • 1 tsp bicarbonate of soda
  • ½ tsp salt
  • 110g butter, plus extra for greasing
  • 225g caster sugar
  • 2 large eggs
  • 4 very ripe and mashed bananas
  • 85ml buttermilk
  • 1 tsp vanilla extract
  • 50g chopped pecan nuts
  • 50g choc Chips
Instructions
  1. Preheat the oven to 180c/160c Fan.
  2. Mash up the bananas to a paste consistency.
  3. Combine the flour, bicarbonate of soda, pecans, choc chips and salt into a large mixing bowl.
  4. In a stand mixer or another bowl, cream the butter and sugar together until light and pale.
  5. Add the eggs, bananas, buttermilk and vanilla extract to the butter and sugar mixture and mix until well combined.
  6. Fold in the flour mixture gently until just combined.
  7. Grease a 2lb loaf tin and pour the cake mixture into it.
  8. Bake for about an hour until golden-brown and if you insert a skewer it comes out clean.
  9. Remove from the oven and allow to cool in the tin for a few minutes.
  10. Turn out onto a wire rack and allow to cool. Serve warm or cold with a drizzle of caramel sauce or spread with Nutella .
3.5.3228

Anzac cookies

3 October 7, 2017 Bake with the kids

Anzac Cookies

Anzac cookies

One of the 11 great bakers I met on the Great British Bake Off (GBBO), the legendary lover of coconut, Peter. was popping in for a cup of tea and a catch up. It is always lovely to see my new baking buddies, one thing is certain there will always be a trade of fresh backed treats.  I was running late home from work, so needed something quick, delicious and of course it had to include coconut.

Anzac biscuits

Fortunately I had stocked up on some desiccated coconut and with the well stocked baking cupboard, I decided to make some Anzac cookies.


These would also be a great easy biscuit to bake with the kids.  I have used coconut sugar in this recipe

but you can switch that out for normal caster sugar.

Peter brought along a couple of fresh baked loaves that were still warm and absolutely delicious.


Makes: 16 – 20 biscuits
Oven Temp: Gas 4, 350F, 180C (160C Fan)

Ingredients
85g oats
85g desiccated coconut
100g plain flour
100g coconut sugar (or caster sugar)
100g butter
1 tbsp golden syrup
1 tsp bicarbonate of soda

Instructions:

  1. Preheat oven to 180c/160c Fan
  2. Put the flour, oats and sugar in a large mixing bowl.
  3. In a small saucepan, gently melt the butter and add the golden syrup and stir until combined.
  4. In a small bowl, mix the bicarbonate of soda with 2 teaspoons of boiling water. Mix and pour into the butter. Stir the butter mixture, it will fizz a little.
  5. Pour the butter mixture into the dry ingredients and stir with a wooden spoon until fully combined.
  6. Line two baking trays with baking parchment.
  7. Wet your hands. Scoop a tablespoon of the mixture and roll into a ball. Place on the baking sheet, allowing plenty of room for the biscuit to spread.
  8. Bake for 8-10 minutes until golden brown.
  9. Allow to cool on the tray for 5 minutes, then move to a cooling tray.
  10. Store in an airtight box when cooled.


Anzac cookies
 
Save Print
Prep time
15 mins
Cook time
8 mins
Total time
23 mins
 
The Ultimate Anzac Cookie, Delicious coconut biscuits.
Author: CluckMuckCook
Serves: 16
Ingredients
  • 85g oats
  • 85g desiccated coconut
  • 100g plain flour
  • 100g coconut sugar (or caster sugar)
  • 100g butter
  • 1 tbsp golden syrup
  • 1 tsp bicarbonate of soda
Instructions
  1. Preheat oven to 180c/160c Fan
  2. Put the flour, oats and sugar in a large mixing bowl.
  3. In a small saucepan, gently melt the butter and add the golden syrup and stir until combined.
  4. In a small bowl, mix the bicarbonate of soda with 2 teaspoons of boiling water. Mix and pour into the butter. Stir the butter mixture, it will fizz a little.
  5. Pour the butter mixture into the dry ingredients and stir with a wooden spoon until fully combined.
  6. Line two baking trays with baking parchment.
  7. Wet your hands. Scoop a tablespoon of the mixture and roll into a ball. Place on the baking sheet, allowing plenty of room for the biscuit to spread.
  8. Bake for 8-10 minutes until golden brown.
  9. Allow to cool on the tray for 5 minutes, then move to a cooling tray.
  10. Store in an airtight box when cooled.
3.5.3228

Raspberry and Lemon Bakewell tart

4 September 2, 2017 Pastry and Pies

Raspberry and Lemon Bakewell Tart

The last of the late fruiting raspberries are picked and rather than just make jam with them, I thought I would get some fresh raspberries into a bake before the season was totally over.


Raspberry and Lemon Bakewell tart


I always associate raspberry jam with Bakewell tarts. Rather than go for a standard Bakewell, I thought a nice fresh lemon Bakewell would work wonders dotted with some fresh raspberries in the lemon frangipane. I think I have created my most favourite Bakewell tart ever.


Makes: 1 x 23cm pie base or 6 individual tarts
Oven Temp: Gas 6, 400F, 200C (180C Fan)

Ingredients

Pastry:
225g plain flour
150g chilled butter
25g icing sugar
1 large egg
2 tablespoons milk

Frangipane:
125g unsalted butter
125g caster sugar
2 medium eggs
125g ground almonds
2 1/2 tablespoons plain flour
1 tablespoon lemon juice
Zest of 1 lemon
4 tablespoons milk

Extras:
Lemon curd
30 raspberries


Instructions

Pastry:
1. Sift the flour into a bowl and rub in the butter using your fingertips until the mixture resembles fine breadcrumbs. Or blitz in a food processor. Then mix in the icing sugar.
2. Add the egg and 2 tablespoons of cold milk and mix until it forms a dough. Try not to overwork the dough.
3. Wrap the ball of dough in cling film and chill for 15 minutes.
4. Roll out the dough on a lightly floured work surface to about the thickness of a £1 coin.
5. Carefully transfer the pastry to a 23cm flan tin. Line the tin with pastry and transfer to the fridge to chill for 30 minutes. Or line 6 individual tart tins.
6. Preheat the oven to 200C/180C Fan.
7. Blind bake the pastry. Line the pastry case with non-stick baking paper and fill with baking beans. Bake for 15 minutes, then remove the beans and paper and cook for a further 5 minutes to finish off the pastry.

Frangipane:
1. Cream the butter and sugar until light and fluffy.
2. Slowly add the beaten eggs until fully combined.
3. Add almonds, flour, lemon zest, milk and lemon juice and mix until fully combined.
4. Spread some lemon curd onto the base of your pastry so there is a nice thin layer. Then spoon in the frangipane mixture.
5. Push the raspberries into the frangipane. If using individual tart cases put 4-5 raspberries per tart.
6.Bake at 180C (160C) Fan for about 30 minutes for a large tart or 20 minutes for individual tarts.


Raspberry and Lemon Bakewell Tart
 
Save Print
Prep time
45 mins
Cook time
45 mins
Total time
1 hour 30 mins
 
The last of the late fruiting raspberries are picked and rather than just make jam with them, I thought I would get some fresh raspberries into a bake before the season was totally over. I always associate raspberry jam with Bakewell tarts. Rather than go for a standard Bakewell, I thought a nice fresh lemon Bakewell would work wonders dotted with some fresh raspberries in the lemon frangipane. I think I have created my most favourite Bakewell tart ever. Makes: 1 x 23cm pie base or 6 individual tarts Oven Temp: Gas 6, 400F, 200C (180C Fan)
Author: CluckMuckCook
Serves: 1 large tart
Ingredients
  • Pastry:
  • 225g plain flour
  • 150g chilled butter
  • 25g icing sugar
  • 1 large egg
  • 2 tablespoons milk
  • Frangipane:
  • 125g unsalted butter
  • 125g caster sugar
  • 2 medium eggs
  • 125g ground almonds
  • 2½ tablespoons plain flour
  • 1 tablespoon lemon juice
  • Zest of 1 lemon
  • 4 tablespoons milk
  • Extras:
  • Lemon curd
  • 30 raspberries
Instructions
  1. Pastry:
  2. Sift the flour into a bowl and rub in the butter using your fingertips until the mixture resembles fine breadcrumbs. Or blitz in a food processor. Then mix in the icing sugar.
  3. Add the egg and 2 tablespoons of cold milk and mix until it forms a dough. Try not to overwork the dough.
  4. Wrap the ball of dough in cling film and chill for 15 minutes.
  5. Roll out the dough on a lightly floured work surface to about the thickness of a £1 coin.
  6. Carefully transfer the pastry to a 23cm flan tin. Line the tin with pastry and transfer to the fridge to chill for 30 minutes. Or line 6 individual tart tins.
  7. Preheat the oven to 200C/180C Fan.
  8. Blind bake the pastry. Line the pastry case with non-stick baking paper and fill with baking beans. Bake for 15 minutes, then remove the beans and paper and cook for a further 5 minutes to finish off the pastry.
  9. Frangipane:
  10. Cream the butter and sugar until light and fluffy.
  11. Slowly add the beaten eggs until fully combined.
  12. Add almonds, flour, lemon zest, milk and lemon juice and mix until fully combined.
  13. Spread some lemon curd onto the base of your pastry so there is a nice thin layer. Then spoon in the frangipane mixture.
  14. Push the raspberries into the frangipane. If using individual tart cases put 4-5 raspberries per tart.
  15. Bake at 180C (160C) Fan for about 30 minutes for a large tart or 20 minutes for individual tarts.
3.5.3228
  • « Go to Previous Page
  • Go to page 1
  • Go to page 2
  • Go to page 3
  • Go to page 4
  • Interim pages omitted …
  • Go to page 7
  • Go to Next Page »

Copyright© 2026 · Cookd Pro Theme by Shay Bocks