• Skip to primary navigation
  • Skip to main content
  • Home
  • About Me
  • Recipes
    • Cake
    • Biscuits
    • Bread
    • Pastry
    • Tray Bakes
    • Condiments
    • Bake with the kids
    • Anti Inflammatory Baking
  • Conversion Charts. Cups – Grams – Ounces
  • Blog

Cluck, Muck & Cook

Baking & Foodie Blog From Sunny Brentwood Essex

CluckMuckCook

Cheese Straws

8 November 14, 2016 Pastry and Pies

Cheese Straws

The Christmas adverts have started on the telly, the kids are writing their Christmas lists and I start thinking of nibbles to have with Christmas Eve drinks.

Cheese Straws

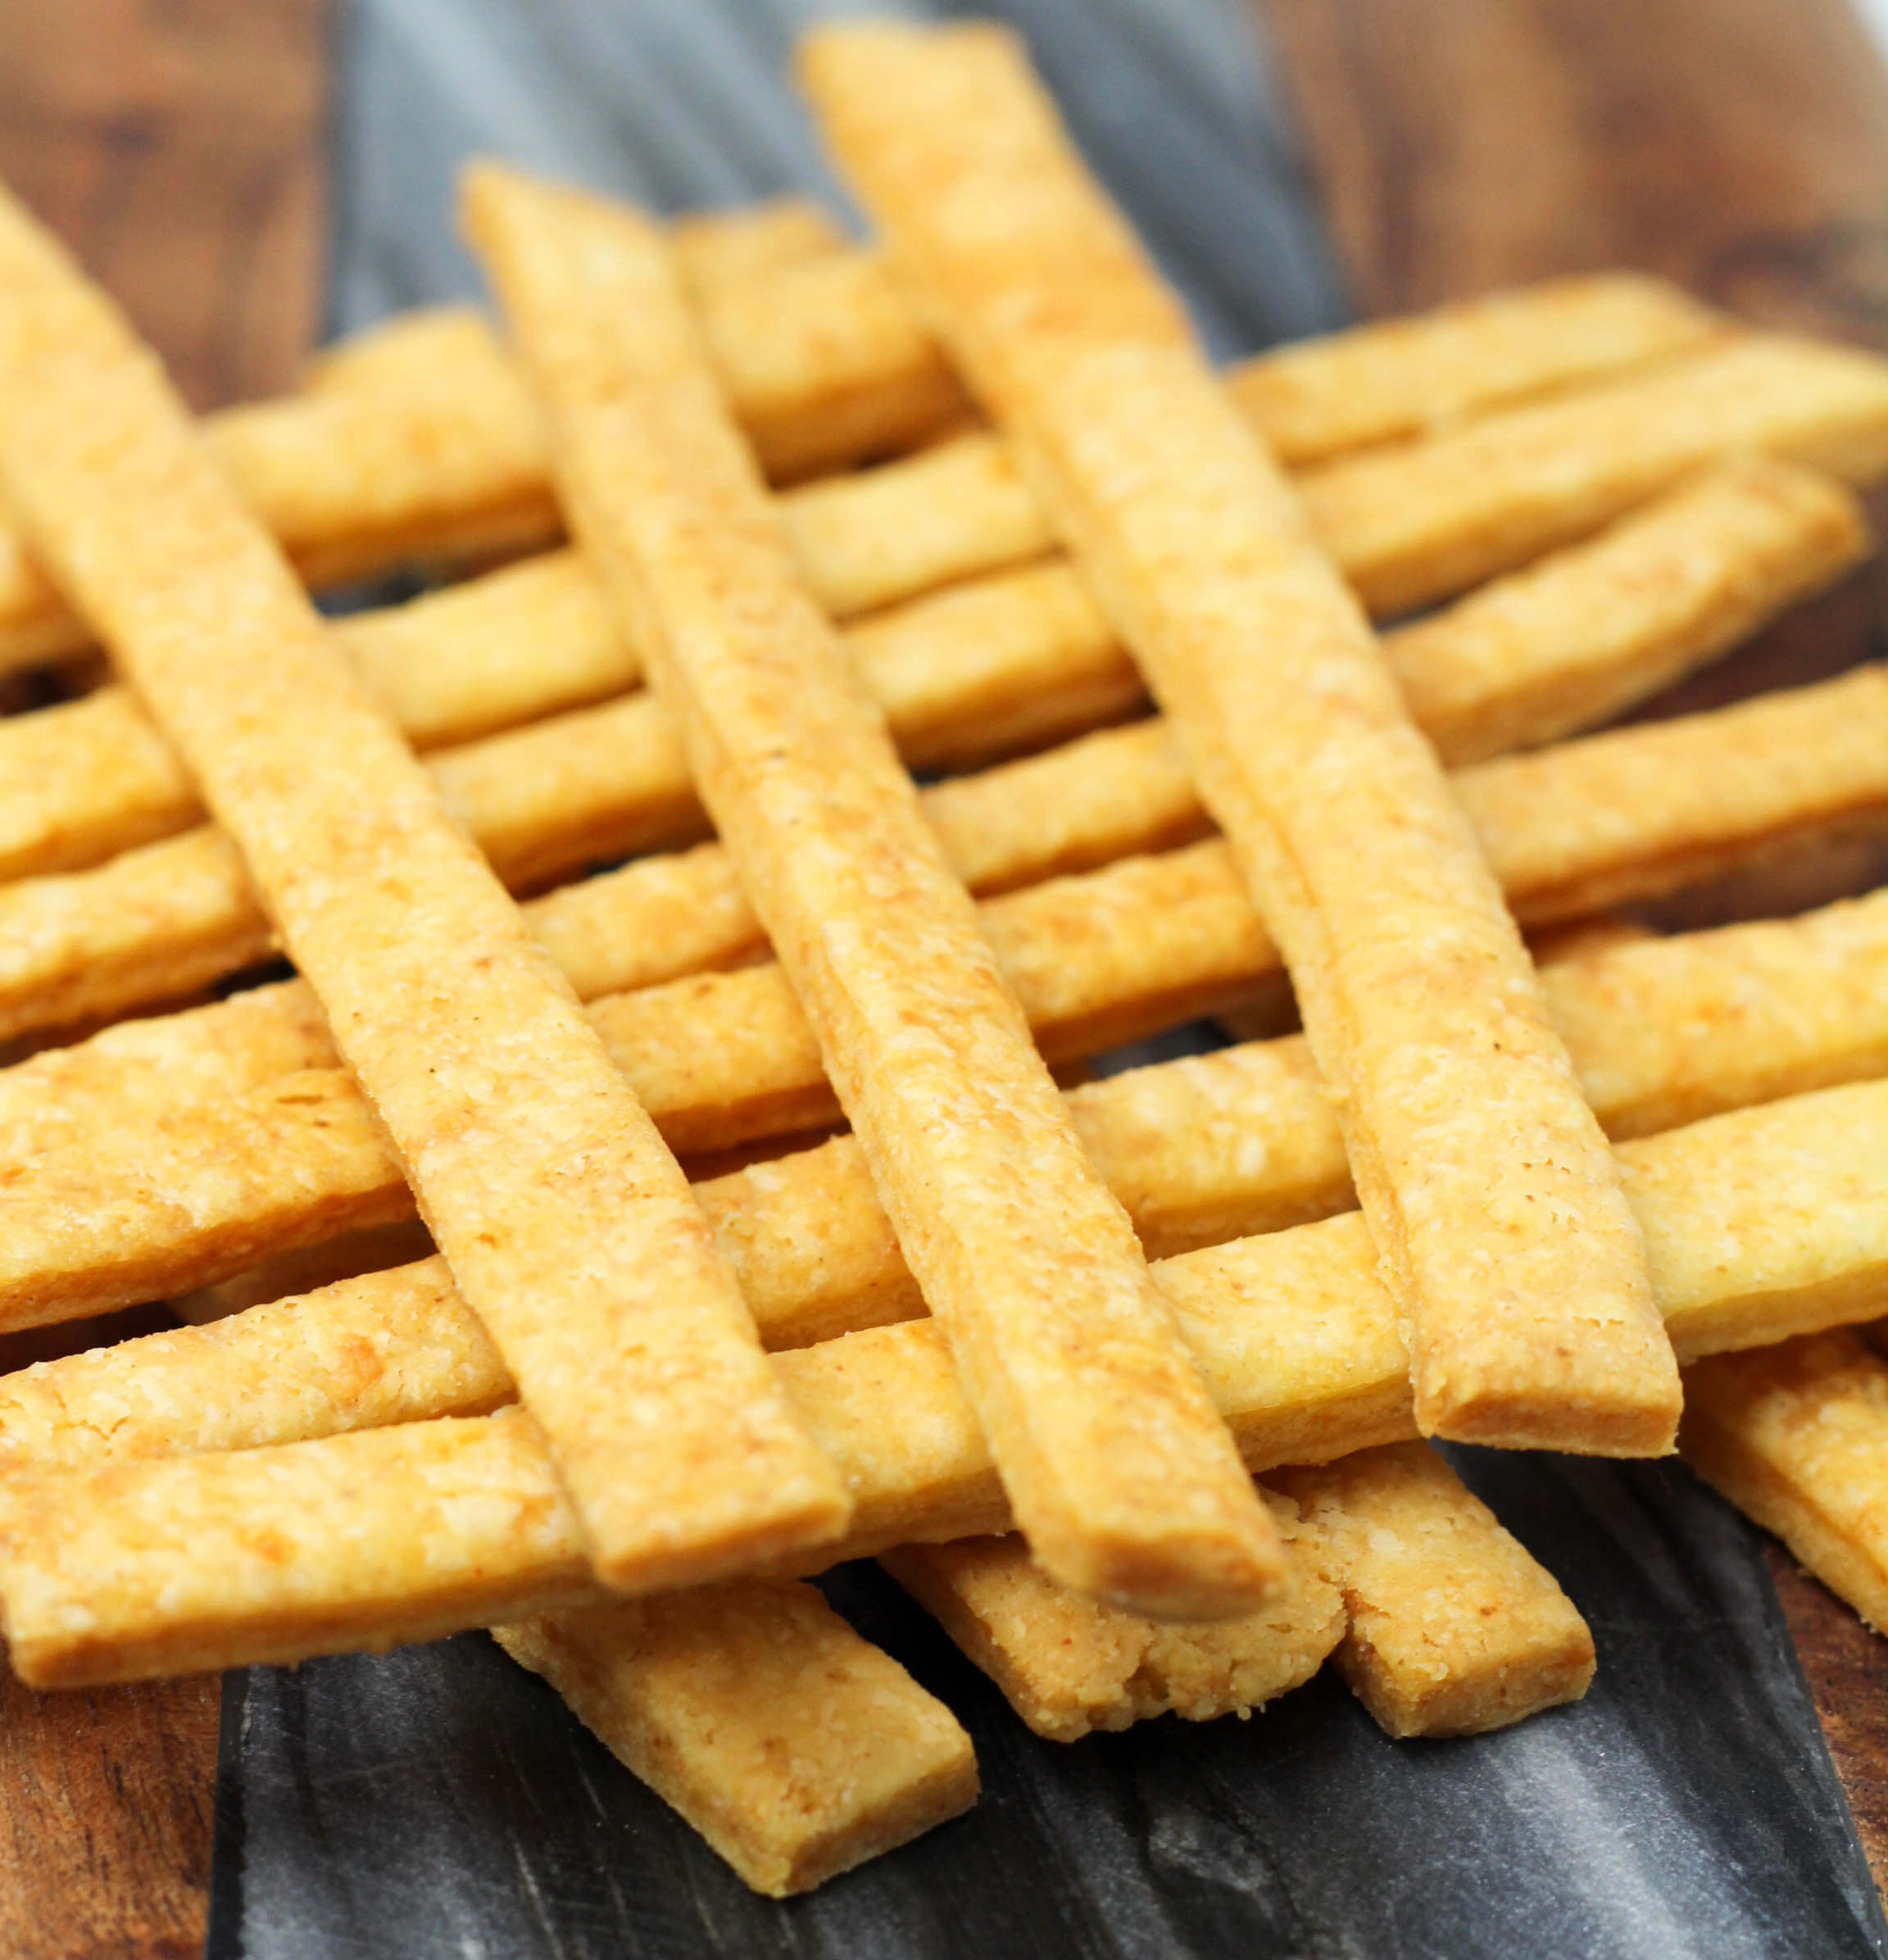
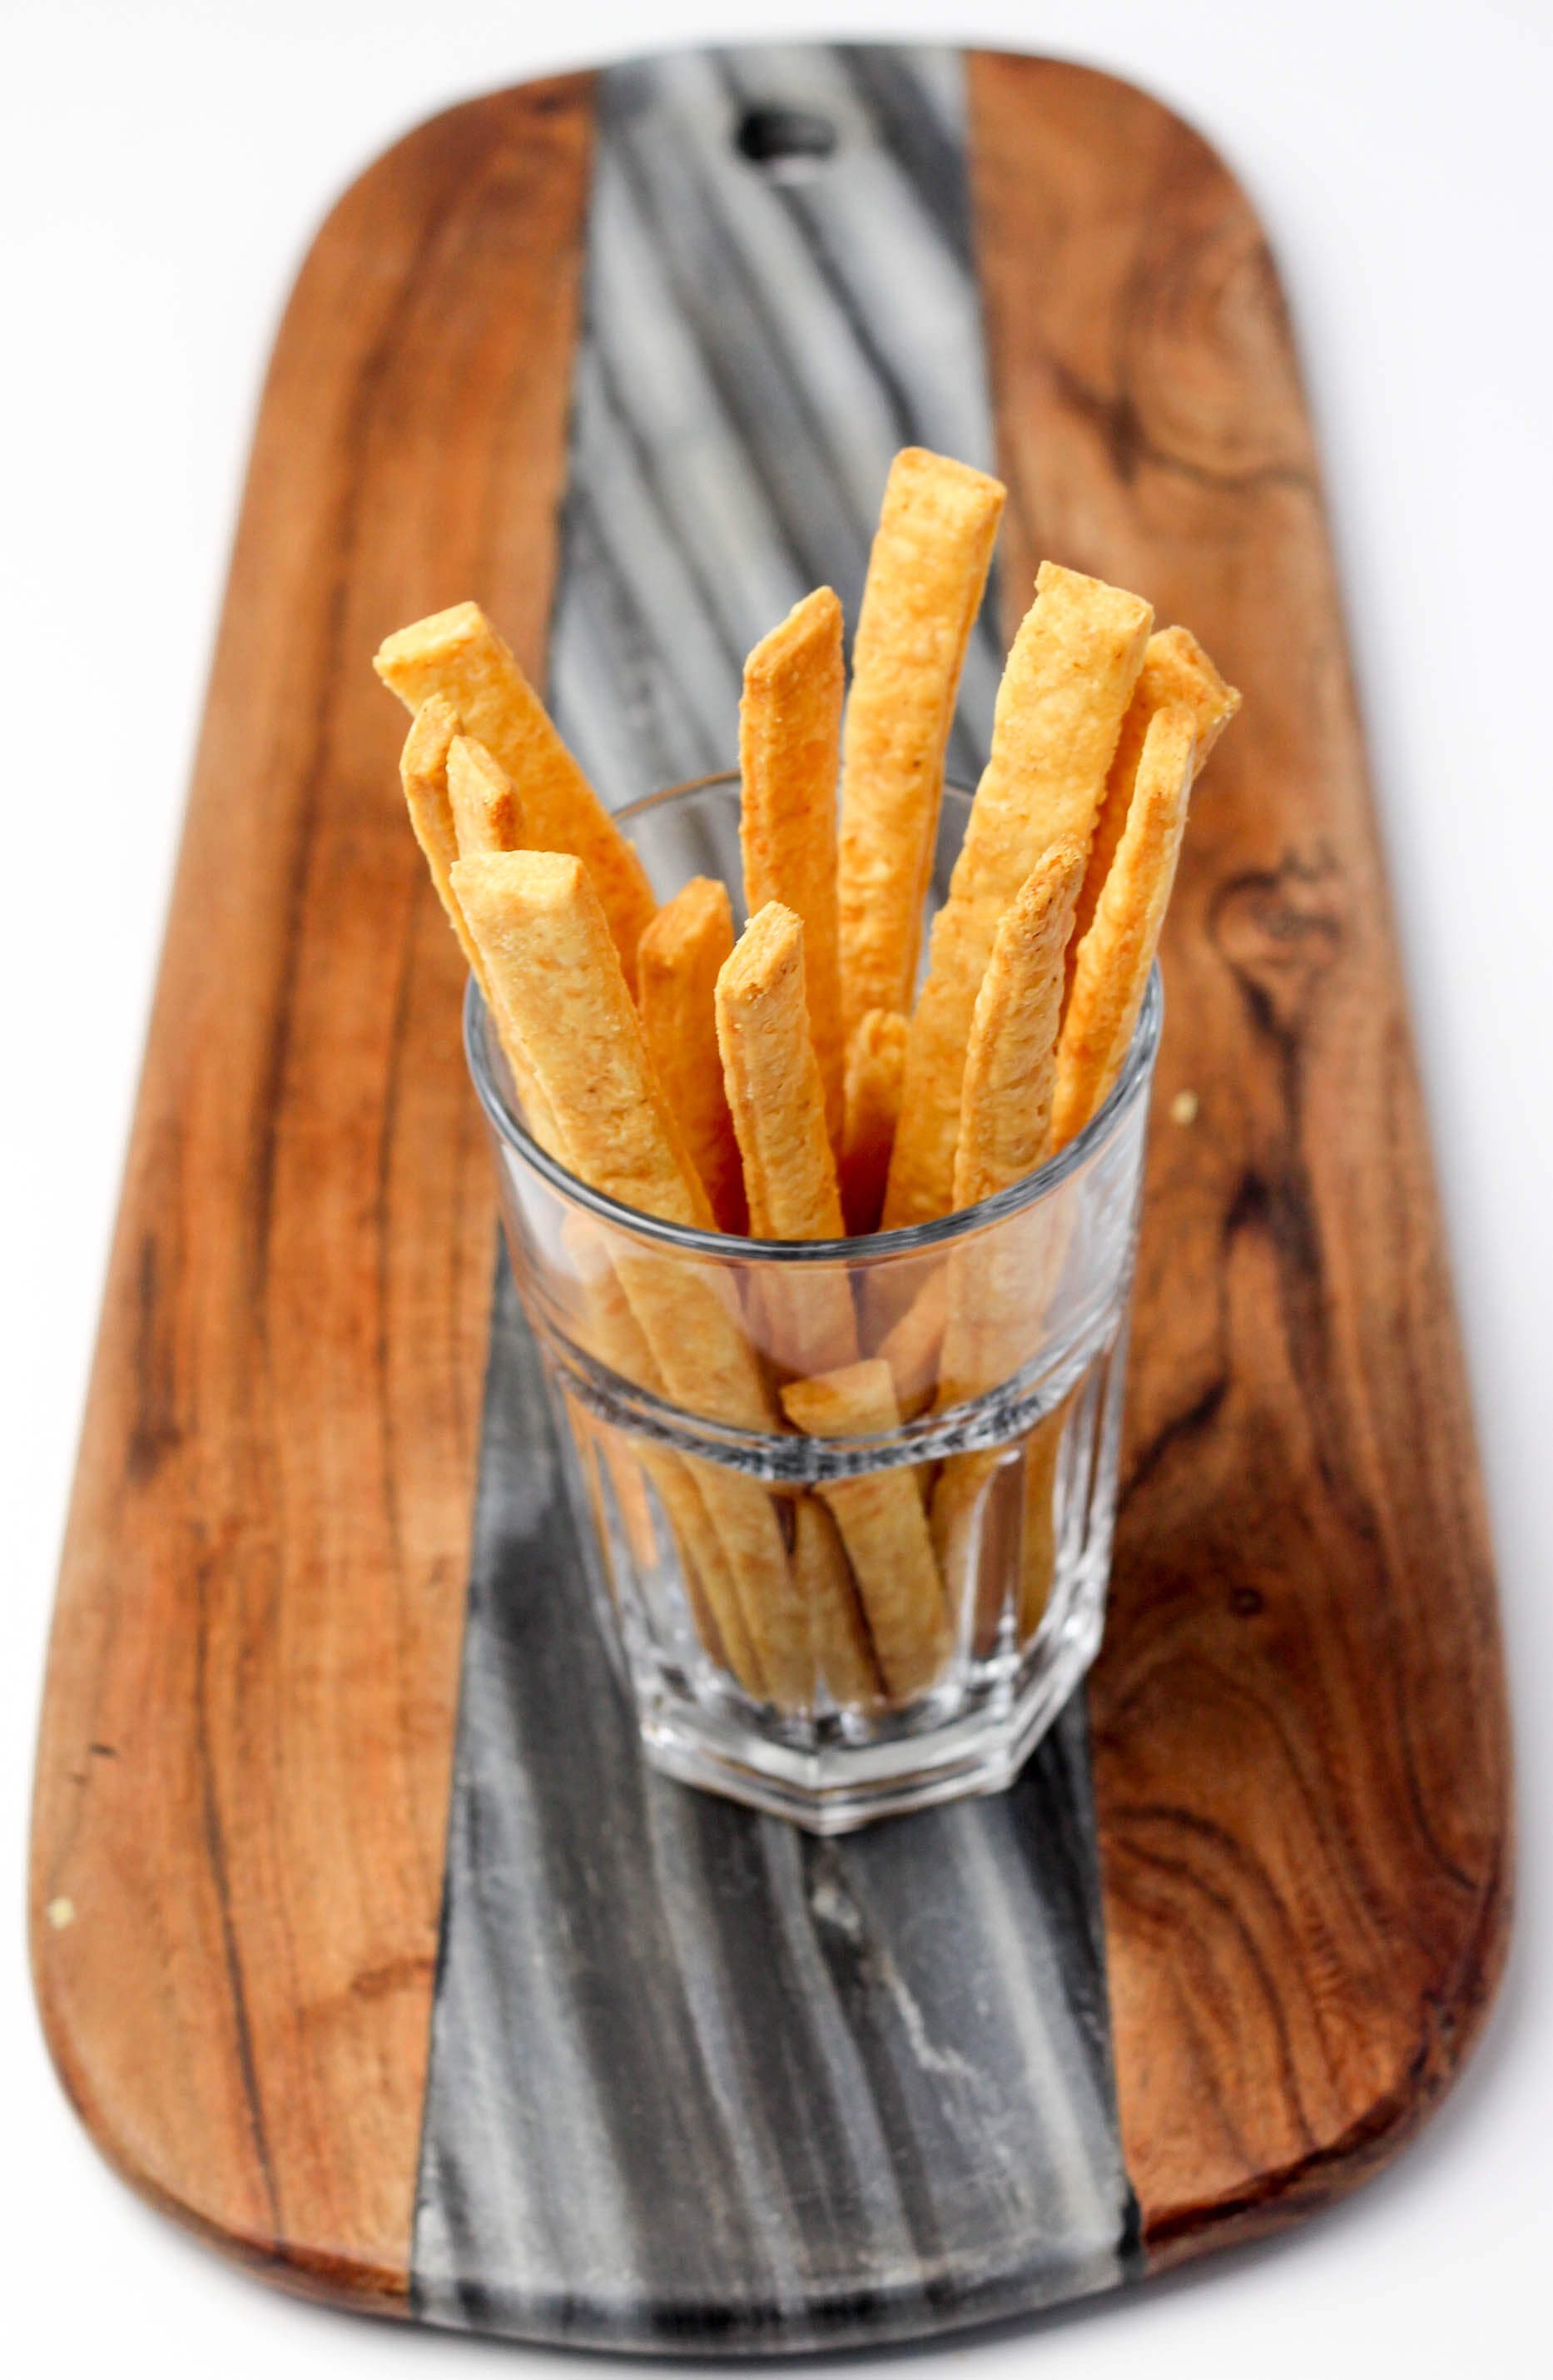
Time to practice the family staple of cheese straws, crumbly buttery pastry with a good hit of a super strong mature cheddar and a kick of smokey paprika, or swap out the paprika for some English mustard powder. Delicious with a cold beer or glass of fizz.

Cheese Straws

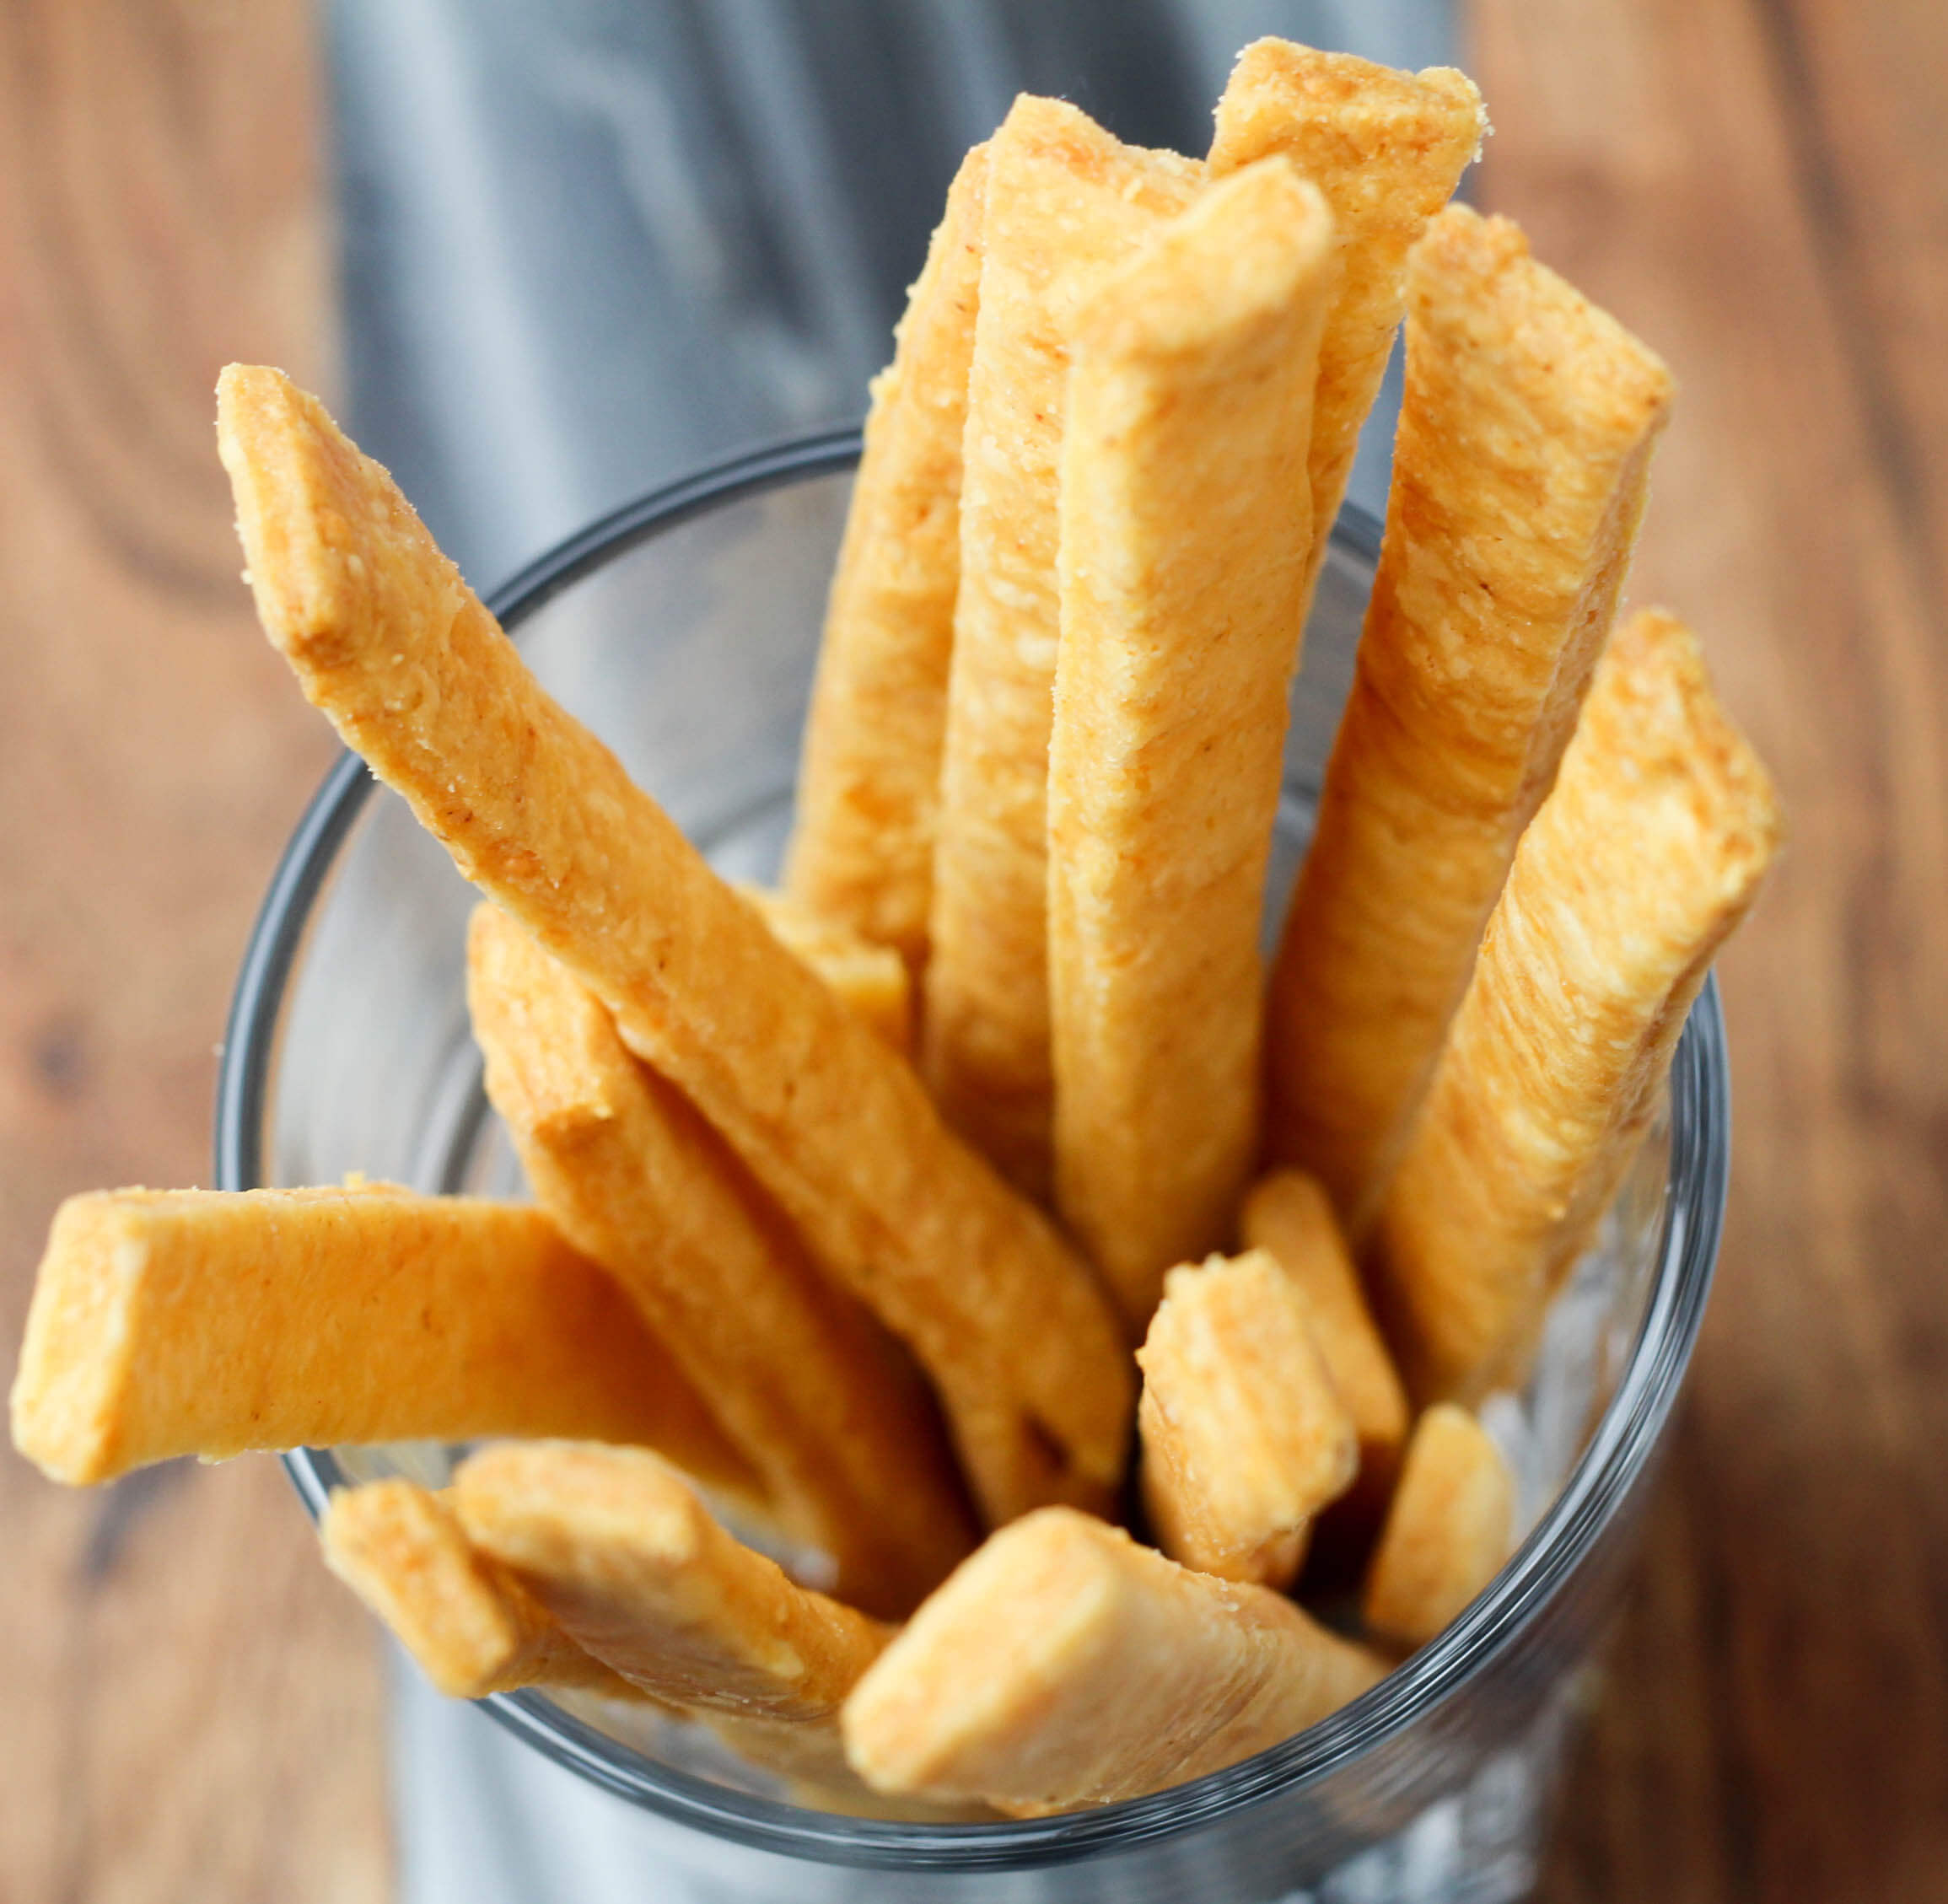
Ridiculously moreish , I would recommend making two batches so you have some left when the guests arrive!

Cheese Straws

This recipe with English mustard powder has been around in the family for as long as I can remember but I personally prefer the smokiness of the paprika.

Makes: about 20
Oven Temp: Gas 6, 400F, 200C (180C Fan)

Ingredients:
100g  plain flour
50g  unsalted butter, chilled and cubed
50g  cheddar cheese, finely grated
1/8th teaspoon paprika
Pinch of sea salt
1 egg yolk, beaten
1 tablespoon milk

Instructions:

  1. Mix the flour, paprika and a pinch of sea salt in a large mixing bowl. Add the butter, rub together until the mixture is like breadcrumbs. Or put it in a food processor and blitz.
  2. Add the cheese, egg yolk and milk with a butter or dinner knife, in a cutting motion through the mixture. It should look like damp sand. Bring the dough together into a ball. You may need to add a little more milk to make the mixture come together.
  3. Use your hands to gather it into a ball, wrap in cling film / food wrap and refrigerate for half an hour. Do not over work the dough whilst bringing it together as the cheese straws will not be flaky.
    Preheat the oven to 200c/180c Fan.
  4. Once the dough has chilled, carefully roll out onto a lightly floured surface. You want them to be quite thin.
  5. Use a ruler and a sharp knife or pizza cutter to cut into straws, whatever size you fancy.
  6. Transfer onto a non-stick baking sheet. Bake for about 10 minutes until golden.
  7. Transfer onto a wire rack to cool.


Cheese Straws
 
Save Print
Prep time
15 mins
Cook time
10 mins
Total time
25 mins
 
A crumbly buttery pastry with a good hit of a super strong mature cheddar and a kick of smokey paprika, or swap out the paprika for some English mustard powder. Delicious with a cold beer or glass of fizz.
Author: CluckMuckCook
Serves: 20
Ingredients
  • 100g plain flour
  • 50g unsalted butter, chilled and cubed
  • 50g cheddar cheese, finely grated
  • ⅛th teaspoon paprika
  • Pinch of sea salt
  • 1 egg yolk, beaten
  • 1 tablespoon milk
Instructions
  1. Oven Temp: Gas 6, 400F, 200C (180C Fan)
  2. Mix the flour, paprika and a pinch of sea salt in a large mixing bowl. Add the butter, rub together until the mixture is like breadcrumbs. Or put it in a food processor and blitz.
  3. Add the cheese, egg yolk and milk with a butter or dinner knife, in a cutting motion through the mixture. It should look like damp sand. Bring the dough together into a ball. You may need to add a little more milk to make the mixture come together.
  4. Use your hands to gather it into a ball, wrap in cling film / food wrap and refrigerate for half an hour. Do not over work the dough whilst bringing it together as the cheese straws will not be flaky.
  5. Preheat the oven to 200c/180c Fan.
  6. Once the dough has chilled, carefully roll out onto a lightly floured surface. You want them to be quite thin.
  7. Use a ruler and a sharp knife or pizza cutter to cut into straws, whatever size you fancy.
  8. Transfer onto a non-stick baking sheet. Bake for about 10 minutes until golden.
  9. Transfer onto a wire rack to cool.
3.5.3226

Ginger Nut Biscuits

6 November 14, 2016 Biscuits

Olivers traditional ginger nut biscuits

After what seemed like a weeks baking and decorating marathon on a Pokemon ball birthday cake for my youngest son’s birthday (pictures on Instagram), I thought it would be nice to do some quick and easy baking for a change. Whilst I enjoy complex baking, you can not beat the instant gratification of baking biscuits and cookies.

Ginger Nut Biscuits

The week before, my eldest son wanted to bake some ginger nut biscuits. Not sure if it was his love of gingerbread men or the looming election and his fascination with Trump, now that man has the finest ginger nut I have ever seen ;-). On our first attempt we managed to incinerate the biscuits! The less charcoal looking ones tasted great. The high sugar content in these biscuits mean they will change from cooked to burnt in the blink of an eye.

Ginger Nut Biscuits

But we are not quitters and ventured back for round two. The recipe is super easy and quick to make and results in a delicious crunchy and warming ginger spiced biscuit. Just like the traditional ginger nuts I loved as a kid. Perfect for dipping into a big mug of tea as the nights draw in and winter takes hold.

Ginger Nut Biscuits

I am glad to say this batch turned out a treat and the recipe is now a firm family favourite.

Makes: about 12
Oven Temp: Gas 4, 350F, 180C (160C Fan)

Ingredients
50g butter
4 tbsp golden syrup
50g soft brown sugar
175g self-raising flour
1 tsp ground ginger
Pinch of salt

Instructions
To make the dough

  1. Preheat oven to 180c/160c Fan.
  2. Gently melt butter, sugar and golden syrup in a pan on a low heat until the sugar has dissolved and all the ingredients are combined.
  3. Take pan off the heat and sift flour and ground ginger into the sugar mixture and stir well until the mixture forms a dough. Allow to cool for a few minutes.
  4. With wet hands make walnut sized balls of the dough and place well onto the baking sheets allowing space to spread. Flatten slightly then bake in the centre of the oven for 15-20 minutes. Watch them closely as they can burn quickly.
  5. Remove from the oven and transfer to a wire rack to cool.


Olivers traditional ginger nut biscuits
 
Save Print
Prep time
15 mins
Cook time
15 mins
Total time
30 mins
 
The recipe is super easy and quick to make and results in a delicious crunchy and warming ginger spiced biscuit. Just like the traditional ginger nuts I loved as a kid. Perfect for dipping into a big mug of tea as the nights draw in and winter takes hold.
Author: CluckMuckCook
Serves: 12
Ingredients
  • 50g butter
  • 4 tbsp golden syrup
  • 50g soft brown sugar
  • 175g self-raising flour
  • 1 tsp ground ginger
  • Pinch of salt
Instructions
  1. Preheat oven to 180c/160c Fan
  2. Gently melt butter, sugar and golden syrup in a pan on a low heat until the sugar has dissolved and all the ingredients are combined.
  3. Take pan off the heat and sift flour and ground ginger into the sugar mixture and stir well until the mixture forms a dough. Allow to cool for a few minutes.
  4. With wet hands make walnut sized balls of the dough and place well onto the baking sheets allowing space to spread. Flatten slightly then bake in the centre of the oven for 15-20 minutes. Watch them closely as they can burn quickly.
  5. Remove from the oven and transfer to a wire rack to cool.
3.5.3226

Pain Aux Raisin

9 November 6, 2016 Pastry and Pies

Pain Aux Raisins

The king of all breakfast pastries for me is the Pain Aux Raisins.

Pain Aux Raisin

Plump raisins wrapped in a swirl of rich buttery laminated yeast risen dough, glued together with thick vanilla crème pâtissière, dusted with cinnamon to give a delicate background spice. Alongside a cafetière or rich dark coffee to cut through the sweetness.

My current favourite coffee is a fruity and citrus flavoured single origin Ethiopia coffee from a local artisan roasters “Coffee Officina“.

The only small set back is that making a Danish pastry dough is a whole weekend commitment. I start on a Friday evening making the dough so it can prove overnight in the fridge. Then through Saturday I attack the lamination process. Finally after resting the laminated dough on Saturday, I roll the pain aux raisins and slice. I then put them on a baking tray, cover in cling film and freeze. After about 4 hours you can take them off the tray, pop in a storage bag and put them in the freezer.


Pain Aux Raisin Dough

Then the night before you want them, just before you go to bed, pull out as many as you need onto a baking tray lined with parchment. Cover lightly with oiled cling film. Leave them on the side for the morning. Then in the morning pop them into a preheated oven at 200(180 fan) for about 15 mins.

pain-aux-raisin-close

I like to give them a brush with some maple syrup for a nice shine.

Makes: about 24
Oven Temp: Gas 6, 400F, 200C (180C Fan)
Ingredients:
For the dough
500g white bread flour, plus a little extra for dusting
80g caster sugar
10g salt
10g instant yeast
2 medium eggs
90ml cool water
125ml lukewarm milk
250g chilled unsalted butter

For the Crème Pâtissière
250ml milk
1 teaspoon vanilla extract
50g caster sugar
2 free-range eggs, yolks only
20g cornflour
20g butter

For the raisin filling
225g raisins
2 teaspoons cinnamon
Maple syrup to glaze (Optional)

Instructions:
To make the dough

    1. Put all the dry ingredients into the bowl of a mixer. Keep the salt and yeast on opposite sides so that the salt does not retard the yeast. Combine all the wet ingredients together in a bowl, then add to the dry ingredients. Mix with a dough hook attachment for about 6-8 minutes until smooth and elastic.
    2. Tip the dough onto a lightly floured surface and shape into a ball. Wrap in cling film and chill in the fridge for an hour.
    3. On a lightly floured surface, roll out your chilled dough to a rectangle, about 50 x 20 cm. Flatten the butter to a rectangle about 33 x 19 cm, by putting in between two sheets of cling film and whacking it with a rolling pin.
    4. Lay the butter on the dough so that it covers the bottom two-thirds of the dough. Try to be neat and tidy.
    5. Fold the third of dough that does not have the butter on it down one-third of the butter. Now gently cut off the bit of the piece off butter you can still see without cutting the dough, and place it on the top of the dough you have just folded down. Fold the bottom third of the dough up. You will now have  two layers of butter and three layers of dough.  Re wrap the dough in cling film and chill for an hour.
    6. Unwrap the dough and put it on the lightly floured surface with the short end towards you. Roll out to a rectangle, about 50 x 20 cm, as before.
    7. This time fold up one-third of the dough and then fold the top third down on top. Wrap the dough again and chill for another hour. Repeat this twice more, putting the dough back into the fridge between turns.
    8. Double wrap in clingfilm and let your dough rest in the fridge for 8 hours or overnight. It should rise slightly. It is then ready to use.

Lamination steps

To make the Crème Pâtissière

  1. Pour the milk into a saucepan and add the vanilla extract. Bring the milk to the boil, then remove from the heat.
  2. Whisk the sugar, egg yolks and cornflour together in a large bowl.
  3. Pour a little of the hot milk into the egg mixture, keep whisking as you pour. Whisk in the rest of the hot milk until well-combined, then return to the saucepan.
  4. Simmer the mixture over a low heat, stirring continuously until the mixture becomes like a thick custard.
  5. Remove from the heat and sieve the mixture into a clean bowl to remove any lumps. Add the butter and stir until melted and combined.
  6. Rest cling film on the surface of the custard to prevent a skim forming and allow to cool. Once cool chill in the fridge.

To make the Pain Aux Raisin

  1. Remove the dough from the fridge and cut in half. Roll one half out on a lightly floured surface to a large rectangle, about 5 mm thick. Turn so a long edge is facing you.
  2. Spread half the crème pâtissière over the dough, leaving a 5 cm margin along the near edge. Sprinkle half the raisins and cinnamon on top of the crème pâtissière .
  3. Roll the dough towards you like a Swiss roll, keeping it tightly rolled and keeping tension on the dough as you roll. When you reach the end, wet the 5 cm strip you left with a little water and roll backwards and forwards on the join to seal. Repeat with the other piece.
  4. Cut the rolls into about 3 cm slices. Lay flat on the baking trays and gently lay some oiled cling film over the top of them. At this stage you can freeze them on the trays. Once frozen put into a freezer bag. Bring them out of the freezer the night before you want to use them and cover them with oiled cling film and they will be ready for the oven in the morning.
  5. Or if you want to taste the fruits of your labour now, leave to rise in a cool place until at least doubled in size, about 2 hours.
  6. Heat your oven to 200°C (180°C fan). Brush the risen pastries with beaten egg and bake for 15 – 20 minutes until golden brown.
  7. I brush mine with a little maple syrup as they come out but that is optional.

Adapted from a Paul Hollywood recipe.

Christmas Mincemeat

8 October 30, 2016 Condiments

Christmas Mincemeat

Stir up Sunday is just around the corner. My last Bramley apples are just falling off the tree . The baking cupboard is full of odds and sods of dried fruits that never get quite used up. Supermarkets have started the Christmas push and it is not even November yet. The morning is misty and Autumnal. It feels like a perfect day to make some mincemeat, so it can mature in time for mice pies or a Christmas version of a Pain Aux Raisin.

Christmas Mincemeat

Christmas Mincemeat

When I lived in Chicago, my US colleagues were often cautious when I announced I was making mince pies, convinced I would be hiding some form of meat in a sweet pie! The 1861 volume Mrs. Beeton’s Book of Household Management called for beef suet and rump steak mixed in with the dried fruit and spice. However my version is packed full of fruit and uses butter instead of suet, not an ounce of meat in sight. Plus a very healthy glug or three of alcohol. Traditionally Brandy but today I substituted the brandy for some damson vodka I made last year. Sherry, Port, Rum or Whiskey all work well.

Christmas Mincemeat

Christmas Mincemeat

The joy of making your own mincemeat is that you can tweak it to your liking. I am not a big fan of almonds so I have substituted in pecan nuts. I have dialed down the mixed peel and thrown in a handful of glacé cherries. As long as the overall weight of dried fruit adds up to total in the recipe, play around with the ratios of fruits.

Makes: 4 Jars
Ingredients
175g currants
175g raisins
175g sultanas
175g dried cranberries
50g mixed peel
50g glace cherries, chopped in quarters
1 medium cooking apple, peeled, cored and chopped
125g butter
50g chopped pecan nuts
225g light brown sugar
½ tsp ground cinnamon
1 tsp mixed spice
1 lemon
200ml brandy (or alcohol of your choice)

Instructions
1. Gently heat the butter, sugar, spices, juice and zest of the lemon until the sugar has dissolved.
2. Add all the remaining ingredients, except the brandy/alcohol into the pan and simmer gently, stirring occasionally, for about 10 minutes.
3. Allow the mixture to cool a little and then stir in the alcohol.
4. Spoon the mincemeat into sterilised jam jars. Put on the lid and store in a cool place. These will improve with age and will store well for up to 6 months in a cool place.

Christmas Mincemeat
 
Save Print
Prep time
10 mins
Cook time
10 mins
Total time
20 mins
 
The 1861 volume Mrs. Beeton’s Book of Household Management called for beef suet and rump steak mixed in with the dried fruit and spice. However my version is packed full of fruit and uses butter instead of suet, not an ounce of meat in sight. Plus a very healthy glug or three of alcohol
Author: CluckMuckCook
Serves: 4 jars
Ingredients
  • 175g currants
  • 175g raisins
  • 175g sultanas
  • 175g dried cranberries
  • 50g mixed peel
  • 50g glace cherries, chopped in quarters
  • 1 medium cooking apple, peeled, cored and chopped
  • 125g butter
  • 50g chopped pecan nuts
  • 225g light brown sugar
  • ½ tsp ground cinnamon
  • 1 tsp mixed spice
  • 1 lemon
  • 200ml brandy (or alcohol of your choice)
Instructions
  1. Gently heat the butter, sugar, spices, juice and zest of the lemon until the sugar has dissolved.
  2. Add all the remaining ingredients, except the brandy/alcohol into the pan and simmer gently, stirring occasionally, for about 10 minutes.
  3. Allow the mixture to cool a little and then stir in the alcohol.
  4. Spoon the mincemeat into sterilised jam jars. Put on the lid and store in a cool place. These will improve with age and will store well for up to 6 months in a cool place.
Notes
Stores well in a cool dark place for 6 months
3.5.3217


sausage roll cooked

8 October 29, 2016 Pastry and Pies

Sausage Rolls

Sausage rolls in my mind are a match made in heaven, delicious crisp, flaky, buttery pastry wrapped around a succulent sausage. (Sounds a bit “carry on”, keep your double entendres to yourselves ;-)).

sausage roll cooked

Sausage Rolls

My eldest son has always had a morbid fear of sausages rolls and cocktail sausages, built from many children’s parties, where a tub of cold cocktail sausages and prepacked cold sausage rolls are the main stay of the kids buffet. Cold, damp pastry is never good in my opinion.

Eventually this year I convinced him to try a freshly made sausage roll straight out of the oven. To make the transition to real sausage rolls I used his favourite sausages in the centre, wrapped in a buttery, crispy homemade ruff puff pastry. He was a convert.

Sausage Rolls

Sausage Rolls

These are great for picnics or can be cut up smaller for buffets and finger food. To make them a little more adult, a small dollop of onion marmalade or Branston pickle in them before you roll them up gives them a little extra flavour.

Now you could cheat and buy some puff pastry and sausages and wack that in the oven but I think the rough puff pastry is pretty easy to make and makes a world of difference to the end product.

Rough puff is easy to make but it does take time, more because it needs to be rested in the fridge in between rolling to keep the butter cold and chilled for a couple of hours before being used. I normally make it the night before and leave it in the fridge for baking on Saturday.

sausage-roll-uncooked

Sausage Roll

Makes: 6 large
Oven Temp: Gas 6, 400F, 200C (180C Fan)
Ingredients
225g plain flour
200g chilled butter
180ml chilled water
1 tablespoon lemon juice
½ tsp salt
6 of your favourite sausages
1 egg to glaze

Instructions
1. Put the butter into the freezer for 15 mins before use. Then cut into cubes.
2. Sift the flour and salt into a bowl and add the butter.
3. Mix the butter around with a butter/dinner knife, to separate the cubes and coat them in flour. Do this gently to keep the butter in lumps.
4. Mix the water and lemon juice together in a jug and pour it into the flour and butter mixture. Reserve a little.
5. Using a butter/dinner knife, stir and cut the contents of the bowl several times, turning the bowl around as you chop the butter into the flour, bringing the dough together.
6. The dough should be quite wet and sticky, if not add a little more of the reserved water.
7. Tip the dough onto a floured work surface and shape it into a rectangle about 30cm x 20cm.
8. With the pastry vertically on the work surface, fold the bottom third of the pastry up onto the middle third, then the top third down onto the other thirds. Wrap in cling film and chill in the fridge for 15 minutes.
9. Bring the pastry out of the fridge, with the folded edge to the sides (90 degrees to the way you rolled it the first time), roll the pastry again into the same size rectangle as the original narrow rectangle and fold in the same way again.
10. Chill again in the fridge. Repeat this twice more. After the last rolling stage, wrap the pastry in cling film and chill in the fridge for two hours or leave overnight.
11. When you are ready to make your sausage rolls, preheat the oven to 200c/180c (Fan). Carefully remove the skin from the sausage by cutting the skin along the length of the sausage. You want to retain the shape of the sausage to wrap the pastry around.
12. Roll out the pastry so it is 3 sausages long and about 30 cm wide.
13. Cut the pastry length ways so you have 2 long pieces 15 cm wide . Then cut each piece into 3 rectangles the length of a sausage each.
14. Place a sausage on the edge and roll up. Seal the edge of the pastry with some egg wash and place on a baking tray with the join underneath. Slash 4 times diagonally across the top and repeat with the other sausages. Then brush egg wash on the tops of all the sausage rolls. If you want more bite size sausage rolls cut each one into 4.
15. Bake for 25-30 mins at 200c/180c (fan) until golden brown and crispy.

Adapted from a Paul Hollywood recipe.


Sausage Rolls
 
Save Print
Prep time
30 mins
Cook time
30 mins
Total time
1 hour
 
Sausage rolls in my mind are a match made in heaven, delicious crisp, flaky, buttery pastry wrapped around a succulent sausage. (Sounds a bit "carry on", keep your double entendres to yourselves ;-)).
Author: CluckMuckCook
Serves: 6
Ingredients
  • Oven Temp: Gas 6, 400F, 200C (180C Fan)
  • 225g plain flour
  • 200g chilled butter
  • 180ml chilled water
  • 1 tablespoon lemon juice
  • ½ tsp salt
  • 6 of your favourite sausages
  • 1 egg to glaze
Instructions
  1. Put the butter into the freezer for 15 mins before use. Then cut into cubes.
  2. Sift the flour and salt into a bowl and add the butter.
  3. Mix the butter around with a butter/dinner knife, to separate the cubes and coat them in flour. Do this gently to keep the butter in lumps.
  4. Mix the water and lemon juice together in a jug and pour it into the flour and butter mixture. Reserve a little.
  5. Using a butter/dinner knife, stir and cut the contents of the bowl several times, turning the bowl around as you chop the butter into the flour, bringing the dough together.
  6. The dough should be quite wet and sticky, if not add a little more of the reserved water.
  7. Tip the dough onto a floured work surface and shape it into a rectangle about 30cm x 20cm.
  8. With the pastry vertically on the work surface, fold the bottom third of the pastry up onto the middle third, then the top third down onto the other thirds. Wrap in cling film and chill in the fridge for 15 minutes.
  9. Bring the pastry out of the fridge, with the folded edge to the sides (90 degrees to the way you rolled it the first time), roll the pastry again into the same size rectangle as the original narrow rectangle and fold in the same way again.
  10. Chill again in the fridge. Repeat this twice more. After the last rolling stage, wrap the pastry in cling film and chill in the fridge for two hours or leave overnight.
  11. When you are ready to make your sausage rolls, preheat the oven to 200c/180c (Fan). Carefully remove the skin from the sausage by cutting the skin along the length of the sausage. You want to retain the shape of the sausage to wrap the pastry around.
  12. Roll out the pastry so it is 3 sausages long and about 30 cm wide.
  13. Cut the pastry length ways so you have 2 long pieces 15 cm wide . Then cut each piece into 3 rectangles the length of a sausage each.
  14. Place a sausage on the edge and roll up. Seal the edge of the pastry with some egg wash and place on a baking tray with the join underneath. Slash 4 times diagonally across the top and repeat with the other sausages. Then brush egg wash on the tops of all the sausage rolls. If you want more bite size sausage rolls cut each one into 4.
  15. Bake for 25-30 mins at 200c/180c (fan) until golden brown and crispy.
Notes
Active time is about 30 mins in all, but there is waiting between the pastry steps.
3.5.3217


Haloween fougasse bread

2 October 27, 2016 Breads

Spooky Fougasse Bread


During botanical week of the Great British Bake Off, the technical challenge was to bake a fougasse. Traditionally a leaf shaped bread, quite similar to an Italian focaccia.  Tom Gilliford one of the contestants declared ‘I love fougasse. It’s actually my cinema snack !’. Which spawned a lot of amusement on Twitter and brought this little known bread into the public eye. Instagram and Pinterest have been flooded with everyone’s new favourite cinema snack.
Haloween fougasse bread

Staying on the Great British Bake Off theme, I also saw a previous contestant Richard Burr post a fougasse Halloween themed bread. So I thought it was time I gave it a go.  Historically bread has been my nemesis but these came out a treat. As always I like to tweak recipes a little and added some dried mixed herbs and also used some good quality Maldon sea salt (I am from Essex after all!).

fougasse halloween

Makes: 4 small loaves
Oven Temp: Gas 7, 425F, 220C (200C Fan)
Ingredients
500g strong white bread flour (plus more for dusting)
2 teaspoons salt
7g fast acting yeast (1 sachet)
375ml water
2 tbsp olive oil
Olive oil spray
Maldon sea salt
1 teaspoon dried mixed herbs
2 large baking sheets

Instructions
1.Put all the dry ingredients into the bowl of a mixer. Keep the salt and yeast on opposite sides so that the salt does not retard the yeast.
2.Add the oil and the water to the bowl. Mix with a spoon to bring together the ingredients.
3.Mix with a dough hook for about 10 minutes. The dough will be very wet
4.Transfer the dough to an oiled bowl, cover with cling film and prove in a warm place for about a hour, until the dough has doubled in size.
5.Put plenty of flour onto the work surface and tip out the dough. I use a plastic dough scraper to make this easier. You want to keep as many bubbles in the dough as possible so treat it gently. Then sprinkle plenty of flour on the top.
6.Using a sharp knife, divide the dough into quarters.
7.Carefully lift each quarter onto the baking trays so there are two on each tray.
8.Cut eyes, a nose and a mouth into each piece of dough. This is tricky as the dough is quite wet. Open out these holes by gently pulling the dough into the shape you want.
9.Cover with oiled clingfilm and leave to rise for 20 minutes.
10.Preheat the oven to 220°C/fan 200°C.
11.Spray the dough with olive oil or gently brush some oil on. Then sprinkle with the sea salt
12.Bake for 20-25 minutes until golden brown

Adapted from a recipe by Richard Burr

Spooky Fougasse Bread
 
Save Print
Prep time
20 mins
Cook time
25 mins
Total time
45 mins
 
During botanical week of the Great British Bake Off, the technical challenge was to bake a fougasse. Traditionally a leaf shaped bread, quite similar to an Italian focaccia. Tom Gilliford one of the contestants declared ‘I love fougasse. It’s actually my cinema snack !’. Which spawned a lot of amusement on Twitter and brought this little known bread into the public eye. Instagram and Pinterest have been flooded with everyone's new favourite cinema snack.
Author: CluckMuckCook
Serves: 4 Small
Ingredients
  • Oven Temp: Gas 7, 425F, 220C (200C Fan)
  • 500g strong white bread flour (plus more for dusting)
  • 2 teaspoons salt
  • 7g fast acting yeast (1 sachet)
  • 375ml water
  • 2 tbsp olive oil
  • Olive oil spray
  • Maldon sea salt
  • 1 teaspoon dried mixed herbs
  • 2 large baking sheets
Instructions
  1. Instructions
  2. Put all the dry ingredients into the bowl of a mixer. Keep the salt and yeast on opposite sides so that the salt does not retard the yeast.
  3. Add the oil and the water to the bowl. Mix with a spoon to bring together the ingredients.
  4. Mix with a dough hook for about 10 minutes. The dough will be very wet
  5. Transfer the dough to an oiled bowl, cover with cling film and prove in a warm place for about a hour, until the dough has doubled in size.
  6. Put plenty of flour onto the work surface and tip out the dough. I use a plastic dough scraper to make this easier. You want to keep as many bubbles in the dough as possible so treat it gently. Then sprinkle plenty of flour on the top.
  7. Using a sharp knife, divide the dough into quarters.
  8. Carefully lift each quarter onto the baking trays so there are two on each tray.
  9. Cut eyes, a nose and a mouth into each piece of dough. This is tricky as the dough is quite wet. Open out these holes by gently pulling the dough into the shape you want.
  10. Cover with oiled clingfilm and leave to rise for 20 minutes.
  11. Preheat the oven to 220°C/fan 200°C.
  12. Spray the dough with olive oil or gently brush some oil on. Then sprinkle with the sea salt
  13. Bake for 20-25 minutes until golden brown
Notes
Active time is about 20 Mins but you will need to let this prove for about an hour
3.5.3217


21 October 23, 2016 Traybakes

Spooky Millionaires Shortbread

Day 2 of the boys weekend and we decided to make one of our favourite quick and easy tray bakes, millionaires shortbread. As Halloween is knocking on the door, we decided to make a ghostly pattern in the chocolate rather than the traditional marbling.

The technique to get the ghost shapes is surprisingly easy. When you get to the chocolate layer in the recipe, reserve a tablespoon of dark chocolate in a piping bag to pipe on the ghost eyes and mouth. For the ghost bodies , pipe a circle of white chocolate on the still melted dark chocolate, then drag a skewer from the centre of the circle to create a tail. Wipe the skewer between ghosts for the best effect, then pipe on some eyes and a mouth.

Makes: 16
Ingredients
250g shortbread biscuits
55g melted butter
150g butter
150g dark brown soft sugar
400g can condensed milk
pinch of salt
200g dark chocolate
100g white chocolate
Square brownie tin approx 20cm

Instructions

  1. Put the biscuits in a bag and crush with a rolling pin until like large breadcrumbs. Line the tin with baking parchment. Mix the crushed biscuits with the melted butter, then press it firmly into your lined tin and chill in the fridge for 30 minutes.
  2.  Heat the sugar,salt and remaining butter in a non-stick pan, stirring until melted. Add the condensed milk and bring to a boil, stirring continuously. Cook for a couple of minutes or until the filling has thickened. Pour the caramel over the base. Cool on a work surface for 15 minutes and then chill in the fridge until set.
  3. Melt the chocolate in separate bowls over pans of simmering water. Pour the dark chocolate over the caramel and then reserve a tablespoon of dark chocolate in a piping bag. For the ghost bodies, pipe a circle of white chocolate on the melted dark chocolate, drag a skewer from the centre of the circle to create a tail. Wipe the skewer between ghosts for the best effect then pipe on some eyes and a mouth.
  4. Chill in the fridge until set. Remove from the tin and cut into squares, dip your knife in hot water between cuts to help cutting through the chocolate.

Stores well in an airtight container in the fridge for up to 2 weeks.

Spooky Millionaires Shortbread
 
Save Print
Prep time
30 mins
Cook time
1 hour
Total time
1 hour 30 mins
 
Author: CluckMuckCook
Serves: 16
Ingredients
  • 250g shortbread biscuits
  • 55g melted butter
  • 150g butter
  • 150g dark brown soft sugar
  • 400g can condensed milk
  • pinch of salt
  • 200g dark chocolate
  • 100g white chocolate
  • Square brownie tin approx 20cm
Instructions
  1. Put the biscuits in a bag and crush with a rolling pin until like large breadcrumbs. Line the tin with baking parchment. Mix the crushed biscuits with the melted butter, then press it firmly into your lined tin and chill in the fridge for 30 minutes.
  2. Heat the sugar,salt and remaining butter in a non-stick pan, stirring until melted. Add the condensed milk and bring to a boil, stirring continuously. Cook for a couple of minutes or until the filling has thickened. Pour the caramel over the base. Cool on a work surface for 15 minutes and then chill in the fridge until set.
  3. Melt the chocolate in separate bowls over pans of simmering water. Pour the dark chocolate over the caramel and then reserve a tablespoon of dark chocolate in a piping bag. For the ghost bodies, pipe a circle of white chocolate on the melted dark chocolate, drag a skewer from the centre of the circle to create a tail. Wipe the skewer between ghosts for the best effect then pipe on some eyes and a mouth.
  4. Chill in the fridge until set. Remove from the tin and cut into squares, dip your knife in hot water between cuts to help cutting through the chocolate.
Notes
Stores well in an airtight container in the fridge for up to 2 weeks.

The first two stages have to chill for 30 mins each once cooled.
3.5.3217

Adapted from a Carnation recipe.

2 October 23, 2016 Condiments

Sweet Chilli Jam

As Autumn takes hold, the nights draw in and there is a fresh chill in the air, it is time to pick that last glut of produce from the allotment and greenhouse. Ready for the Autumnal pastime of pickling, jam or chutney making to preserve some of those goodies for the winter months.

chillijamclose

Every year I grow too many chillies. The ones that do not make it into the freezer for stir fry and currys are destined for my favourite sweet chilli jam recipe.

For me this is the Russian roulette of jam making depending on what chillies I have decided to grow. Using supermarket standard red chillies give consistent results of a sweet spicy jam with a gentle kick. This year a combination of red and yellow aji lemon chillies have produced a slightly more atomic version. Tweak the number and type of chillies to your liking and tolerance for heat.

This sweet chilli jam is very versatile and will perk up your cold meats, cheeses or I love a little on my fajitas.

Adding a little ancho chilli paste gives an additional fruity and smoky depth of flavour or a teaspoon of smoked paprika will also work well.

Makes: 3 large jars or 4 small jars
Ingredients
8 red peppers
10 red chilli
Thumb-sized piece fresh root ginger, peeled and roughly chopped
1 bulb garlic (10-12 cloves)
400g can cherry tomatoes
750g caster sugar
250ml cider vinegar
1 teaspoon ancho chilli paste (Optional)

Instructions

  1. Deseed peppers and chop roughly. Chop up chilli, garlic and ginger.
  2. Put all the chopped ingredients into a blender or food processor and whizz until smooth. Pour into a heavy saucepan. Put the tomatoes into the blender or food processor, whizz up and add to the saucepan. Add the ancho chilli paste if using.
  3. Add sugar and vinegar and bring to the boil stirring occasionally. Skim off the scum that rises to the surface as the mixture boils. Then reduce the heat to a gentle simmer and cook for 50 minutes, stirring occasionally.
  4. The sauce should have thickened, continue to simmer until the mixture bubbles like lava, stirring more often so it does not burn on the bottom of the pan.
  5. Leave to cool for 10-15 minutes then transfer to sterilised jars. It will last up to 3 months in the fridge.

Adapted from a GoodFood recipe

Sweet Chilli Jam
 
Save Print
Prep time
15 mins
Cook time
1 hour
Total time
1 hour 15 mins
 
This sweet chilli jam is very versatile and will perk up your cold meats, cheeses or I love a little on my fajitas.
Author: CluckMuckCook
Serves: 3-4 jars
Ingredients
  • 8 red peppers
  • 10 red chillies
  • Thumb-sized piece fresh root ginger, peeled and roughly chopped
  • 1 bulb garlic (10-12 cloves)
  • 400g can cherry tomatoes
  • 750g caster sugar
  • 250ml cider vinegar
  • 1 teaspoon ancho chilli paste (Optional)
Instructions
  1. Deseed peppers and chop roughly. Chop up chilli, garlic and ginger.
  2. Put all the chopped ingredients into a blender or food processor and whizz until smooth. Pour into a heavy saucepan. Put the tomatoes into the blender or food processor, whizz up and add to the saucepan. Add the ancho chilli paste if using.
  3. Add sugar and vinegar and bring to the boil stirring occasionally. Skim off the scum that rises to the surface as the mixture boils. Then reduce the heat to a gentle simmer and cook for 50 minutes, stirring occasionally.
  4. The sauce should have thickened, continue to simmer until the mixture bubbles like lava, stirring more often so it does not burn on the bottom of the pan.
  5. Leave to cool for 10-15 minutes then transfer to sterilised jars. It will last up to 3 months in the fridge.
Notes
Lasts up to 3 months in the fridge.
3.5.3217


Gingerbread skeleton

2 October 23, 2016 Bake with the kids

Halloween Gingerbread Men

While the wife’s away the kids will play.

This weekend has been a boys weekend in my house, with the wife popping away to catch up with some old school friends. Which left me and my two boys alone for the weekend to get up to mischief.

Gingerbreadmen

Gingerbread Men

On Saturday morning we decided to pop to the local farm shop’s new cafe to sample their breakfasts. As usual at any coffee shop we go to the boys will sniff out the gingerbread men. The farm shop was full of pumpkins as Halloween is just around the corner. That gave me the idea to dust off my favourite gingerbread man recipe and do some baking with the boys. Skeletons and mummies were on the cards.

I have a great skeleton cutter that I have not had a chance to use yet that imprints a skeleton onto the dough so you can fill the impression with icing. Unfortunately the definition was slightly lost as the biscuits cooked but it did give me a guide for my first attempt at piping royal icing. The smaller mummies I just free handed with a small flat piping nozzle.

Gingerbread skeleton

Gingerbread skeleton

This recipe uses golden syrup rather than treacle so makes a slightly lighter coloured gingerbread but it has a good kick of ginger and cinnamon to make a lovely, warming biscuit.

Makes: About 20

Oven Temp: Gas 4, 350F, 180C (160C Fan)

Ingredients
350g plain flour
1 teaspoon bicarbonate of soda
2 teaspoon ground ginger
1 teaspoon ground cinnamon
1/2 teaspoon salt
125g butter
175g light soft brown sugar
1  egg
4 tablespoons golden syrup
Extra flour for rolling
250g royal icing sugar
1 teaspoon vanilla extract
40-50ml water

Instructions

  1. Sift together the all of the dry ingredients into the bowl of a food processor. Add the butter and whizz until the mix looks like fine breadcrumbs. Add in the sugar and whizz again just to incorporate.
  2. Beat the egg and golden syrup together, add to the food processor and whizz until the mixture starts to come together. Tip the dough out onto a lightly floured surface and knead until smooth, wrap in cling film and leave to chill in the fridge for 15 minutes.
  3. Preheat the oven to 180C. Line two baking trays with grease-proof paper.
  4. Roll the dough out to about half a centimetre thickness on a lightly floured surface. Using gingerbread men cookie cutters, cut out and place on the baking tray, leaving a gap between them.
  5. Bake for 12-15 minutes, or until lightly golden-brown.
  6. Leave on the tray for 10 minutes to cool slightly, then move to a wire rack to finish cooling.
  7. To make the icing add the royal icing sugar, vanilla extract and 40ml of water to the bowl of a mixer with the whisk attachment or you can use an electric whisk. Before whisking mix together with a spoon or spatula. This will prevent a icing sugar cloud when you start mixing.
  8. Whisk for a couple of minutes until thick, if too thick to pipe, loosen with an additional teaspoon or two of water.
  9. Put into a piping bag.When cooled decorate with the icing.

Adapted from a GoodFood recipe.

Halloween Gingerbread Men
 
Save Print
Prep time
30 mins
Cook time
12 mins
Total time
42 mins
 
A lighter coloured gingerbread but it has a good kick of ginger and cinnamon to make a lovely, warming biscuit.
Author: James
Serves: 20
Ingredients
  • 350g plain flour
  • 1 teaspoon bicarbonate of soda
  • 2 teaspoon ground ginger
  • 1 teaspoon ground cinnamon
  • ½ teaspoon salt
  • 125g butter
  • 175g light soft brown sugar
  • 1 egg
  • 4 tablespoons golden syrup
  • Extra flour for rolling
  • 250g royal icing sugar
  • 1 teaspoon vanilla extract
  • 40-50ml water
Instructions
  1. Oven Temp: Gas 4, 350F, 180C (160C Fan)
  2. Sift together the all of the dry ingredients into the bowl of a food processor. Add the butter and whizz until the mix looks like fine breadcrumbs. Add in the sugar and whizz again just to incorporate.
  3. Beat the egg and golden syrup together, add to the food processor and whizz until the mixture starts to come together. Tip the dough out onto a lightly floured surface and knead until smooth, wrap in cling film and leave to chill in the fridge for 15 minutes.
  4. Preheat the oven to 180C. Line two baking trays with grease-proof paper.
  5. Roll the dough out to about half a centimetre thickness on a lightly floured surface. Using gingerbread men cookie cutters, cut out and place on the baking tray, leaving a gap between them.
  6. Bake for 12-15 minutes, or until lightly golden-brown.
  7. Leave on the tray for 10 minutes to cool slightly, then move to a wire rack to finish cooling.
  8. To make the icing add the royal icing sugar, vanilla extract and 40ml of water to the bowl of a mixer with the whisk attachment or you can use an electric whisk. Before whisking mix together with a spoon or spatula. This will prevent a icing sugar cloud when you start mixing.
  9. Whisk for a couple of minutes until thick, if too thick to pipe, loosen with an additional teaspoon or two of water.
  10. Put into a piping bag.When cooled decorate with the icing.
3.5.3217


1 October 15, 2016 Breads

“Jimmy Gingers” Soft Burger Rolls

My good friend Jimmy Ginger tweeted me at the end of the week to see if I had any good soft burger bun recipes. My answer was let me have a play at the weekend and I will get back to you.

white roll board

Now Jamie aka “Jimmy Ginger” is a keen foodie, BBQ fanatic and more importantly a very good artisan chilli sauce maker. So I know the standard will need to be high.

whiterolldough

I have known Jamie all my life, even as kids we were foodies, a passion we inherited from our parents. We both ended up in the City working for financial institutions. However we let our creative sides run wild outside of our respective offices. Mine being generally focused on bakes, whereas Jamie’s is growing chilli peppers for his delicious artisan sauces but we both are passionate about BBQ.

So after a few attempts I have landed on the below recipe which are soft and delicious. They are only proved once, which is a great time saver if you are getting ready for a big BBQ.

These rolls are also made with plain (all purpose flour) rather than strong bread flour and use milk and butter in the mix. That combination makes a rich, soft and buttery roll, perfect for a BBQ’d burger.

whiterollbroken

Please pop along to Jimmy Gingers website to read his story and take a look at his store and chilli shop.

Makes: 12 rolls
Oven Temp: Gas 6, 400F, 200C (180C Fan)

Ingredients
600g plain flour
2 teaspoons salt
7g fast acting yeast(1 sachet)
2 tablespoons caster sugar
120ml water
230ml milk
40g butter
1 egg
Sesame seeds or poppy seeds optional
2 baking sheets
A little extra flour for dusting and a little oil or butter for greasing the baking sheets

Instructions
1. Sift flour into a large bowl or the bowl of a stand mixer with the dough hook attached.
2. Add the yeast and sugar to one side of the bowl. Add the salt to the other side of the bowl. This helps stop the yeast being retarded by the salt.
3. In a small pan warm up water, milk and butter to around 120F/50C. Ensure the butter has melted (so it is quite warm to the touch). This will help kick start the yeast.
4. Make a well in the centre and add in the egg and most of the the warmed liquid ingredients. Reserve a little which can be added through the next step.
5. Mix together well and bring to a ball. You dont want an over dry dough or it will not rise well. I prefer my dough on the slightly wetter side at this point as when you start kneading you can add a little flour to bring it to a smooth and silky consistency.
6. Knead for 10 minutes by hand or 7 minutes in a stand mixer with a dough hook.
7. Once the dough is smooth and elastic, gather into a ball
8. Split the dough into 12 pieces and roll into balls. Slightly flatten the balls and place on a greased baking sheet, 6 to each sheet. Cover with oiled plastic wrap and leave to rise until doubled. About an hour in a warm room.
9. Preheat oven to 200C/180C Fan.
10. You can brush the risen rolls with a little milk and sprinkle with poppy/sesame seeds if using.
11. Bake for around 10-12 mins until golden brown . Once out of the oven I like to brush over a little melted butter to give them a shine. Cool on a wire rack.

"Jimmy Gingers" Soft Burger Rolls
 
Save Print
Prep time
15 mins
Cook time
10 mins
Total time
25 mins
 
A rich, soft and buttery roll, perfect for a BBQ'd burger.
Author: CluckMuckCook
Serves: 12
Ingredients
  • 600g plain flour
  • 2 teaspoons salt
  • 7g fast acting yeast(1 sachet)
  • 2 tablespoons caster sugar
  • 120ml water
  • 230ml milk
  • 40g butter
  • 1 egg
  • Sesame seeds or poppy seeds optional
  • 2 baking sheets
  • A little extra flour for dusting and a little oil or butter for greasing the baking sheets
Instructions
  1. Oven Temp: Gas 6, 400F, 200C (180C Fan)
  2. Sift flour into a large bowl or the bowl of a stand mixer with the dough hook attached.
  3. Add the yeast and sugar to one side of the bowl. Add the salt to the other side of the bowl. This helps stop the yeast being retarded by the salt.
  4. In a small pan warm up water, milk and butter to around 120F/50C. Ensure the butter has melted (so it is quite warm to the touch). This will help kick start the yeast.
  5. Make a well in the centre and add in the egg and most of the the warmed liquid ingredients. Reserve a little which can be added through the next step.
  6. Mix together well and bring to a ball. You dont want an over dry dough or it will not rise well. I prefer my dough on the slightly wetter side at this point as when you start kneading you can add a little flour to bring it to a smooth and silky consistency.
  7. Knead for 10 minutes by hand or 7 minutes in a stand mixer with a dough hook.
  8. Once the dough is smooth and elastic, gather into a ball
  9. Split the dough into 12 pieces and roll into balls. Slightly flatten the balls and place on a greased baking sheet, 6 to each sheet. Cover with oiled plastic wrap and leave to rise until doubled. About an hour in a warm room.
  10. Preheat oven to 200C/180C Fan.
  11. You can brush the risen rolls with a little milk and sprinkle with poppy/sesame seeds if using.
  12. Bake for around 10-12 mins until golden brown . Once out of the oven I like to brush over a little melted butter to give them a shine. Cool on a wire rack.
3.5.3217


  • « Go to Previous Page
  • Go to page 1
  • Interim pages omitted …
  • Go to page 3
  • Go to page 4
  • Go to page 5
  • Go to page 6
  • Go to page 7
  • Go to Next Page »

Copyright© 2025 · Cookd Pro Theme by Shay Bocks