• Skip to primary navigation
  • Skip to main content
  • Home
  • About Me
  • Recipes
    • Cake
    • Biscuits
    • Bread
    • Pastry
    • Tray Bakes
    • Condiments
    • Bake with the kids
    • Anti Inflammatory Baking
  • Conversion Charts. Cups – Grams – Ounces
  • Blog

Cluck, Muck & Cook

Baking & Foodie Blog From Sunny Brentwood Essex

CluckMuckCook

Boxing Day Chutney

2 December 18, 2016 Uncategorized

Boxing Day Chutney

The annual pre Christmas lunch is looming, a tradition that has been going on for about 18 years. It started pre kids with 5 couples and now with all the kids there will be 18 for lunch.

As we do not have a table large enough to seat 18, this year I am going for a Boxing Day buffet theme. The cola baked ham is out of the oven, encrusted with treacle, mustard and demerara sugar. The turkey has been smoked on the BBQ. The brussels and carrots have been peeled and prepped and a bottled of chilled wine has been opened to start the festive dinner preparation.

Boxing Day Chutney

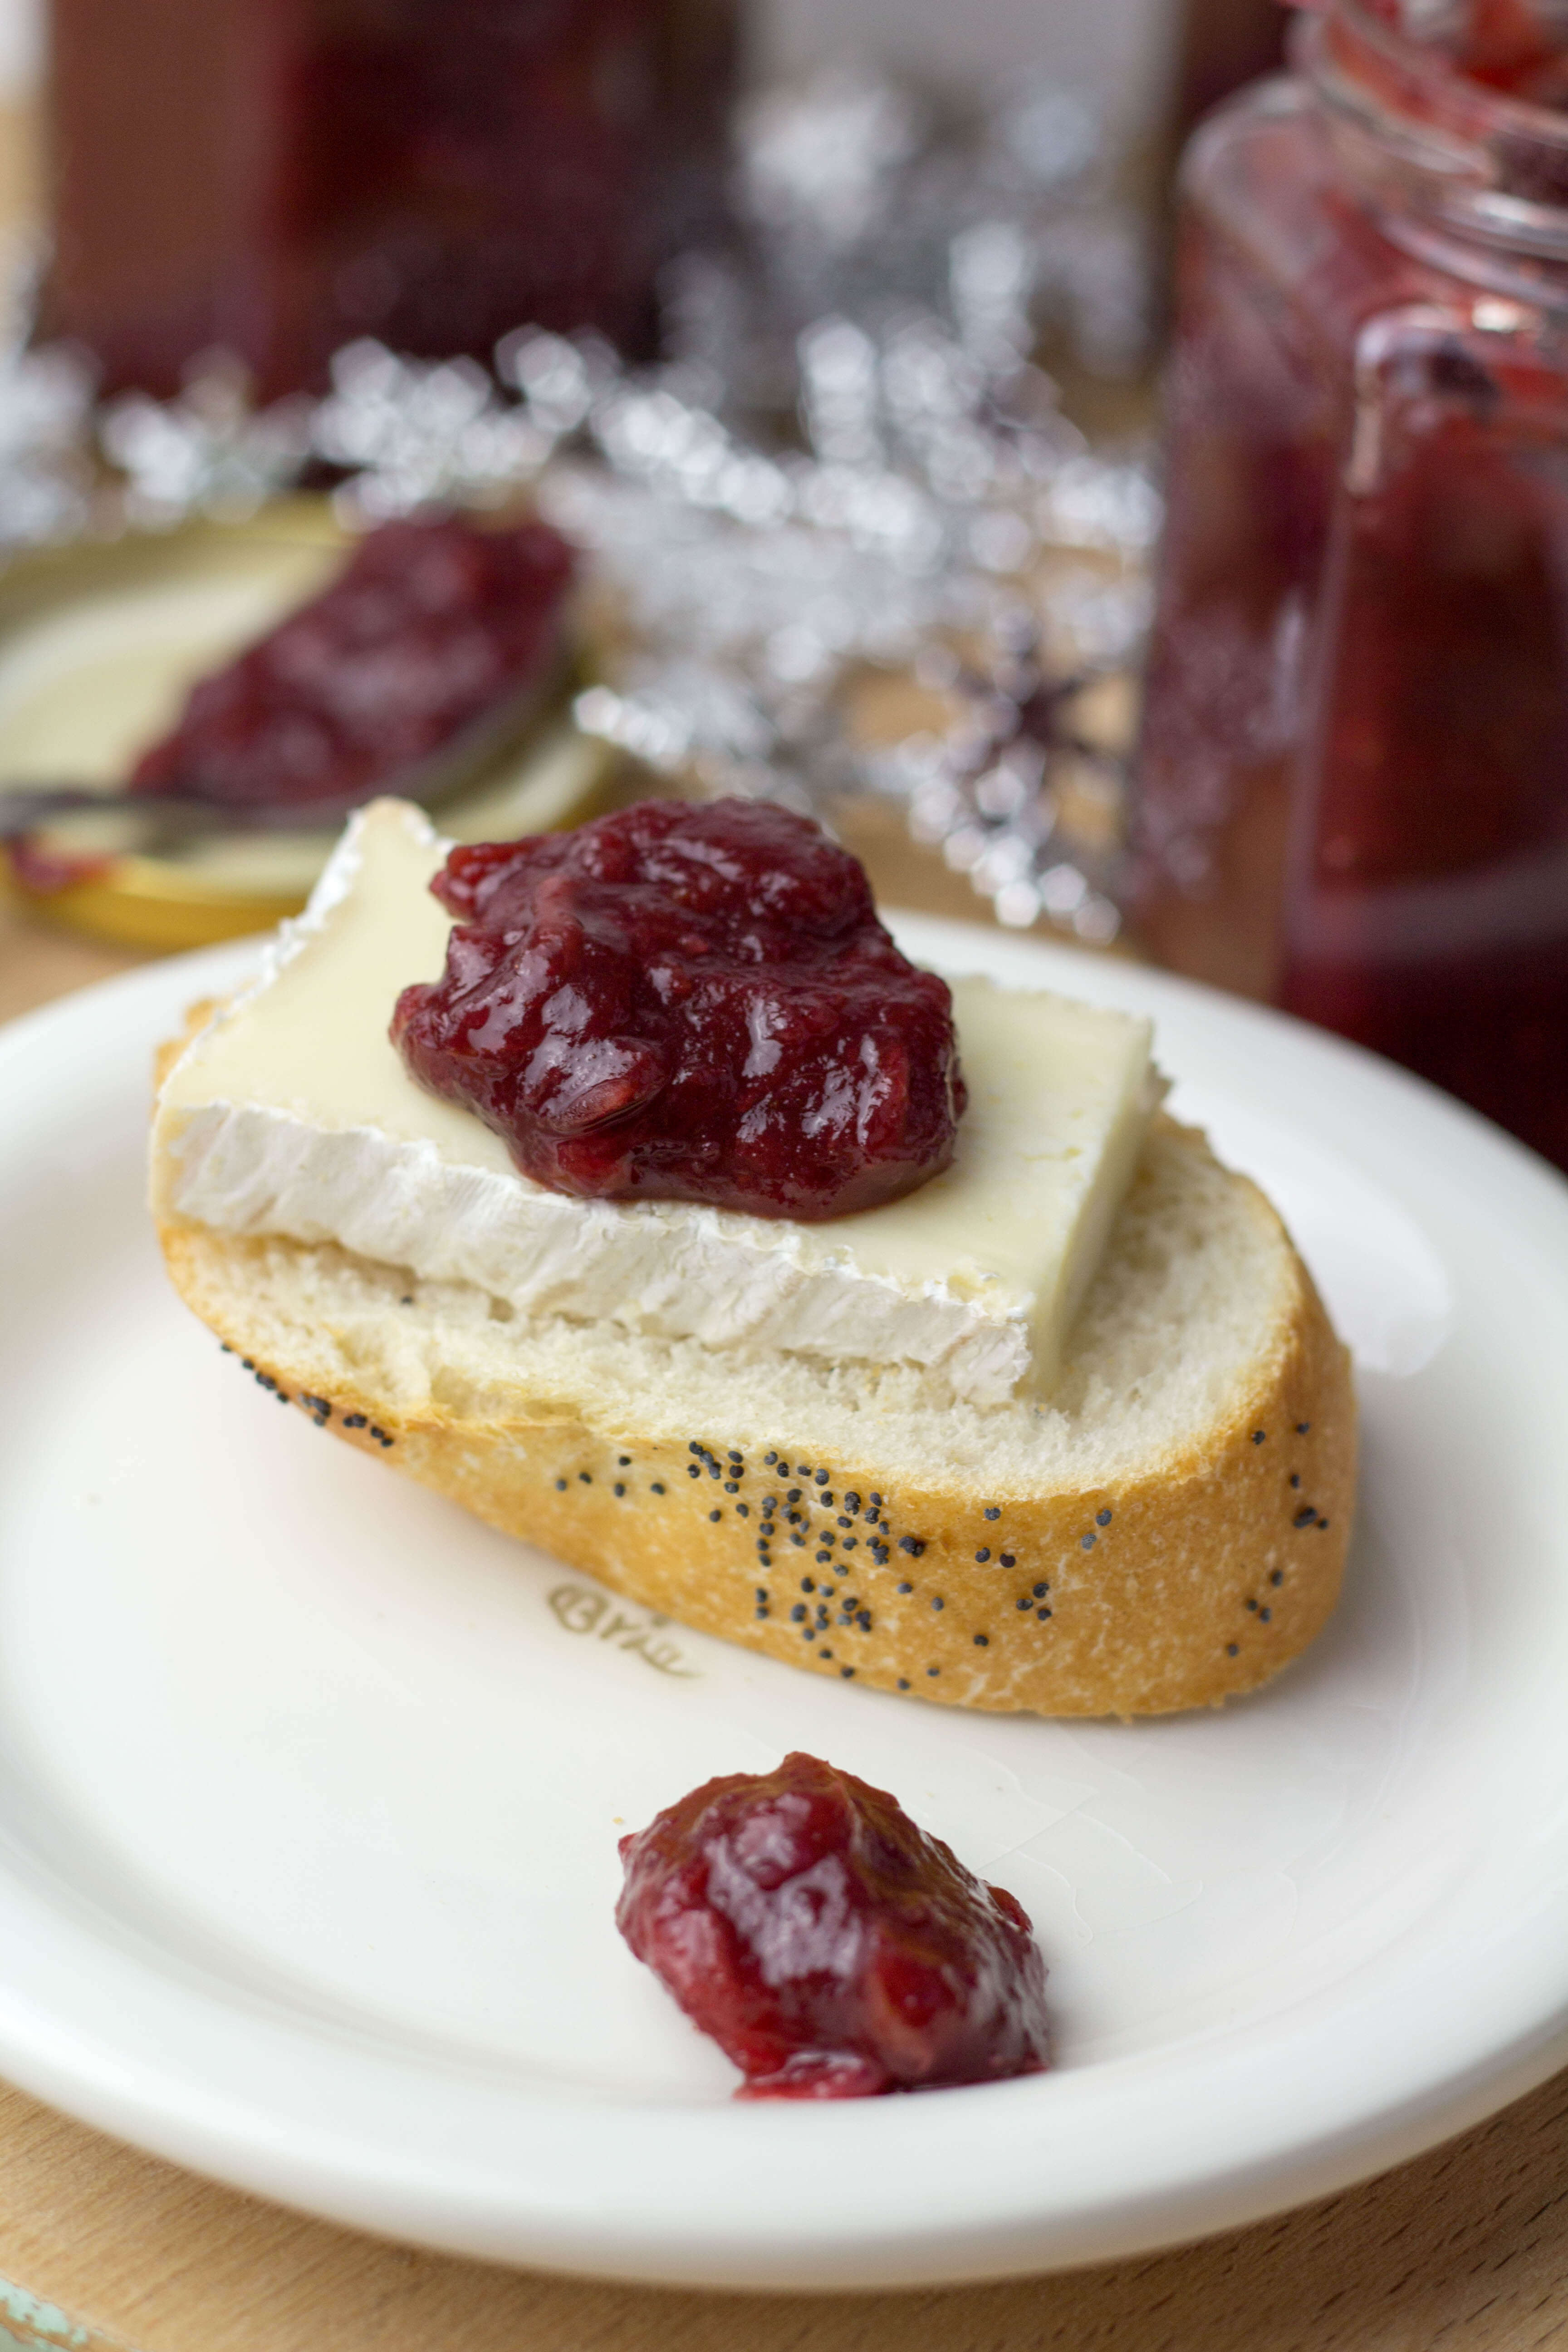
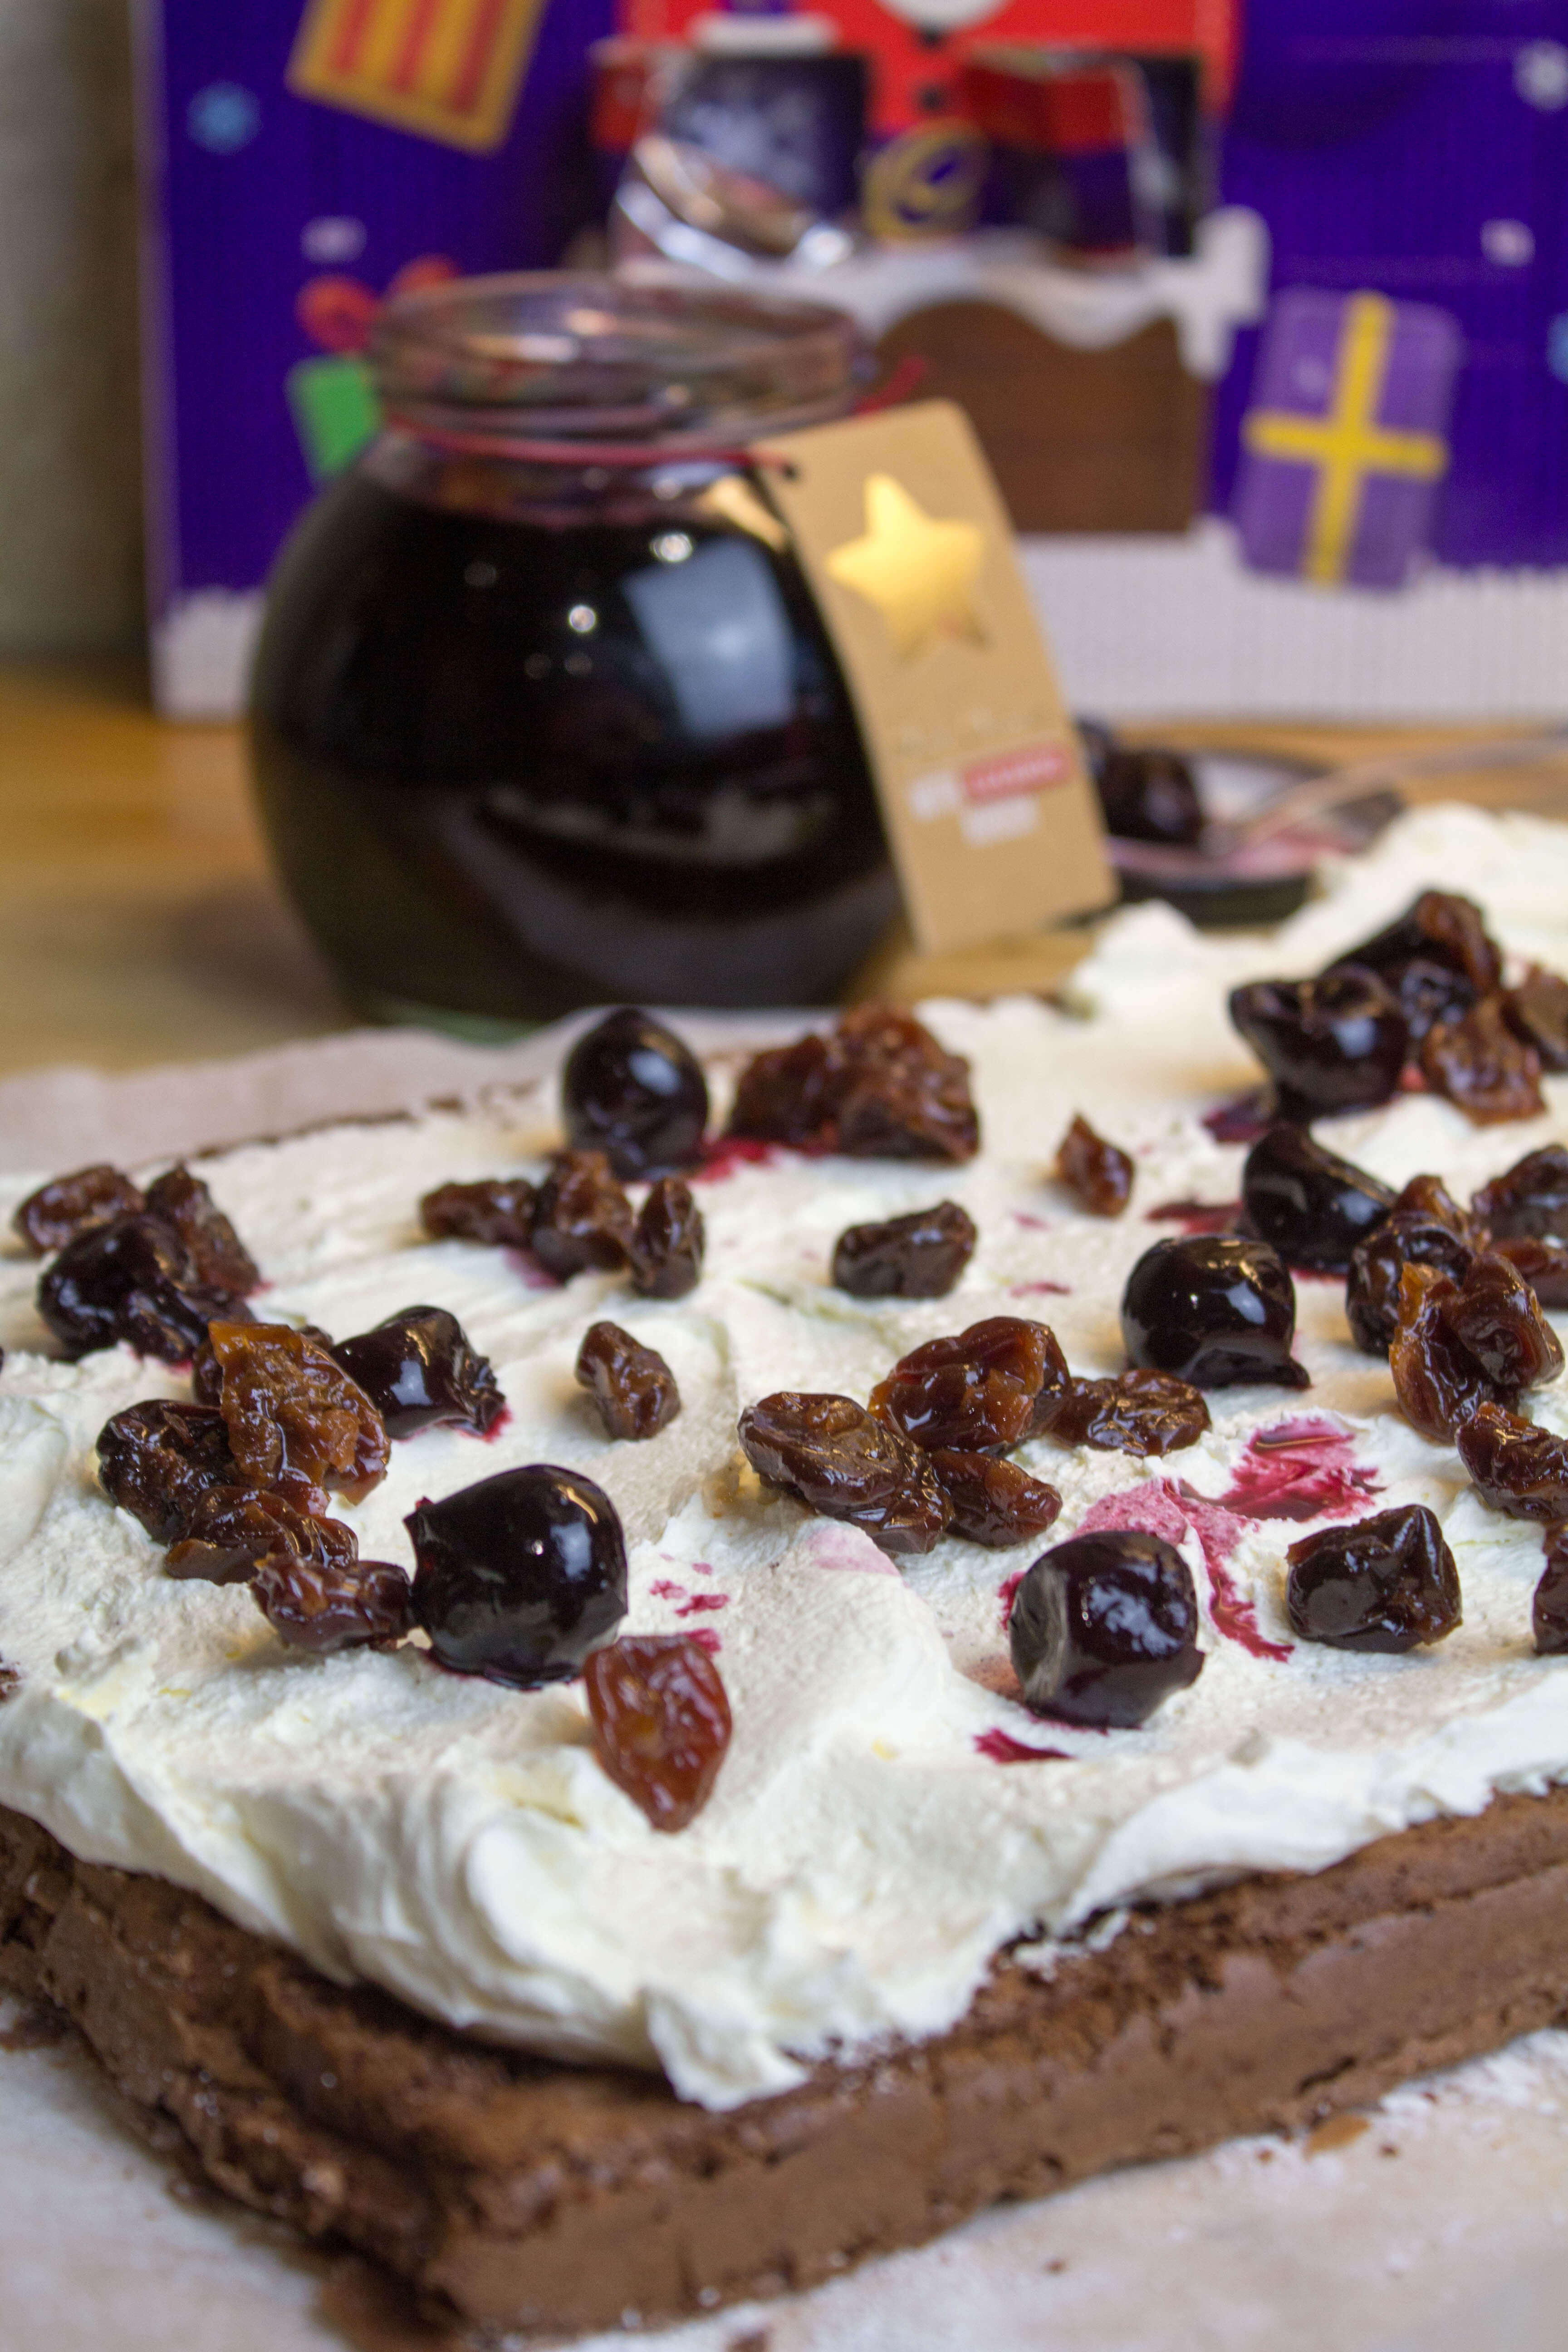
For me, the best bit of the Boxing Day buffet are all the pickles and chutneys to accompany the cold meats and cheeses. I have already made a Port and Cranberry sauce but I still need a special chutney to go with the European cheese mountain one of the guests always brings.

Boxing Day Chutney

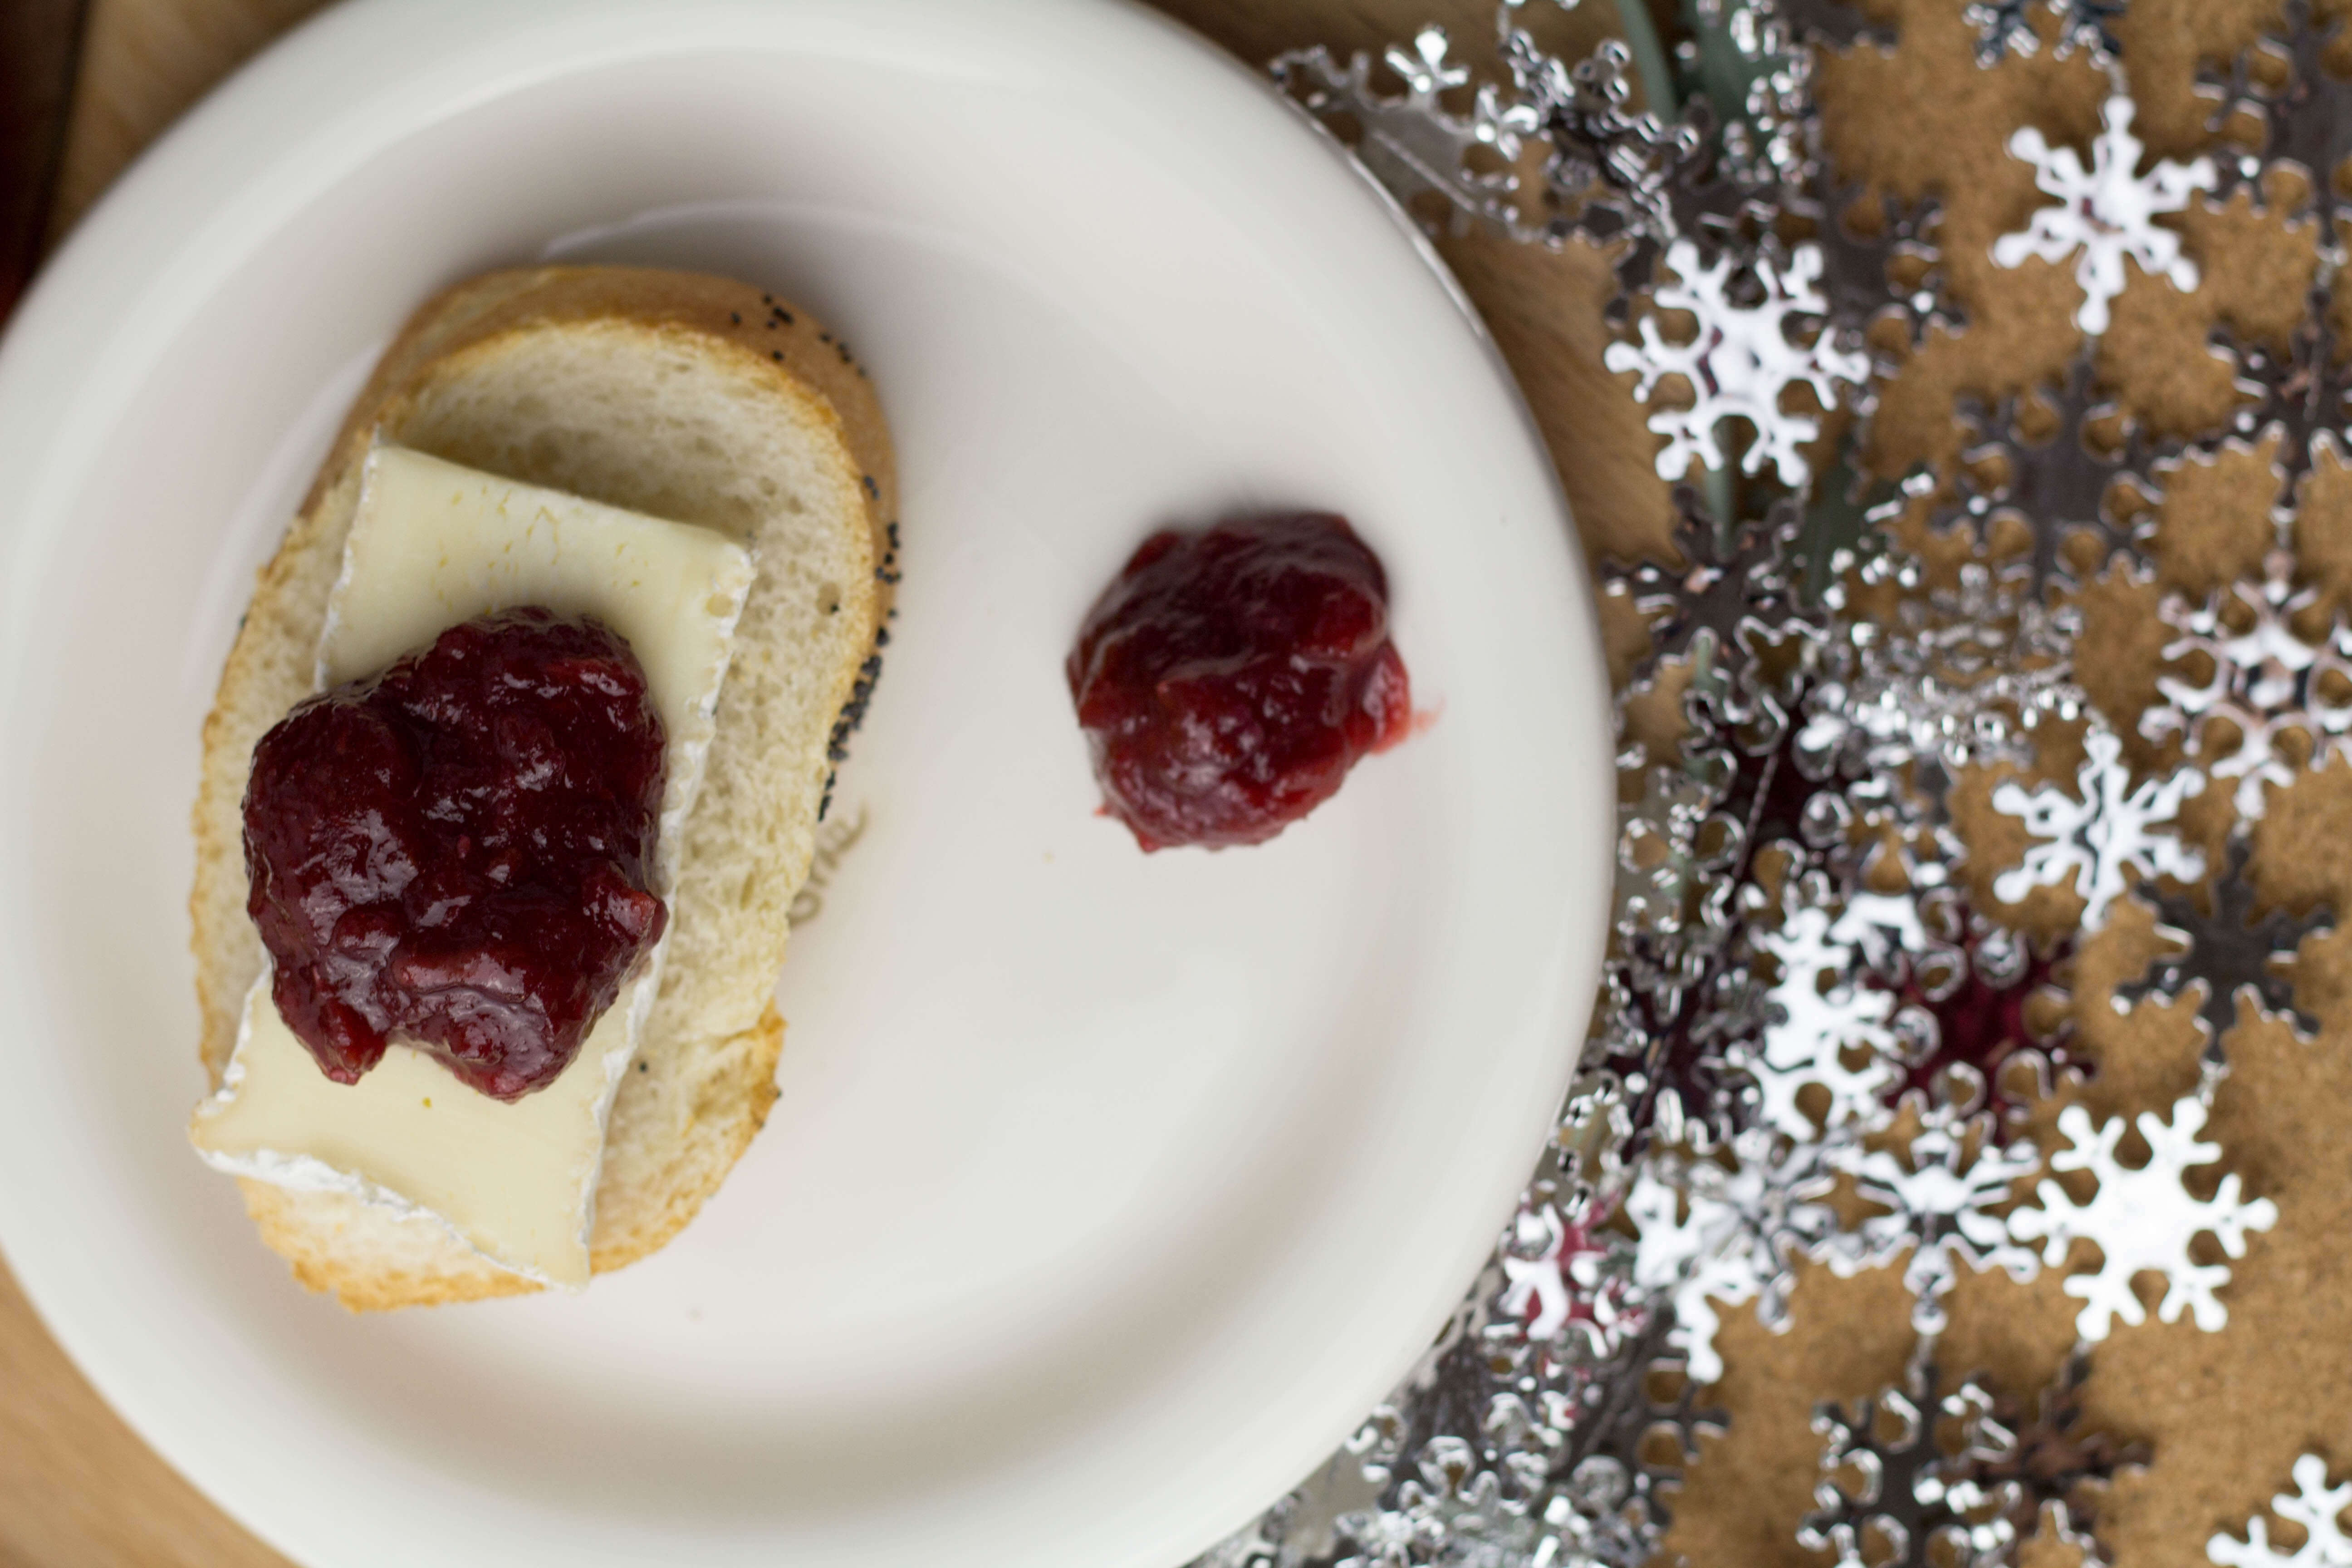
I came across Nigella Lawson’s aptly named “Christmas Chutney”. With a little adaptation I now present my “Boxing Day” chutney, full of festive cranberries, satsuma, apples, figs and Christmas spices. Delicious as an accompaniment to your cold meats and cheeses or slathered on a turkey and ham roll.

Ingredients
Makes: 4 jam jars
375g cooking apples
1 small onion
250g cranberries
125g soft dates
1 clementine or satsuma
200g caster sugar
1/2 teaspoon ground ginger
3/4 teaspoon ground cinnamon
1 teaspoon mild chilli powder
250ml cider vinegar
1 teaspoon Maldon sea salt

Instructions
1. Sterilize your jars. I put mine through a hot cycle on the dishwasher.
2. Peel, core and roughly chop the cooking apples. Peel and roughly chop the onion. Put in a large saucepan. Add cranberries (defrost if frozen) and chopped dates into the pan.
3. Zest the clementines/satsumas into the pan and squeeze in the juice.
4. Add the sugar, ginger, cinnamon, salt and chilli powder, then pour in the vinegar.
5. Give the pan a good stir, bring to a boil, then turn down the heat to simmer gently, uncovered, for about 45 mins to an hour or until you have a sticky mix that bubbles like lava.
6. Fill your sterilised jars and seal.
7. This matures with age, store in a dark, cool, dry place. It should store well for 6-12 months. Once open keep in the fridge and use within a month.

Boxing Day Chutney
 
Save Print
Prep time
15 mins
Cook time
45 mins
Total time
1 hour
 
I came across Nigella Lawson's aptly named "Christmas Chutney". With a little adaptation I now present my "Boxing Day" chutney, full of festive cranberries, satsuma, apples, figs and Christmas spices. Delicious as an accompaniment to your cold meats and cheeses or slathered on a turkey and ham roll.
Author: CluckMuckCook
Serves: 4 Jars
Ingredients
  • 375g cooking apples
  • 1 small onion
  • 250g cranberries
  • 125g soft dates
  • 1 clementine or satsuma
  • 200g caster sugar
  • ½ teaspoon ground ginger
  • ¾ teaspoon ground cinnamon
  • 1 teaspoon mild chilli powder
  • 250ml cider vinegar
  • 1 teaspoon Maldon sea salt
Instructions
  1. Sterilize your jars. I put mine through a hot cycle on the dishwasher.
  2. Peel, core and roughly chop the cooking apples. Peel and roughly chop the onion. Put in a large saucepan. Add cranberries (defrost if frozen) and chopped dates into the pan.
  3. Zest the clementines/satsumas into the pan and squeeze in the juice.
  4. Add the sugar, ginger, cinnamon, salt and chilli powder, then pour in the vinegar.
  5. Give the pan a good stir, bring to a boil, then turn down the heat to simmer gently, uncovered, for about 45 mins to an hour or until you have a sticky mix that bubbles like lava.
  6. Fill your sterilised jars and seal.
  7. This matures with age, store in a dark, cool, dry place. It should store well for 6-12 months. Once open keep in the fridge and use within a month.
3.5.3226


Gingersnaps

1 December 18, 2016 Biscuits

Pepparkakor Swedish Ginger Snap Cookie

This week my youngest son (7 years old) came home from school after making Pepparkakor in his first cooking lesson. He declared we have to make them at home at the weekend as they were delicious and he wants to make a giant one for his headteacher.

Gingersnaps

Now that sentiment, whilst cute as a box of puppies, filled me with mixed emotions. The first being what the hell are they? Followed closely by, that is the head teacher who only put me in second place in the school bake off, after my unbeaten run of a couple of years winning. I’m not bitter, honest, ok maybe a tiny bit! However it is a church school and it is Christmas so I will mentally move on from my defeat although I will hide the largest cutter, that will teach her :-).

Firstly a little research was needed, Google and Pinterest here I come. I soon discovered that these are Swedish ginger snaps or in good old Blighty, a thin version of the ginger nut. One of my all time favourite biscuits. I tweaked a recipe, dropping the cloves as that is one of my least favourite spices and just went for ginger and cinnamon.

Gingersnaps

Being Christmas, out came the star cookie cutters. Normally a 3 inch circle cutter is used and you should get about 24 out of the mix.

The smell of warm ginger and cinnamon cookies wafting through the house is a fantastic thing and better than any Christmas air freshener in trying to remove the lingering after effects of brussel sprouts!

These are the perfect cookie to make with the kids, super easy and quick to mix up the dough. The kids can go crazy with any cookie cutters you have at hand.

Makes: 24 (3 inch) cookies
Oven Temp: Gas 4, 350F, 180C (160C Fan)

Ingredients
180g plain flour
85g butter, softened
75g caster sugar
1 medium egg
85g treacle
1/2 teaspoon bicarbonate of soda
1 teaspoon ginger
1/2 teaspoon cinnamon
Pinch of salt

Instructions
1. Preheat the oven to 180C/160C Fan
2. Beat together butter and sugar until light and fluffy with a wooden spoon or in a stand mixer with a paddle attached.
3. Add in beaten egg and treacle and beat together. It does not matter if it looks a little separated.
4. Sift in flour, ginger, cinnamon, bicarbonate of soda and a pinch of salt and stir into a soft dough.
5. Wrap in cling film and chill in the fridge for 3 to 4 hours, until firm.
6. Line your baking sheets with baking parchment or a silicon mat.
7. Liberally dust your work surface and roll out to about 3 mm. Cut out with a 3 inch round cookie cutter or any shape cutter you fancy.
8. Bake for between 8-10 minutes until browning on the edges.
9. Remove from the oven, let cool on the tray for a few minutes, then transfer to a wire rack to cool. Keep in an airtight box.

Pepparkakor Swedish Ginger Snap Cookie
 
Save Print
Prep time
15 mins
Cook time
10 mins
Total time
25 mins
 
These delicious cookies are Swedish ginger snaps or in good old Blighty, a thin version of the ginger nut. One of my all time favourite biscuits. I tweaked a recipe, dropping the cloves as that is one of my least favourite spices and just went for ginger and cinnamon.
Author: CluckMuckCook
Serves: 24
Ingredients
  • 180g plain flour
  • 85g butter, softened
  • 75g caster sugar
  • 1 medium egg
  • 85g treacle
  • ½ teaspoon bicarbonate of soda
  • 1 teaspoon ginger
  • ½ teaspoon cinnamon
  • Pinch of salt
Instructions
  1. Preheat the oven to 180C/160C Fan
  2. Beat together butter and sugar until light and fluffy with a wooden spoon or in a stand mixer with a paddle attached.
  3. Add in beaten egg and treacle and beat together. It does not matter if it looks a little separated.
  4. Sift in flour, ginger, cinnamon, bicarbonate of soda and a pinch of salt and stir into a soft dough.
  5. Wrap in cling film and chill in the fridge for 3 to 4 hours, until firm.
  6. Line your baking sheets with baking parchment or a silicon mat.
  7. Liberally dust your work surface and roll out to about 3 mm. Cut out with a 3 inch round cookie cutter or any shape cutter you fancy.
  8. Bake for between 8-10 minutes until browning on the edges.
  9. Remove from the oven, let cool on the tray for a few minutes, then transfer to a wire rack to cool. Keep in an airtight box.
Notes
Oven Temp: Gas 4, 350F, 180C (160C Fan)
3.5.3226


Ciabatta

0 December 11, 2016 Breads

Ciabatta

Back to a bit of bread baking this weekend. Bread has been my nemesis for most of my baking life, that is until this year when I had a eureka moment. I realised that I had always made my dough too dry and that produced bread with the same density of lead which would sink any duck we fed it to in the local park!

Ciabatta

This year my bread skills have improved greatly. My latest favorite bread being the “slipper”, the Italian retort to the French baguette. The fantastic ciabatta, a versatile light and open textured loaf.

Ciabatta

The dough is the polar opposite of the dense dry dough’s of old. The Ciabatta dough is very wet and loose. You really need a stand mixer to knead the dough to build up the gluten. Then you prove it in a square Tupperware box for a couple of hours before carefully transferring the dough to a heavily floured work surface. Cut into loaf shapes and quickly transfer them to baking sheets before the dough try’s to ooze off the workbench.

Ciabatta

Ciabatta

Makes: 4 loafs
Oven Temp: Gas 7, 425F, 220C (200C Fan)

Ingredients
500g strong white bread flour, plus extra for dusting
10g salt
10g instant yeast
3 tablespoons olive oil
400 ml lukewarm water

Instructions
1. Oil a 2 litre square plastic container.
2. Sift flour into a large bowl or the bowl of a stand mixer with the dough hook attached.
3. Add the yeast to one side of the bowl. Add the salt to the other side of the bowl. This helps stop the yeast being retarded by the salt.
4. Add the olive oil and water and begin mixing on a slow speed. As the dough starts to come together, turn the speed up to medium and mix for a further 5-8 minutes until the dough is smooth and elastic.
5. Tip the dough into the oiled container, cover with some plastic wrap and leave until at least doubled in size – a couple of hours.
6. Preheat the oven to 220°C and flour 2 baking trays.
7. Generously dust the work surface heavily with flour. Gently tip out the dough (it will be very wet), trying to keep a rough square shape. Handle it gently so you do not knock much air out of the dough. Dust the top of the dough with more flour.
8. Cut the dough in half lengthwise and divide each half lengthwise again. Place on prepared baking trays.
9. Leave the ciabatta dough to rest for 10 minutes, then bake for 25 minutes, until the loaves are golden brown and sound hollow when tapped underneath. Cool on a wire rack.


Ciabatta
 
Save Print
Prep time
30 mins
Cook time
25 mins
Total time
55 mins
 
My latest favorite bread being the "slipper", the Italian retort to the French baguette. The fantastic ciabatta, a versatile light and open textured loaf.
Author: CluckMuckCook
Serves: 4 loaves
Ingredients
  • 500g strong white bread flour, plus extra for dusting
  • 10g salt
  • 10g instant yeast
  • 3 tablespoons olive oil
  • 400 ml lukewarm water
Instructions
  1. Oil a 2 litre square plastic container.
  2. Sift flour into a large bowl or the bowl of a stand mixer with the dough hook attached.
  3. Add the yeast to one side of the bowl. Add the salt to the other side of the bowl. This helps stop the yeast being retarded by the salt.
  4. Add the olive oil and water and begin mixing on a slow speed. As the dough starts to come together, turn the speed up to medium and mix for a further 5-8 minutes until the dough is smooth and elastic.
  5. Tip the dough into the oiled container, cover with some plastic wrap and leave until at least doubled in size – a couple of hours.
  6. Preheat the oven to 220 C (200 C fan) and flour 2 baking trays.
  7. Generously dust the work surface heavily with flour. Gently tip out the dough (it will be very wet), trying to keep a rough square shape. Handle it gently so you do not knock much air out of the dough. Dust the top of the dough with more flour.
  8. Cut the dough in half lengthwise and divide each half lengthwise again. Place on prepared baking trays.
  9. Leave the ciabatta dough to rest for 10 minutes, then bake for 25 minutes, until the loaves are golden brown and sound hollow when tapped underneath. Cool on a wire rack.
3.5.3226


Tuile Biscuits

2 December 7, 2016 Biscuits

Tuile Biscuits

After a lovely dog walk at the weekend through the local woods with the paths covered in fallen leaves, I had a vision of an autumnal birch log layer cake that I want to make. It is adorned with baked goodies resembling the forest floor. Normally I focus on the flavour rather than the look, so this could be a challenge.

Tuile Biscuits

First I thought I would recreate the fallen leaves and tuile biscuits are a perfect option. These thin and crispy biscuits shape well when warm and taken on the shape of fallen leaves perfectly. I made a mixture of vanilla and then added some cocoa powder to mix the colours up a bit to get some autumn shades.

Tuile Biscuits

You need to be super quick shaping these as they come out of the oven as they set hard as they cool and will shatter if you try and bend them. I laid the cookies over a rolling pin and wrapped them around handles of wooden spoons. You can sneak them back in the oven for 30 seconds to warm them up if needed.

Tuile Biscuits

This tuile recipe would work just as well with the traditional round templates to make that classic French arched roof tile shape that these biscuits are named after.

You can make your own templates by cutting a shape out of the top of a plastic ice cream container lid. Search on YouTube or Google and you will find lots of guides and instructions. However I found a company that sells leaf tuile templates that work a treat.

So over the next few weeks I will be playing with a few more ideas before I make the whole cake.

Makes: 30
Oven Temp: Gas 4, 350F, 180C (160C Fan)

Ingredients

65g plain flour
65g butter, melted and cool
60g icing sugar
2 large eggs, whites only
1/2 teaspoon of vanilla extract

Instructions
1. Preheat the oven to 180C/160C Fan.
2. Gently mix the melted butter, sifted icing sugar and vanilla extract into a paste.
3. Lightly beat the eggs whites. Mix the eggs whites into the butter and sugar mixture.
4. Sift in flour and stir into a batter. Do not over mix.
5. Rest in the fridge for 15 minutes.
6. Line your baking sheets with baking parchment or a silicon mat. Put the tuile template on the mat.
7. Fill the template with the batter, then draw a palate knife across the template to level the tuile and remove surplus batter.
8. Bake for between 5-10 minutes until light golden brown.
9. Remove from the oven if you are making the traditional arched tile shape. Quickly remove from the baking tray and lay over a rolling pin. This has to be done when they are hot or they will crack as you try to shape them. If they are going too hard put them back in the oven for 30 seconds.

Chocolate roulade

2 December 7, 2016 Cakes

Black Forest Roulade

Keeping on the Christmas baking theme, as a kid every year at Christmas we would make a chocolate Yule log. This comprised of a shop bought chocolate swiss roll that we cut to look like a branch and then covered in a ton of chocolate butter icing. Then it was liberally dusted with icing sugar snow and decorated with plastic holly and a robin. We felt like artistic geniuses once it was complete and drove my parents mad on a pre Christmas sugar high once my brother and I had demolished it.

Chocolate roulade

This week I was feeling nostalgic and thought it was time to create a more grown up version. As the brain cells got working I thought of blending the height of sophistication of desserts in the late 70s early 80s, the black forest gateau, with a chocolate log.

Chocolate roulade

This rich chocolate roulade is filled with thick cream and stuffed full of juicy morello cherries soaked in kirsch. For an extra depth of flavour and kick, I also added some dried sour cherries steeped overnight in vodka.

Chocolate roulade

Makes: 1 Roulade
Oven Temp: Gas 4, 350f, 180C (160C Fan)

Ingredients

200g dark chocolate
150g caster sugar
5 medium eggs
300 ml fresh double cream
125g Morello cherries with kirsch
50g dried cherries (steeped overnight in vodka) (optional)
1 tablespoon cocoa powder, for dusting
1 tablespoon icing sugar, for dusting

Instructions

1. Preheat the oven to 180C/160C Fan and Line a 33cm x 23cm Swiss-roll tin with baking parchment.
2. Melt the chocolate in a bowl over a pan of simmering water (be careful that the bowl doesn’t touch the water).
3. Separate the eggs. In a stand mixer or with an electric whisk, whisk the sugar and egg yolks until very thick and pale. Fold in the melted chocolate.
4. In a separate bowl, whisk the egg whites until stiff.
5. Mix a couple of tablespoons of the eggs whites into the chocolate mixture to lessen it up, then gently fold in the remainder.
6.Pour into the prepared tin and gentle spread out to fill the tin, bake for 15-20 mins until risen and firm to the touch.
7. Lay out a large piece of baking parchment and sift half the icing sugar over it. Turn out the warm roulade  onto the baking parchment  and cover with a clean damp tea towel. Allow to cool completely.
8. Whilst the roulade is cooling, whip the cream to soft peaks in a bowl.
9. Remove the top baking parchment layer from the roulade and spread with the cream. Then scatter over the cherries and drizzle a little of the kirsch/cherry juice over the cream.
10. Use the bottom piece of baking parchment to roll up the roulade from one short end.
11. Transfer to a serving platter and dust with cocoa powder and icing sugar.

5.0 from 1 reviews
Black Forest Roulade
 
Save Print
Prep time
30 mins
Cook time
20 mins
Total time
50 mins
 
This rich chocolate roulade is filled with thick cream and stuffed full of juicy morello cherries soaked in kirsch. For an extra depth of flavour and kick, I also added some dried sour cherries steeped overnight in vodka.
Author: CluckMuckCook
Serves: 1
Ingredients
  • 200g dark chocolate
  • 150g caster sugar
  • 5 medium eggs
  • 300 ml fresh double cream
  • 125g Morello cherries with kirsch
  • 50g dried cherries (steeped overnight in vodka) (optional)
  • 1 tablespoon cocoa powder, for dusting
  • 1 tablespoon icing sugar, for dusting
Instructions
  1. Preheat the oven to 180C/160C Fan and Line a 33cm x 23cm Swiss-roll tin with baking parchment.
  2. Melt the chocolate in a bowl over a pan of simmering water (be careful that the bowl doesn’t touch the water).
  3. Separate the eggs. In a stand mixer or with an electric whisk, whisk the sugar and egg yolks until very thick and pale. Fold in the melted chocolate.
  4. In a separate bowl, whisk the egg whites until stiff.
  5. Mix a couple of tablespoons of the eggs whites into the chocolate mixture to lessen it up, then gently fold in the remainder.
  6. Pour into the prepared tin and gentle spread out to fill the tin, bake for 15-20 mins until risen and firm to the touch.
  7. Lay out a large piece of baking parchment and sift half the icing sugar over it. Turn out the warm roulade onto the baking parchment and cover with a clean damp tea towel. Allow to cool completely.
  8. Whilst the roulade is cooling, whip the cream to soft peaks in a bowl.
  9. Remove the top baking parchment layer from the roulade and spread with the cream. Then scatter over the cherries and drizzle a little of the kirsch/cherry juice over the cream.
  10. Use the bottom piece of baking parchment to roll up the roulade from one short end.
  11. Transfer to a serving platter and dust with cocoa powder and icing sugar.
3.5.3226


Orange Cranberry Sable Biscuits

9 December 2, 2016 Biscuits

Cranberry and Orange Sable Biscuits

The classic French sable with a holiday twist of orange and cranberry. The biscuits get their name for their sandy texture, sable meaning sand in French. Very much like an English shortbread, the addition of fresh orange zest and dried cranberries bring these biscuits to life.

Orange Cranberry Sable Biscuits

You can make these all year around but on Christmas Eve they end up on a plate by the fire for Santa alongside a glass of sherry and a carrot for Santa’s  reindeer. It is a welcome change from mince pies.

The basic dough is versatile, swap out the orange zest and cranberries for lemon zest or a teaspoon of vanilla extract.

Orange Cranberry Sable Biscuits

It is also a great make ahead dough, Once you get to the stage that you roll it into a sausage and chill, double wrap it and pop it in the freezer. Then just bring it out when you need it, defrost and bake and you have a fresh batch of delicious cookies.

Orange Cranberry Sable Biscuits

Makes: 24 Biscuits
Oven Temp: Gas 4, 350f, 180C (160C Fan)

Ingredients:
250g plain flour
250g butter, softened
55g icing sugar
1/2 teaspoon salt
1 large egg yolk
75g  caster sugar
90g dried cranberries pecans
zest of 2 oranges

Instructions.
1. In the stand mixer with the paddle attachment fitted or in a bowl with a hand mixer, mix the butter and salt on low speed until smooth.
2.Add the caster sugar and icing sugar and mix until smooth,scraping  down the bowl as needed.
3.Chop the cranberries into small pieces.
4.Add 1„ egg yolk, zest of two oranges and the cranberries and mix for 1 minute on low speed.
5. Sift in the flour and mix until just blended, the dough should be soft.
6. Turn the dough out onto the counter and gently bring it together in a ball. Divide it in half and shape each half into a 9-inch log.
7.Wrap the logs in plastic wrap and refrigerate for at least 3„ hours. At this stage you can freeze and keep them to cook another day. Just defrost them in the fridge overnight.
8.Preheat the oven to 180C/160C Fan.
9.Trim the rounded ends of the logs. Then cut the dough into 1/2 inch thick discs. Put them on the baking sheets, leaving 2 „inches between discs as these do spread.
10.Bake the biscuits for 18 to 22 minutes until the edges are golden brown. Allow to cool on the sheets for 5„ minutes, then transfer to a cooling rack and let cool completely.

5.0 from 1 reviews
Cranberry and Orange Sable Biscuits
 
Save Print
Prep time
15 mins
Cook time
20 mins
Total time
35 mins
 
The classic French sable with a holiday twist of orange and cranberry. The biscuits get their name for their sandy texture, sable meaning sand in French. Very much like an English shortbread, the addition of fresh orange zest and dried cranberries bring these biscuits to life.
Author: CluckMuckCook
Serves: 24
Ingredients
  • 250g plain flour
  • 250g butter, softened
  • 55g icing sugar
  • ½ teaspoon salt
  • 1 large egg yolk
  • 75g caster sugar
  • 90g dried cranberries
  • zest of 2 oranges
Instructions
  1. In the stand mixer with the paddle attachment fitted or in a bowl with a hand mixer, mix the butter and salt on low speed until smooth.
  2. Add the caster sugar and icing sugar and mix until smooth,scraping down the bowl as needed.
  3. Chop the cranberries into small pieces.
  4. Add 1„ egg yolk, zest of two oranges and the cranberries and mix for 1 minute on low speed.
  5. Sift in the flour and mix until just blended, the dough should be soft.
  6. Turn the dough out onto the counter and gently bring it together in a ball. Divide it in half and shape each half into a 9-inch log.
  7. Wrap the logs in plastic wrap and refrigerate for at least 3„ hours. At this stage you can freeze and keep them to cook another day. Just defrost them in the fridge overnight.
  8. Preheat the oven to 180C/160C Fan.
  9. Trim the rounded ends of the logs. Then cut the dough into ½ inch thick discs. Put them on the baking sheets, leaving 2 „inches between discs as these do spread.
  10. Bake the biscuits for 18 to 22 minutes until the edges are golden brown. Allow to cool on the sheets for 5„ minutes, then transfer to a cooling rack and let cool completely.
Notes
There is 3 hour chilling time between making and baking
3.5.3228


Shortcrust pastry

3 November 27, 2016 Pastry and Pies

Sweet Shortcrust Pastry

Yes, you can buy shortcrust pastry from your supermarket. However it is so simple to make and takes no time at all and you probably have all the ingredients in your cupboard. I really don’t think there’s an excuse!

Shortcrust pastry

Puff pastry or filo pastry, now that’s a different story. They can both be a lot more time consuming and a bit more daunting and may not be worth the faff if you just want to whip up something delicious and quick at the weekend.

You can swap caster sugar for icing sugar and add the milk slowly as you may not need it all.

Makes: 1 x 23cm pie base
Oven Temp: Gas 6, 400F, 200C (180C Fan)

Ingredients:
225g plain flour
150g butter, chilled
25g icing sugar
1 large free-range egg
2 tablespoons milk

Instructions:

1.Sift the flour into a bowl and rub in the butter using your fingertips until the mixture resembles fine breadcrumbs. Or blitz in a food processor. Then mix in the icing sugar.
2.Add the egg and 2 tablespoons cold milk, and mix until it forms a dough. Try not to overwork the dough.
3.Wrap the ball of dough in cling film and chill for 15 minutes.
4.Roll out the dough on a lightly floured work surface to about the thickness of a pound coin.
5.Carefully transfer the pastry to a 23cm flan tin, line the tin with pastry and transfer to the fridge to chill for 30 minutes.
6.Preheat the oven to 200C/180C Fan.
7.Blind bake the pastry. Line the pastry case with non-stick baking paper and fill with baking beans. Bake  for 15 minutes, then remove the beans and paper and cook for a further 5 minutes to finish off the pastry.

You are now ready to make your favorite pecan pie, bakewell tart, lemon meringue pie or use with any of your favorite fillings.


pecan pie

1 November 27, 2016 Pastry and Pies

Pecan Pie

Thanksgiving week has passed, Winter is taking hold and my mind turns to those rib sticking recipes that fortify you through those dark, cold winter months and long, cold, wet and muddy dog walks.

pecan pie

As a Brit, the traditional family winter favorite is the treacle tart. But from my few years living in the States, I was converted to the Thanksgiving favorite, the humble but delicious Pecan Pie. A rich, sugary pie which gives a nod to our favorite treacle tart but filled with creamy pecans which caramelize and toast on top, giving a rich nutty flavor that is absolutely delicious.

pecan pie

Then I came across Nigella Lawson’s “Pecan Pie Plus” recipe, where she dares to change up the classic with a bag of Christmas mixed nuts. This got me thinking and in this recipe I decided on a mix of pecans, walnuts and macadamia nuts. All deliciously creamy but each with its own flavor that complement each other perfectly.

Whether you go traditional or mixed up, I like to serve it warm with a big dollop of cream or ice cream.


Makes: 1 x 23cm pie
Oven Temp: Gas 6, 400F, 200C (180C Fan)

Ingredients:
225g plain flour
150g butter, chilled
25g icing sugar
4 large eggs
2 tablespoons milk
150g golden syrup
100g soft butter
200g soft light brown sugar
1 teaspoon vanilla extract
350g pecans ( or 200g pecans, 100g walnuts, 50g macadamia nuts)

Instructions:

1.Sift the flour into a bowl and rub in the butter using your fingertips until the mixture resembles fine breadcrumbs. Or blitz in a food processor. Then mix in the icing sugar.
2.Add one egg and 2 tablespoons cold milk, and mix until it forms a dough. Try not to overwork the dough.
3.Wrap the ball of dough in cling film and chill for 15 minutes.
4.Roll out the dough on a lightly floured work surface to about the thickness of a pound coin.
5.Carefully transfer the pastry to a 23cm flan tin, line the tin with pastry and transfer to the fridge to chill for 30 minutes.
6.Preheat the oven to 200C/180C Fan.
7.Blind bake the pastry. Line the pastry case with non-stick baking paper and fill with baking beans or rice. Bake for 15 minutes, then remove the beans/rice and paper.
8. In a pan melt the syrup, butter, vanilla and brown sugar over a low heat until melted and everything is combined, leave to cool for about 10 minutes.
9. Fill the part baked pastry case with the nuts.
10.Whisk the eggs into the sugary syrup until fully combined, then pour it over the nuts.
11.Turn the oven down to 180C/160C Fan.
12.Bake in the oven for 40 minutes until the filling has set.


Pecan Pie
 
Save Print
Prep time
30 mins
Cook time
55 mins
Total time
1 hour 25 mins
 
the humble but delicious Pecan Pie. A rich, sugary pie which gives a nod to our favorite treacle tart but filled with creamy pecans which caramelize and toast on top, giving a rich nutty flavor that is absolutely delicious.
Author: CluckMuckCook
Serves: 1
Ingredients
  • 225g plain flour
  • 150g butter, chilled
  • 25g icing sugar
  • 4 large eggs
  • 2 tablespoons milk
  • 150g golden syrup
  • 100g soft butter
  • 200g soft light brown sugar
  • 1 teaspoon vanilla extract
  • 350g pecans ( or 200g pecans, 100g walnuts, 50g macadamia nuts)
Instructions
  1. Sift the flour into a bowl and rub in the butter using your fingertips until the mixture resembles fine breadcrumbs. Or blitz in a food processor. Then mix in the icing sugar.
  2. Add one egg and 2 tablespoons cold milk, and mix until it forms a dough. Try not to overwork the dough.
  3. Wrap the ball of dough in cling film and chill for 15 minutes.
  4. Roll out the dough on a lightly floured work surface to about the thickness of a pound coin.
  5. Carefully transfer the pastry to a 23cm flan tin, line the tin with pastry and transfer to the fridge to chill for 30 minutes.
  6. Preheat the oven to 200C/180C Fan.
  7. Blind bake the pastry. Line the pastry case with non-stick baking paper and fill with baking beans or rice. Bake for 15 minutes, then remove the beans/rice and paper.
  8. In a pan melt the syrup, butter, vanilla and brown sugar over a low heat until melted and everything is combined, leave to cool for about 10 minutes.
  9. Fill the part baked pastry case with the nuts.
  10. Whisk the eggs into the sugary syrup until fully combined, then pour it over the nuts.
  11. Turn the oven down to 180C/160C Fan.
  12. Bake in the oven for 40 minutes until the filling has set.
Notes
Cook time- 15 Mins blind baking the pastry case , 40 Mins for the filling
Do not forget to Turn the oven down to 180C/160C Fan to cook the filling.
3.5.3226


Christmas Mincemeat Crumble Bars

6 November 20, 2016 Traybakes

Christmas Mincemeat Crumble Traybake

It has come to my favourite time of year. I like to call it the pre Christmas taste test. All the my regular sandwich shops have brought out their Christmas sandwiches. The supermarkets are battling for the best mince pie and Christmas pudding. Of course all of which I have to test myself and give the CluckMuckCook seal of approval.

Christmas Mincemeat Crumble Bars

Which means I will need to up the dog walking to counteract the pre Christmas feasting. Chester the cockerpoo will be happy about that on two fronts. Firstly he snuffles his way in to some testing titbits and secondly he loves a nice long romp over the local forest chasing squirrels and deer.

Chester Cockerpoo

But more importantly Pret A Manger bring out the Christmas crimble crumble bar which ends up a regular afternoon treat with a nice cappuccino. This year I thought I would try and make a quick and easy version. Rather than a shortbread base and a crumble, I made a big crumble mix, half of which gets pressed firmly into the baking tin and the other half gets sprinkled lightly over the top. Which does make these extra crumbly.

Christmas Mincemeat Crumble Bars

This is super quick to make. If you do not have a food processor, just rub in the butter, flour and sugar to form fine breadcrumbs, then mix in the spice and nuts.

Makes 12 slices
Oven Temp: Gas 5, 350F, 180C (160C Fan)

Ingredients:
250g self-raising flour
225g butter
50g light brown sugar
50g pecan nuts
1 tsp mixed spice
400g mincemeat
Caster or demerara sugar to sprinkle

Instructions:
1.Preheat the oven to 180°C/160°C fan
2.Grease and line the base of a rectangular tin, 28 x 18 x 3cm, with baking parchment.
3.Place the flour, sugar, spice, nuts and butter in a food processor and blitz until the mixture resembles fine breadcrumbs.
4.Tip half of the mixture into the tin and press down with the back of a large metal spoon.
5.Spread mincemeat over the top then sprinkle the remaining crumble mix over the mincemeat, so it is covered.
6.Sprinkle a little extra sugar on top.
7.Bake for 35 minutes until golden brown.

Christmas Mincemeat Crumble Traybake
 
Save Print
Prep time
15 mins
Cook time
35 mins
Total time
50 mins
 
Delicious alternative to a mince pie , Super crumbly and perfect with a cup of tea or coffee
Author: CluckMuckCook
Serves: 12
Ingredients
  • 250g self-raising flour
  • 225g butter
  • 50g light brown sugar
  • 50g pecan nuts
  • 2 tsp mixed spice
  • 400g mincemeat
  • Caster or demerara sugar to sprinkle
Instructions
  1. Preheat the oven to 180°C/160°C fan
  2. Grease and line the base of a rectangular tin, 28 x 18 x 3cm, with baking parchment.
  3. Place the flour, sugar, spice, nuts and butter in a food processor and blitz until the mixture resembles fine breadcrumbs.
  4. Tip half of the mixture into the tin and press down with the back of a large metal spoon.
  5. Spread mincemeat over the top then sprinkle the remaining crumble mix over the mincemeat, so it is covered. 6.Sprinkle a little extra sugar on top.
  6. Bake for 35 minutes until golden brown.
3.5.3226


Christmas cake

0 November 20, 2016 Cakes

Classic Christmas Cake

Sunday 20th November is ‘Stir-up Sunday’. Traditionally the day to make your Christmas puddings and Christmas cakes. This tradition goes back to Victorian times where the family got together on the Sunday before Advent. It gets its name from the beginning of the collect for the day in the Book of Common Prayer, which begins with the words, “Stir up, O Lord, the wills of thy faithful people”.

Classic Christmas Cake

Whist I am not particularly religious, it is a great way to remember when to make your Christmas puddings and cakes. For my traditional Christmas cake, it allows for 5 weeks of weekly feeding the cake with a tablespoon or 2 of brandy every weekend to get that lovely boozy, warming, rich fruitcake for Christmas Day tea. Everyone in the family takes a turn to stir the cake mix and make a special wish for the year ahead.

Christmas cake

Last Christmas when I was in the supermarket stocking up on dried fruit, a retired lady and I were dancing around each other to get to the ingredients, both obviously getting ready for Stir up Sunday. We got talking and I found out she was a retired home economics teacher. She said she was impressed that firstly I was a man who could not only be bothered to actually make a Christmas cake from scratch, when I could just as easily have picked a ready made and iced one in the next aisle. Secondly she could see the passion I had for baking and the desire to share that and build memories and traditions with my two young sons in the same way my father and I did many years before. I think we both left the supermarket with even more Christmas cheer than when we entered. We were both in firm agreement that we wished more people would take the time to have fun in the kitchen and pass on skills and traditions that can be so quickly lost in the high speed world we live in.


Christmas cake

If you are not partial to alcohol, soak the fruit in orange juice instead of brandy and skip the feeding.

I normally ice and decorate the cake with marzipan and fondant icing the weekend before Christmas. You will have to wait a little while before I can add the finished iced version.

Christmas Cake

Soak the fruit at least overnight, preferably a few days.

Makes: 1 cake
You will need a 20cm cake tin
Ingredients
450g currants
150g raisins
150g sultanas
50g dried cranberries
50g mixed peel
50g glace cherries, chopped
50g pecans, chopped
100ml brandy (or orange juice)
225g butter
225g soft dark brown sugar
5 eggs, medium
225g plain flour
1/4 teaspoon  nutmeg
1/2 teaspoon  mixed spice
1/2 teaspoon salt
Grated zest of 1 lemon
Grated zest of 1 orange
1 tablespoon treacle
Brandy to feed

To decorate
2 tablespoons of apricot jam
250g ready roll marzipan
500g ready roll icing
A little icing sugar

Instructions
A few days before, put all of the dried fruit and nuts into a large ziploc bag or Tupperware box and pour over the brandy or orange juice. Give it a good stir each day.

Preheat oven to 280F/140C (120C Fan)/Gas 1

1.Grease and line a 20cm cake tin with baking parchment. Then wrap and tie with string a double thickness of baking parchment on the outside of the tin. This will protect it through the long slow bake.
2.Combine the flour, salt and spices into a large bowl. Add sugar, eggs, softened butter and beat with a wooden spoon until light and fluffy.
3.Gently fold in the presoaked fruit, the grated zest of the orange and lemon and treacle.
4.Using a large spoon transfer the mixture to the lined tin, smooth out the top and cover the top with a double layer of parchment. Cut a small hole in the parchment to let out steam.
5.Place in the bottom shelf of the oven and bake for about 4 hours. Insert a skewer and make sure it comes out clean to ensure the cake is cooked through . It can take an extra 30 minutes. If it is not quite done, check every 15 mins until the skewer comes out clean.
6.Cool for 30 minutes in the tin. Then remove from the tin and cool on a wire rack.
7. Once cool, poke holes in the top of the cake and feed (slowly drizzle) with a tablespoon of brandy.
8.Wrap in parchment and then in foil. Store in an airtight tin and feed with brandy weekly.

Icing the cake

1. Warm the jam in a small saucepan to remove any lumps. Put the cake on a cake board or plate. Brush the jam over the top of the cake.
2. Dust the work surface with icing sugar and roll out the marzipan. Cut out a 20cm disc and place on top of the cake.
3. Repeat this step with the icing and then decorate using your own creative flair.
4. Store in an airtight container.

Classic Christmas Cake
 
Save Print
Prep time
30 mins
Cook time
4 hours
Total time
4 hours 30 mins
 
A lovely boozy, warming, rich fruitcake for Christmas Day tea
Author: CluckMuckCook
Serves: 1
Ingredients
  • 450g currants
  • 150g raisins
  • 150g sultanas
  • 50g dried cranberries
  • 50g mixed peel
  • 50g glace cherries, chopped
  • 50g pecans, chopped
  • 100ml brandy (or orange juice)
  • 225g butter
  • 225g soft dark brown sugar
  • 5 eggs, medium
  • 225g plain flour
  • ¼ teaspoon nutmeg
  • ½ teaspoon mixed spice
  • ½ teaspoon salt
  • Grated zest of 1 lemon
  • Grated zest of 1 orange
  • 1 tablespoon treacle
  • Brandy to feed
Instructions
  1. A few days before, put all of the dried fruit and nuts into a large ziploc bag or Tupperware box and pour over the brandy or orange juice. Give it a good stir each day.
  2. Preheat oven to 280F/140C (120C Fan)/Gas 1
  3. Grease and line a 20cm cake tin with baking parchment. Then wrap and tie with string a double thickness of baking parchment on the outside of the tin. This will protect it through the long slow bake.
  4. Combine the flour, salt and spices into a large bowl. Add sugar, eggs, softened butter and beat with a wooden spoon until light and fluffy.
  5. Gently fold in the presoaked fruit, the grated zest of the orange and lemon and treacle.
  6. Using a large spoon transfer the mixture to the lined tin, smooth out the top and cover the top with a double layer of parchment. Cut a small hole in the parchment to let out steam.
  7. Place in the bottom shelf of the oven and bake for about 4 hours. Insert a skewer and make sure it comes out clean to ensure the cake is cooked through . It can take an extra 30 minutes. If it is not quite done, check every 15 mins until the skewer comes out clean.
  8. Cool for 30 minutes in the tin. Then remove from the tin and cool on a wire rack.
  9. Once cool, poke holes in the top of the cake and feed (slowly drizzle) with a tablespoon of brandy.
  10. Wrap in parchment and then in foil. Store in an airtight tin and feed with brandy weekly.
  11. Icing the cake
  12. Warm the jam in a small saucepan to remove any lumps. Put the cake on a cake board or plate. Brush the jam over the top of the cake.
  13. Dust the work surface with icing sugar and roll out the marzipan. Cut out a 20cm disc and place on top of the cake.
  14. Repeat this step with the icing and then decorate using your own creative flair.
  15. Store in an airtight container.
3.5.3251


  • « Go to Previous Page
  • Go to page 1
  • Go to page 2
  • Go to page 3
  • Go to page 4
  • Go to page 5
  • Go to page 6
  • Go to page 7
  • Go to Next Page »

Copyright© 2026 · Cookd Pro Theme by Shay Bocks